When you work with OpenCV, you most often work with images. However, you may find it useful to create animation from multiple images. Chances are that showing images in rapid succession may give you different insight or it is easier to visualize your work by introducing a time axis.
In this post, you will see how to create a video clip in OpenCV. As an example, you will also learn some basic image manipulation techniques to create the images. In particular, you will learn:
How to manipulate images as numpy array
How to manipulate images using OpenCV functions
How to create video file in OpenCV
Kick-start your project with my book Machine Learning in OpenCV. It provides self-study tutorials with working code.
Let’s get started.
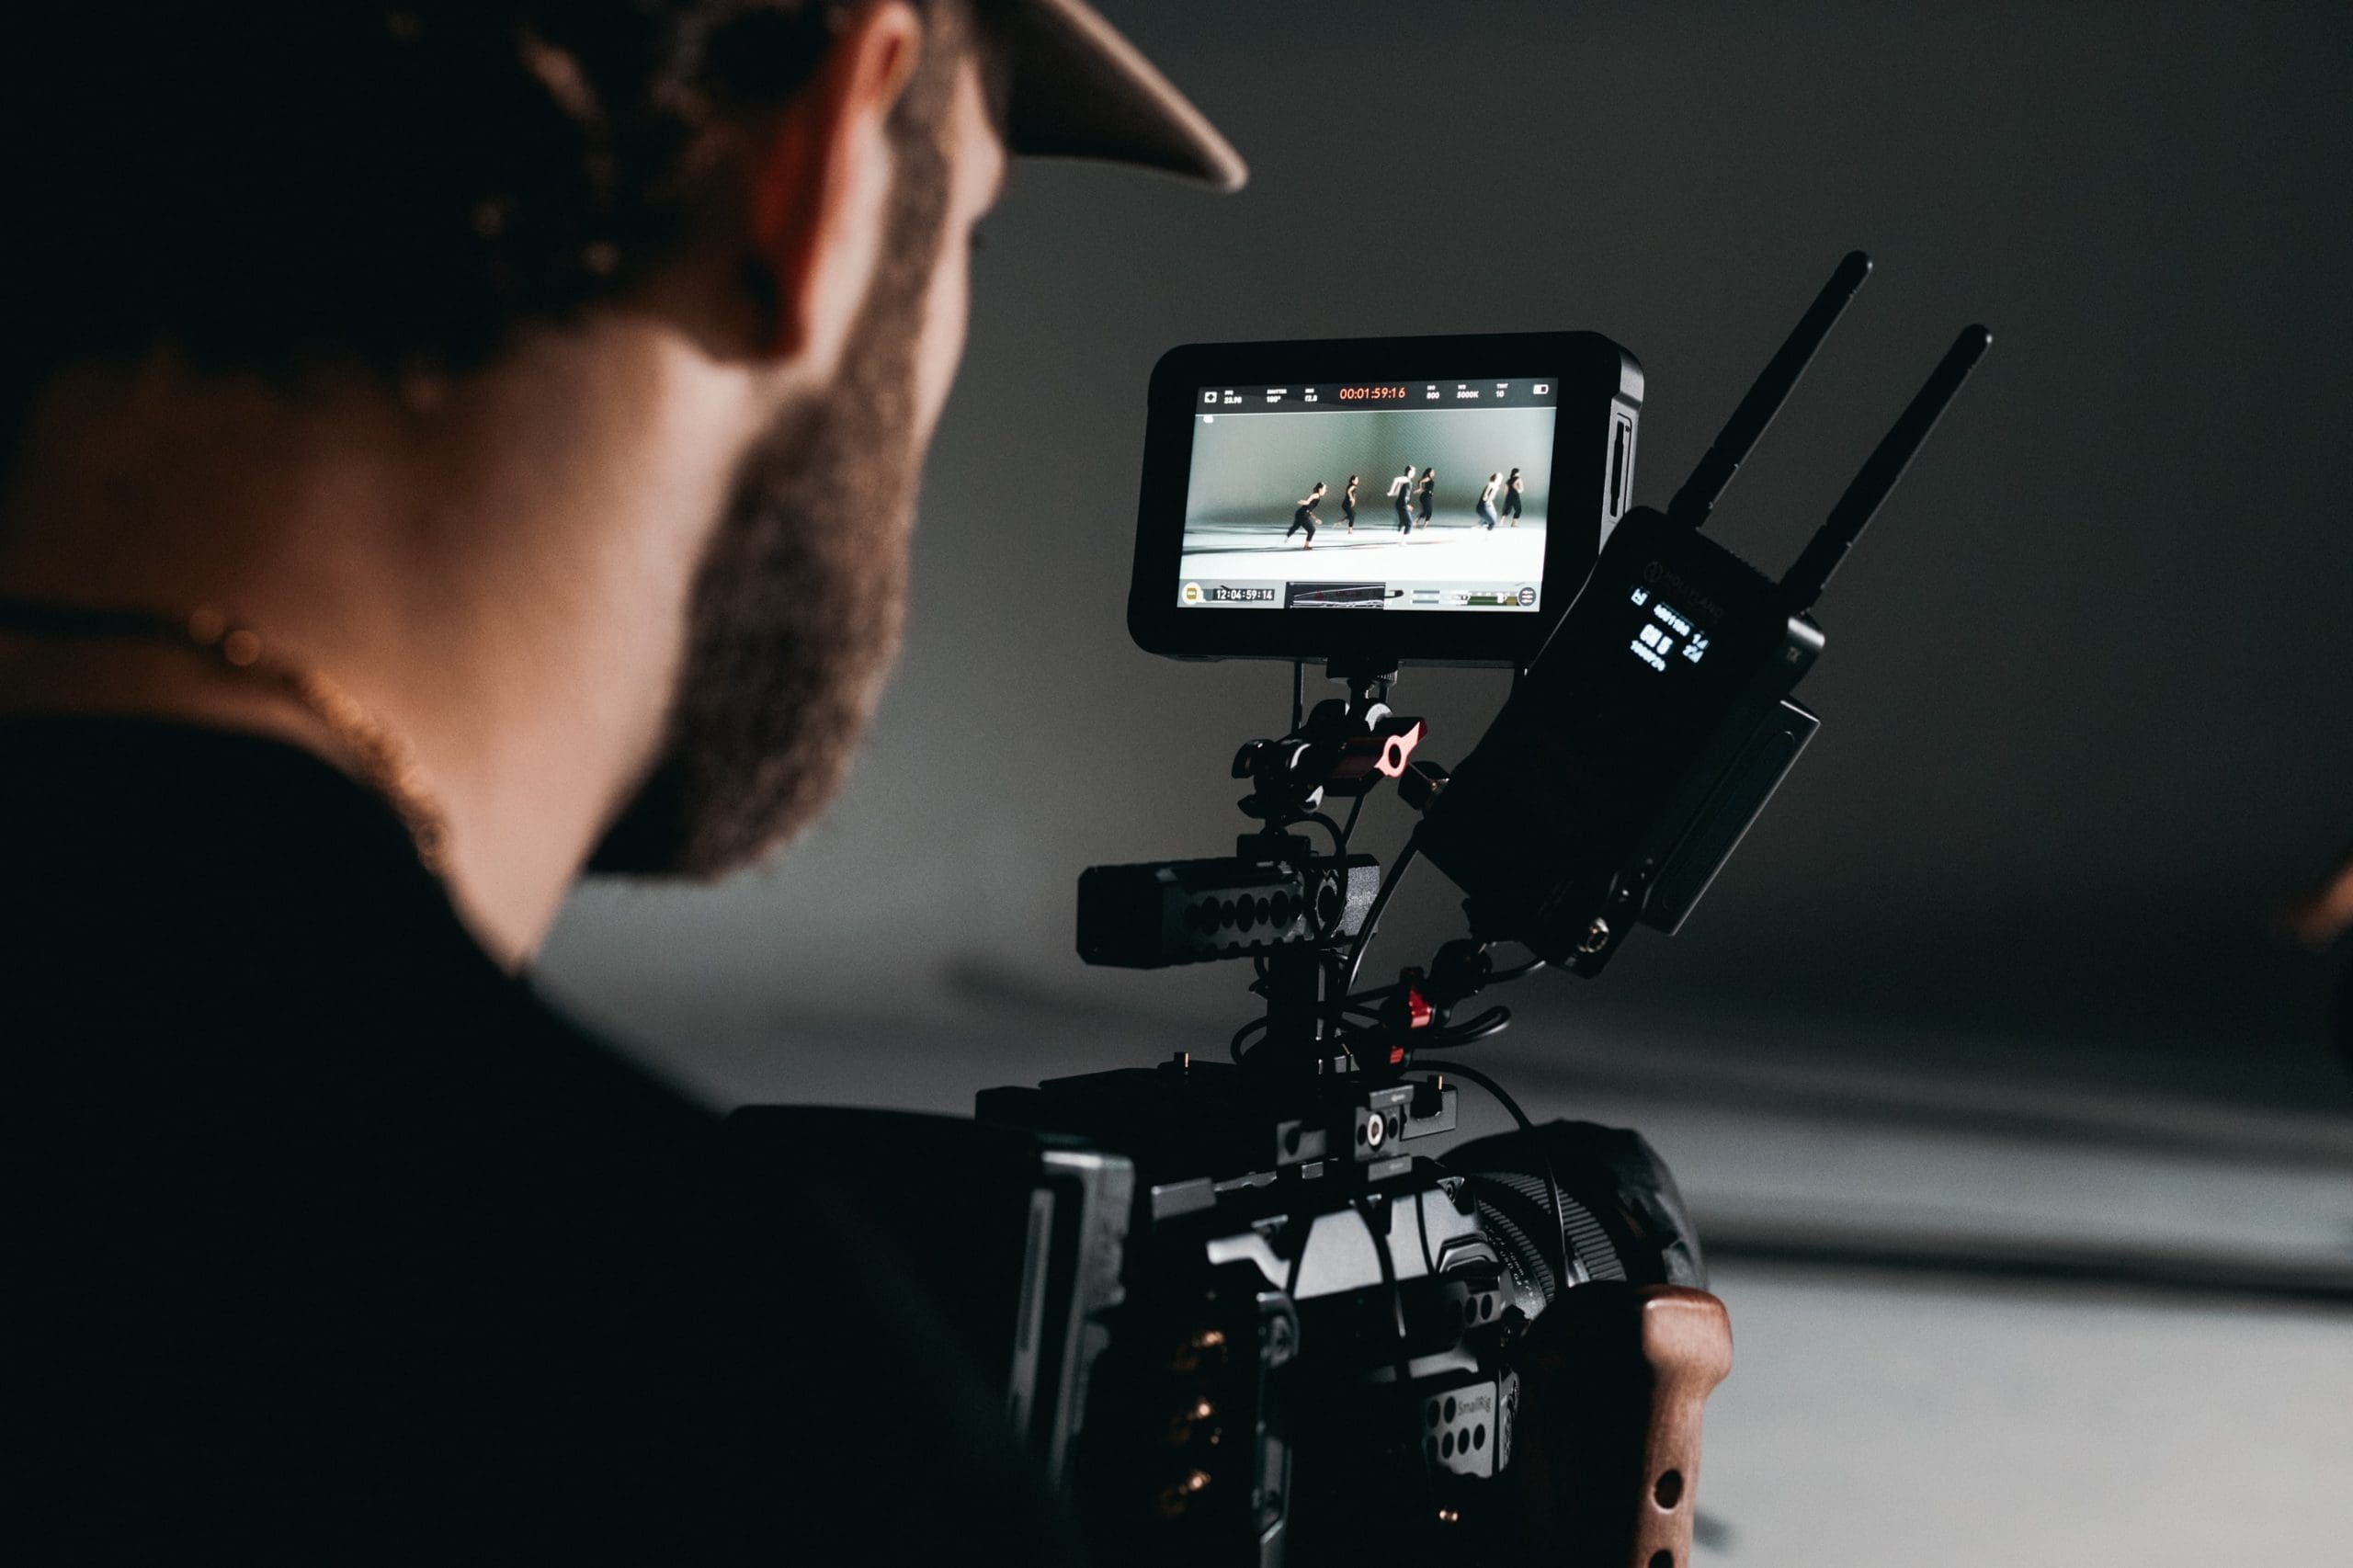
How to Transform Images and Create Video with OpenCV Photo by KAL VISUALS. Some rights reserved.
Overview
This post is divided into two parts; they are:
Ken Burns Effect
Writing Video
Ken Burns Effect
You are going to create a lot of images by following other posts. Maybe it is to visualize some progress of your machine learning project, or to show how a computer vision technique is manipulating your image. To make things simpler, you are going to do the simplest manipulation to an input image: cropping.
The task in this post is to create Ken Burns effect. It is a panning and zooming technique named after the filmmaker Ken Burns:
Instead of showing a large static photo on screen, the Ken Burns effect crops to a detail, then pans across the image.
— Wikipedia, “Ken Burns effect”
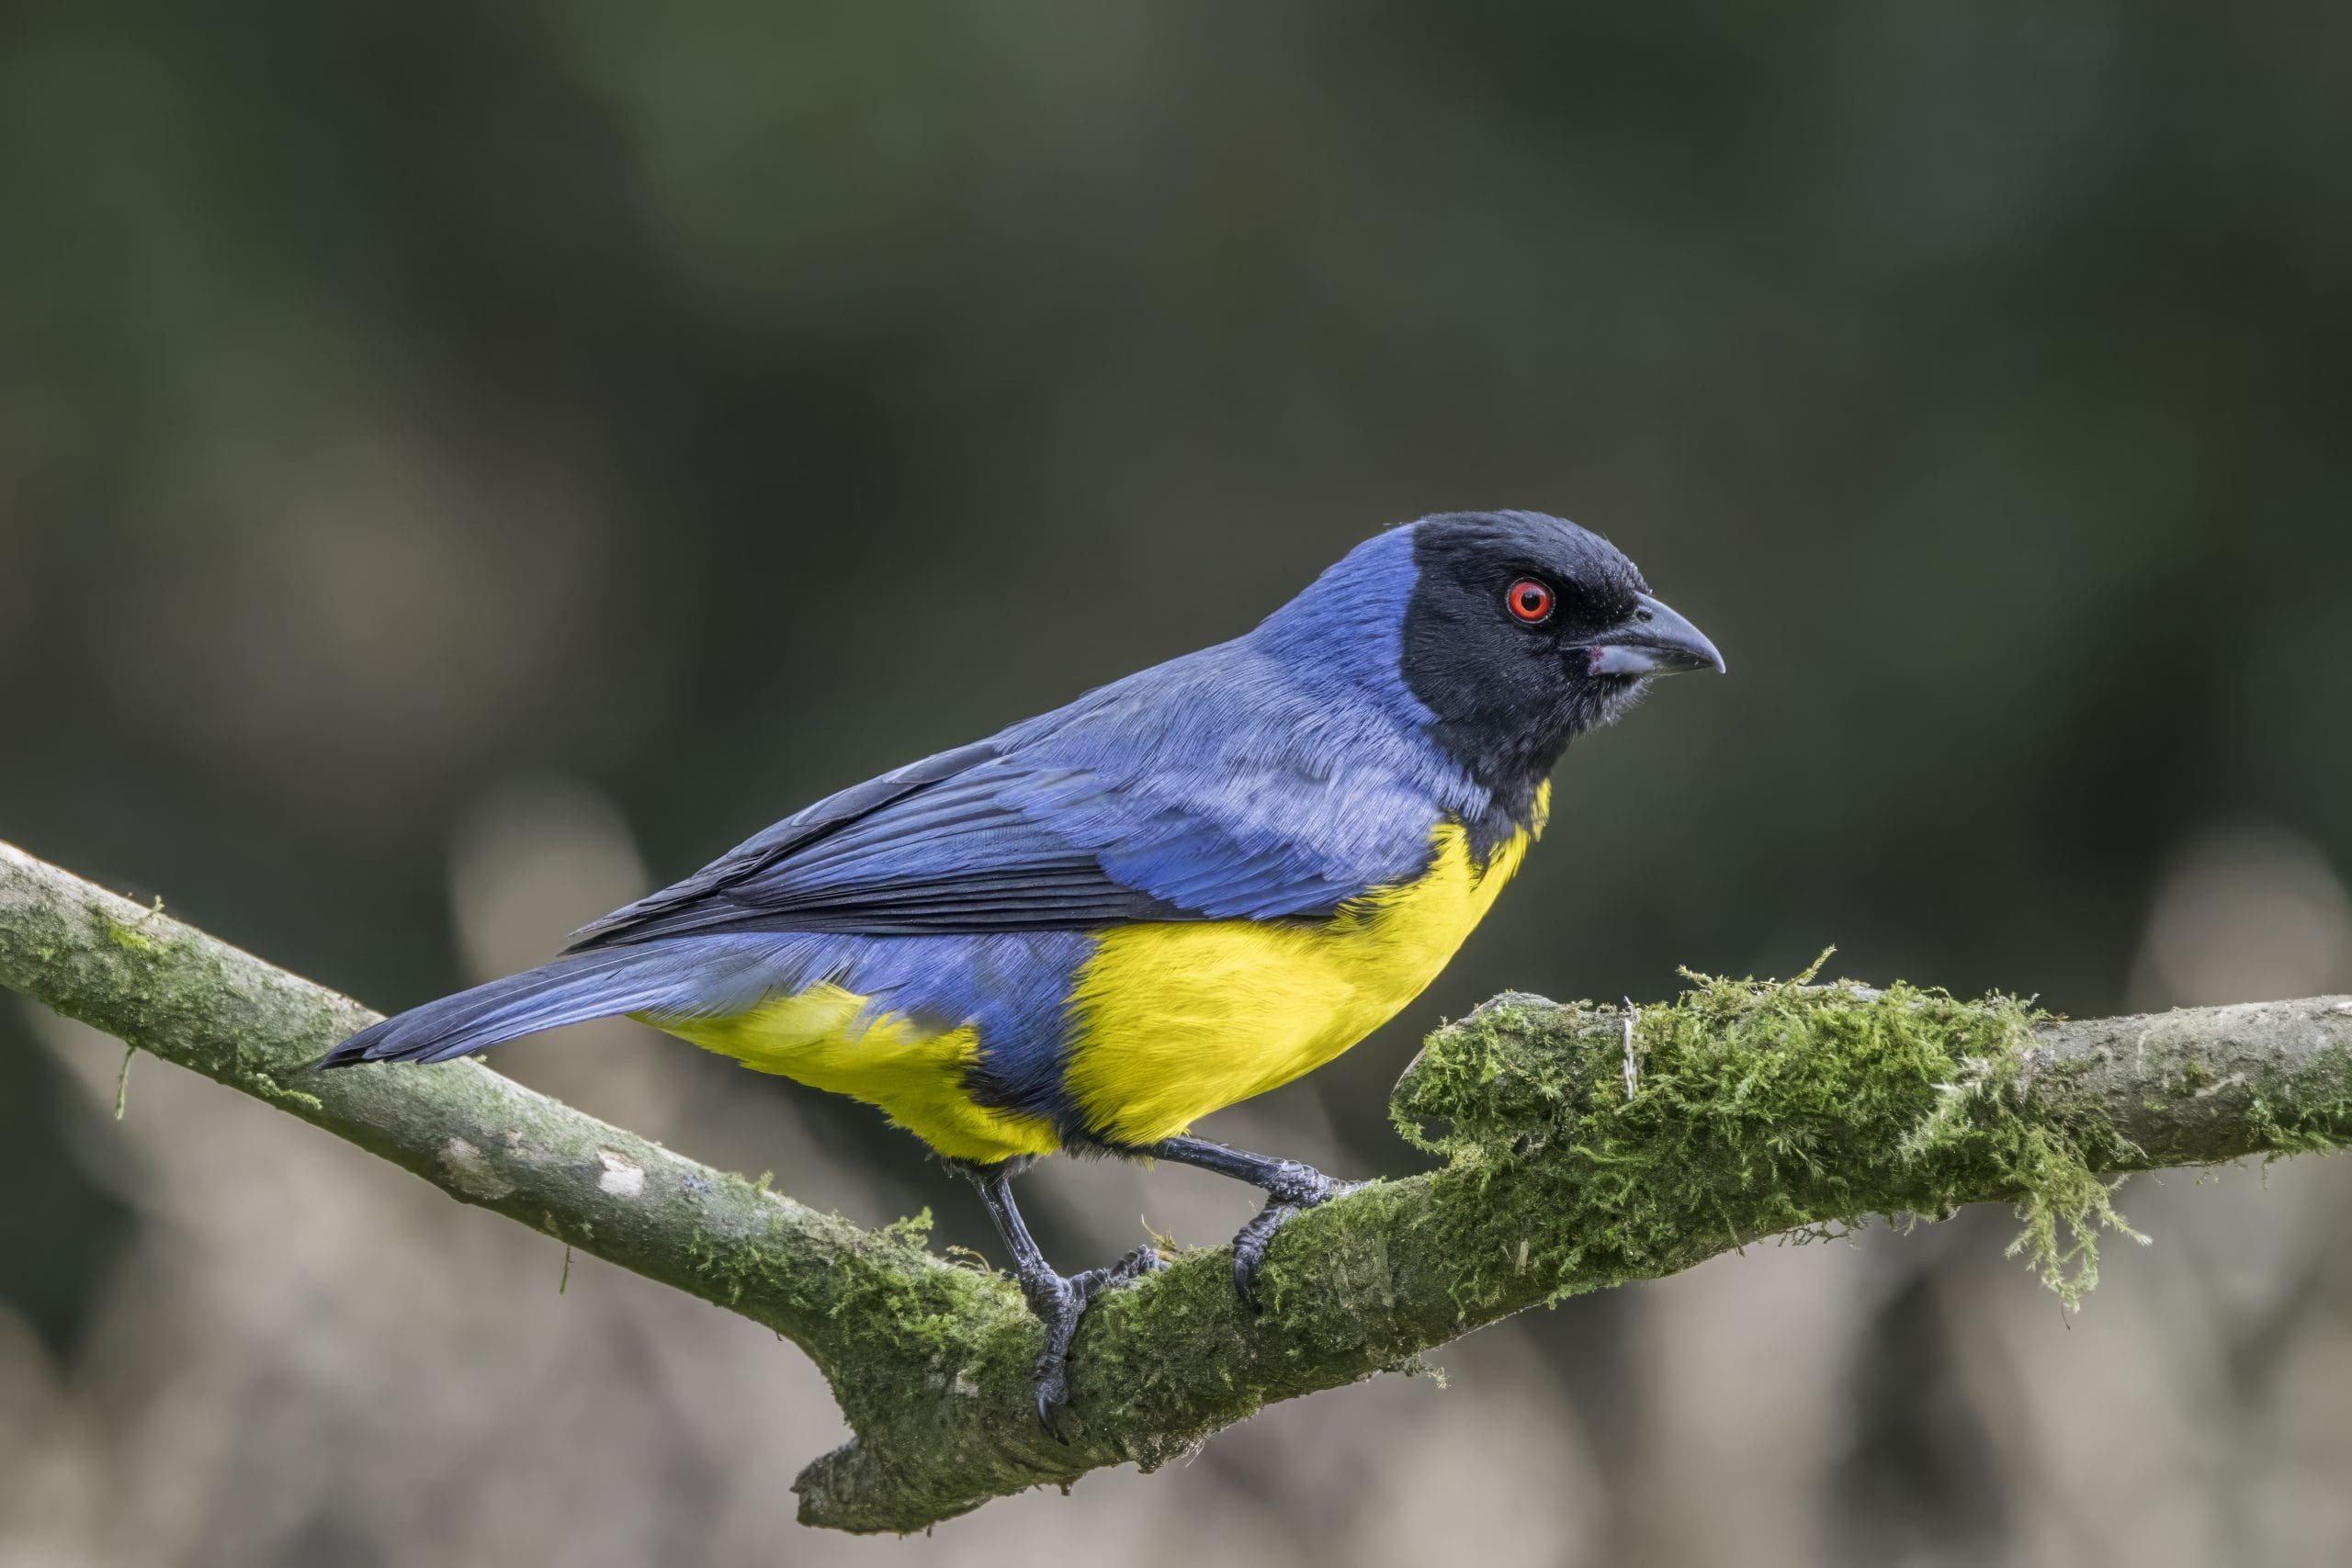
Let’s see how you can create the Ken Burns effect in Python code using OpenCV. We start with an image, for example the bird picture below that you can download from Wikipedia:
The image read by OpenCV, img, is indeed a numpy array of shape (3042, 4563, 3) and in the data type uint8 (8-bit unsigned integer) for it is a colored image which each pixel is represented as BGR values between 0 and 255.
Ken Burns effect is to zoom and pan. Each frame in the video is a crop of the original image (and then zoom to fill the screen). To crop the image given a numpy array is easy, since numpy already provided the slicing syntax for you:
1
cropped=img[y0:y1,x0:x1]
The image is a three-dimensional numpy array. The first two dimensions are for height and width, respectively (same as how to set a coordinate for a matrix). Hence you can use the numpy slicing syntax to take pixels $y_0$ to $y_1$ in the vertical direction and pixels $x_0$ to $x_1$ in the horizontal direction (remember that in matrix, coordinates are numbered from top to bottom and from left to right).
Cropping a picture means to take a picture of dimension $W\times H$ into a smaller dimension $W’\times H’$. In order to make a video, you want to create frames of a fixed dimension. The cropped dimension $W’\times H’$ would need to be resized. Moreover, to avoid distortion, the cropped image also needs to be at a predefined aspect ratio.
To resize an image, you can define a new numpy array, then calculate and fill in the pixel values one by one. There are many ways to calculate pixel value, such as using linear interpolation or simply copy over the nearest pixel. If you try to implement the resize operation, you will find it not hard but still quite cumbersome. Hence the easier way is to use OpenCV’s native function, such as the following:
The function cv2.resize() takes an image and the target dimension as a tuple of (width, height) in pixel size and returns a new numpy array. You can specify the algorithm for resizing. The above is using linear interpolation and it looks good in most cases.
These are basically all ways you can manipulate an image in OpenCV, namely:
Manipulate the numpy array directly. This works well for simple tasks where you want to work at the pixel level
Using OpenCV functions. This is more suitable for complex tasks where you need to consider the entire image or it is too inefficient to manipulate each pixel.
With these, you can build your Ken Burns animation. The flow is as follows:
Given an image (preferably a high-resolution one), you want to define pan by specifying the starting and ending focus coordinates. You also want to define the starting and ending zoom ratio.
You have a predefined video duration and the FPS (frame per second). The total number of frames in the video is the duration multiplied by the FPS.
For each frame, calculate the crop coordinates. Then resize the cropped image to the target resolution of the video
With all the frames prepared, you write to the video file.
Let’s start with the constants: Assume we are going to create a two-second 720p video (resolution 1280×720) at 25 FPS (which is quite low but visually acceptable). The pan will start at the center at 40% from left and 60% from top of the image, and end at the center at 50% from left and 50% from top of the image. The zoom will be start from 70% of the original image, then zoom out to 100%.
You are going to crop the image a lot of times to create frames (precisely, there are 2×25=50 frames). Therefore it is beneficial to create a function for cropping:
1
2
3
4
def crop(img,x,y,w,h):
x0,y0=max(0,x-w//2), max(0, y-h//2)
x1,y1=x0+w,y0+h
returnimg[y0:y1,x0:x1]
This cropping function takes an image, the tentative center position in pixel coordinate, and the width and height in number of pixels. The cropping will ensure it will not start beyond the image border, hence the two max() functions are used. Cropping is done using numpy slicing syntax.
If you consider that the current point of time is at $\alpha$% of the entire duration, you can use affine transform to calculate the exact level of zoom and the position of pan. In terms of the relative position of the pan center (in terms of percentage of original width and height), the affine transform gives
1
2
rx=end_center[0]*alpha+start_center[0]*(1-alpha)
ry=end_center[1]*alpha+start_center[1]*(1-alpha)
where alpha is between 0 and 1. Similarly, the zoom level is
1
scale=end_scale*alpha+start_scale*(1-alpha)
Given the original image size and the scale, you can calculate the size of cropped image by multiplication. But since the aspect ratio of the image may not be the same as the video, you should adjust the cropped dimension to fit the video aspect ratio. Assume the image numpy array is img, and the zoom level as scale calculated above, the cropped size can be calculated as:
The above is to compare the aspect ratio (width divided by height) between the image and video, and the zoom level is used for the more limited edge and calculates the other edge based on the target aspect ratio.
Once you know how many frames you needed, you can use a for-loop to create each frame with a different affine parameter alpha, which can be obtained using a numpy function linspace(). The complete code is as follows:
The last few lines is how you use OpenCV to write a video. You create a VideoWriter object with the FPS and resolution specified. Then you write the frames one by one, and release the object to close the written file.
The created video is one like the this. A preview is as follows:
Preview of the created video. Viewing this requires a supported browser.
Writing Video
From the example in the previous section, you saw how we create a VideoWriter object:
Unlike how you may write an image file (such as JPEG or PNG), the format of the video that OpenCV created is not inferred from the filename. It is the second parameter to specify the video format, namely, the FourCC, which is a code of four characters. You can find the FourCC code and the corresponding video format from the list at the following URL:
However, not all FourCC code can be used. It is because OpenCV create the video using the FFmpeg tool. You can find the list of supported video format using the command:
1
ffmpeg-codecs
Be sure that the ffmpeg command is same as what OpenCV used. Also note that, the output of the above command only tells you what format ffmpeg supported, not the corresponding FourCC code. You need to lookup the code elsewhere, such as from the abovementioned URL.
To check if you can use a particular FourCC code, you must try it out and see if OpenCV raise an exception:
Want to Get Started With Machine Learning with OpenCV?
Take my free email crash course now (with sample code).
Click to sign-up and also get a free PDF Ebook version of the course.
Summary
In this post, you learned how to create a video in OpenCV. The video created is built from a sequence of frames (i.e., no audio). Each frame is an image of a fixed size. As an example, you learned how to apply the Ken Burns effect to a picture, which in particular, you applied:
The technique of cropping an image using numpy slicing syntax
The technique of resizing an image using OpenCV functions
Using affine transform to calculate the parameters of zoom and pan, and create frames of the video
And finally, you write the frames into a video file using the VideoWriter object in OpenCV.
Get Started on Machine Learning in OpenCV!
Learn how to use machine learning techniques in image processing projects
...using OpenCV in advanced ways and work beyond pixels
It provides self-study tutorials with all working code in Python to turn you from a novice to expert. It equips you with logistic regression, random forest, SVM, k-means clustering, neural networks,
and much more...all using the machine learning module in OpenCV
Kick-start your deep learning journey with hands-on exercises


Excellent tutorial One question: for the sake of symmetry wouldn’t it be more appropriate to use
y = int(orig_shape[0]*ry)
instead of
y = int(orig_shape[0]*rx)?
Hi Nuno…Thank you for your feedback! You may be correct! Please proceed with your recommendation and let us know what you find.
Thank you so much!
A beautiful post.