In this article, you will learn how to build production-grade LLM systems by following a structured six-step LLMOps roadmap covering observability, evaluation, cost control, and agent orchestration.
Topics we will cover include:
- How LLMOps differs from traditional MLOps, and what foundational skills you need before touching any LLMOps tooling.
- How to instrument LLM calls with full tracing, build and evaluate RAG pipelines using RAGAS, and implement cost controls with model routing.
- A step-by-step learning plan that takes you from your first LLM API project through deploying and evaluating production agent systems.
There is a lot of ground to cover, so let’s get started.
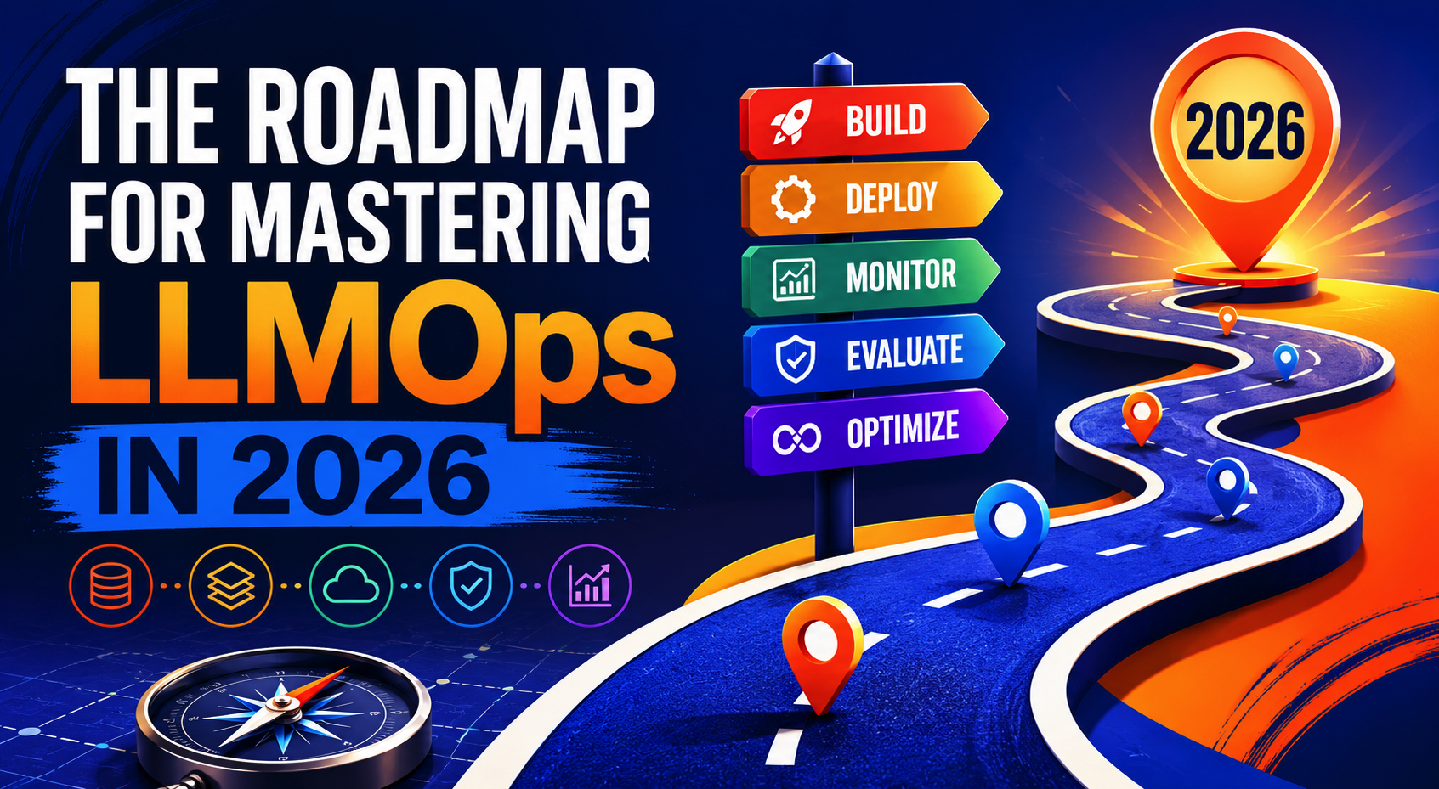
The Roadmap for Mastering LLMOps in 2026
Introduction
The LLMOps market is projected to grow from \$1.97 billion in 2024 to \$4.9 billion by 2028 at a 42% CAGR. Meanwhile, 72% of enterprises are adopting AI automation tools in 2026, but most have not built cost controls into their LLM infrastructure. Those two numbers together describe the actual opportunity: enormous demand, and most of the people building these systems are doing it without the operational discipline to make them reliable, auditable, or cost-efficient.
LLMOps is the engineering practice that closes that gap. It is not a single tool or a one-time setup — it is the discipline of building LLM-based systems that behave like production software: versioned, monitored, evaluated, and improvable over time. This roadmap is a phase-by-phase path from foundations through production-grade systems. It includes the tools that matter, the skills to build in order, two complete runnable code examples, and a step-by-step plan you can follow starting today.
LLMOps vs MLOps
Traditional MLOps is built around a clear object: the model. You train it, version it, deploy it, monitor its predictions for drift, and retrain it when performance degrades.
In LLMOps, the model is often the least frequently changed component. You are not versioning model weights as often — you are versioning prompts, which change frequently. A prompt that worked last week may produce worse outputs after a model provider silently updates their base model. A rephrasing of the system prompt that seemed cleaner in testing may degrade performance on edge cases in production. Every prompt change is a deployment, and every deployment needs to be tracked, tested, and reversible.
The second major difference is that LLM outputs are non-deterministic. The same input can produce different outputs across calls, which means traditional monitoring — did the model return the right class label? — does not apply. You need evaluation infrastructure that scores quality on a continuous scale, not binary correctness. This requires building golden test sets, running evaluation pipelines, and using LLM-as-judge to score outputs at scale without requiring human review of every response.
Token optimization practices typically save 30–50% on API costs, often covering the entire tooling budget. Inference costs that look manageable at 1,000 daily users become budget crises at 100,000. Cost is a first-class metric in LLMOps in a way it never was in traditional MLOps, and treating it as an afterthought is how engineering teams end up explaining unexpected bills to finance.
What You Need Before LLMOps
Do not start with LLMOps tooling before you have these in place. Trying to instrument a system you do not yet understand how to build is a reliable way to waste steps.
- Python proficiency: Core software engineering skills remain essential. Python fluency, understanding of distributed systems, comfort with cloud platforms, and strong debugging abilities form the foundation for everything else. The specific Python you need: async/await for non-blocking API calls, error handling and retry logic, working with JSON and structured data, packaging code into installable modules, and writing tests. Not advanced Python, but enough that you can build and maintain a service someone else depends on.
- LLM fundamentals: Before you can operate LLM systems well, you need to understand how they fail. That means understanding tokens and context windows (why long inputs cost more and perform differently), temperature and sampling (why outputs vary and how to control that), the difference between base models and instruction-tuned models, what tool calling looks like at the API level, and what hallucination actually is mechanistically — not just as a word. Build three to five small projects before touching any LLMOps tooling: a summarizer, a document classifier, a simple RAG pipeline. The hands-on experience with failure modes is what makes the operational work make sense later.
- Cloud and infrastructure basics: You will be deploying services, not just running scripts. Comfort with at least one cloud provider — AWS, GCP, or Azure — along with Docker for containerization, and basic CI/CD concepts are the minimum. You do not need to be a DevOps engineer, but you need to understand what a container is, how environment variables work, and how to run a service that does not die when you close your laptop.
- Version control discipline: Prompts need to be in Git. Config files need to be in Git. Evaluation datasets need to be in Git. Everything that changes needs a history. This habit is the foundation of everything in the operational layer — if it is not versioned, you cannot debug it, roll it back, or understand what changed when performance degrades.
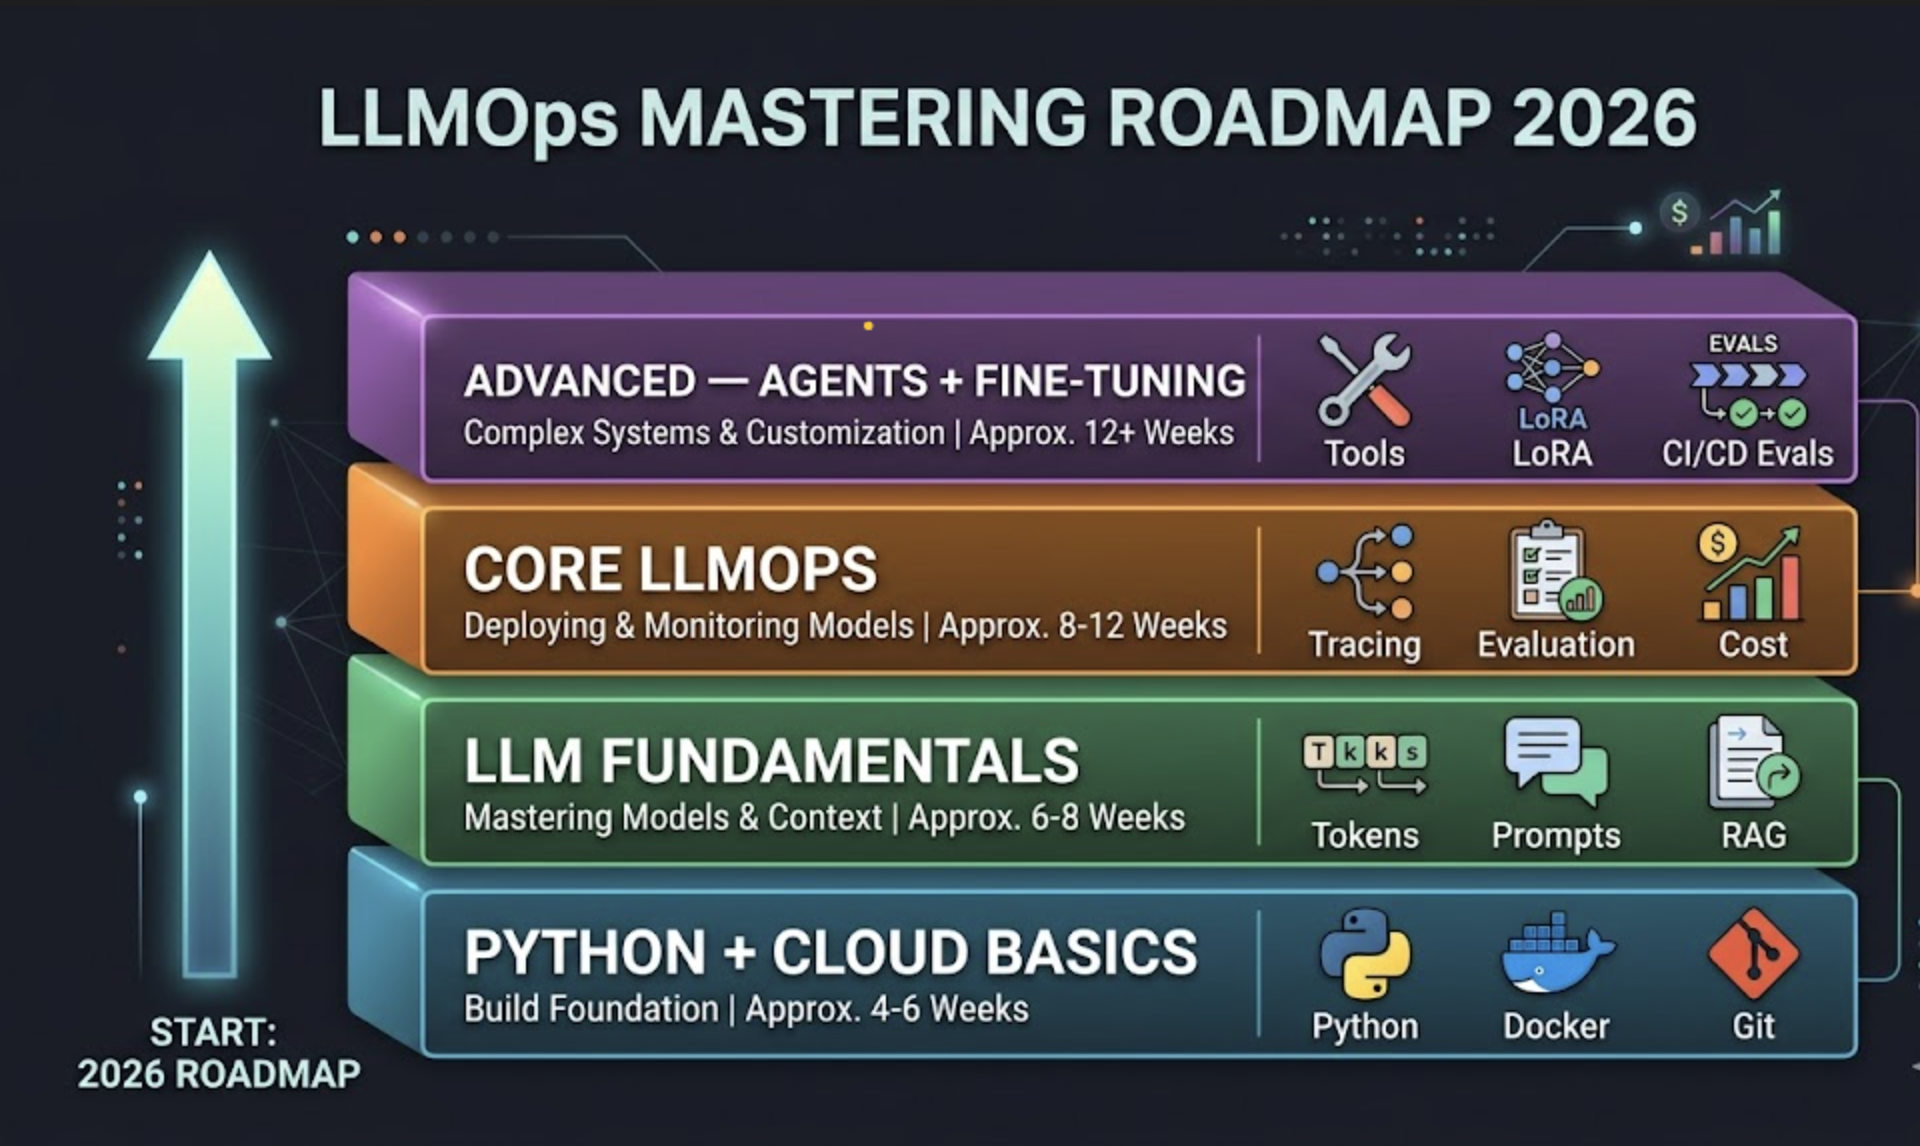
A clean upward “learning stack” diagram with four labeled layers stacked from bottom to top (click to enlarge)
Image by Author
Phase 1: Build Your First Production-Ready LLM System
The goal of this phase is not to build something impressive — it is to build something real. A demo that works on your machine is not a production system. A production system has logging, error handling, cost visibility, and someone who can debug it at 2am when it breaks.
What to Build
A chatbot, a document Q&A tool, or an API endpoint that accepts a user query and returns an LLM response. The specific application matters less than the operational requirements you impose on yourself: every call must be logged, every response must be traceable, and you must know what each request costs in tokens and dollars before you move to the next phase.
Skills to Build in This Phase
- Prompt versioning: Treat every prompt like production code. Store it in a file, commit it to Git with a descriptive message, and do not edit it directly in the API call. When something breaks, you need to know what changed.
- Structured outputs: Use JSON mode or function calling to get responses in a predictable format your application can parse reliably. Unstructured text output is fine for chat interfaces. For anything your code needs to act on, structured output is non-negotiable.
- Basic observability: Log every LLM call: the input, the output, the model used, the token count, the latency, and the calculated cost. This data is what lets you debug, evaluate, and optimize.
Install prerequisites:
|
1 |
pip install langfuse anthropic python-dotenv |
You will also need:
- A free Langfuse account (or self-hosted instance) — grab your LANGFUSE_PUBLIC_KEY and LANGFUSE_SECRET_KEY from the project settings.
- An Anthropic API key or any LLM provider key.
- A .env file in your project root with those keys.
Code: Instrumented LLM Call with Langfuse Tracing
|
1 2 3 4 5 6 7 8 9 10 11 12 13 14 15 16 17 18 19 20 21 22 23 24 25 26 27 28 29 30 31 32 33 34 35 36 37 38 39 40 41 42 43 44 45 46 47 48 49 50 51 52 53 54 55 56 57 58 59 60 61 62 63 64 65 66 67 68 69 70 71 72 73 74 75 76 77 78 79 80 81 82 83 84 85 86 87 88 89 90 91 92 93 94 95 96 97 98 99 100 101 102 103 104 105 106 107 108 109 110 111 112 113 114 115 116 117 118 119 120 121 122 123 124 125 126 127 128 129 130 131 132 133 134 135 136 137 138 139 140 141 142 143 144 145 146 147 148 149 150 151 152 153 154 155 156 157 158 159 160 161 162 163 164 165 166 167 168 169 170 171 172 173 174 175 176 177 178 179 180 181 182 183 184 185 186 187 188 189 190 191 192 |
# llm_with_tracing.py # Purpose: A production-ready LLM call wrapper with full observability. # Every call is traced in Langfuse: input, output, tokens, cost, latency. # # Prerequisites: # pip install langfuse anthropic python-dotenv # # Setup: # 1. Create a free account at https://cloud.langfuse.com # 2. Get your keys from Settings > API Keys # 3. Create a .env file with the variables below # # Run: # python llm_with_tracing.py import os import time from dotenv import load_dotenv import anthropic from langfuse import Langfuse # Load environment variables from .env file load_dotenv() # Required environment variables in your .env: # LANGFUSE_PUBLIC_KEY=pk-lf-... # LANGFUSE_SECRET_KEY=sk-lf-... # LANGFUSE_HOST=https://cloud.langfuse.com (or your self-hosted URL) # ANTHROPIC_API_KEY=sk-ant-... # Initialize clients langfuse_client = Langfuse() # Reads keys automatically from environment anthropic_client = anthropic.Anthropic() # Reads ANTHROPIC_API_KEY from environment # ── Configuration ───────────────────────────────────────────────────────────── # Store your prompt here, not inline in the API call. # This makes it versionable and testable independently. SYSTEM_PROMPT = """You are a helpful customer support assistant. Answer questions clearly and concisely. If you do not know something, say so directly -- do not guess.""" MODEL = "claude-sonnet-4-20250514" # Anthropic's pricing as of mid-2026 (update when pricing changes) # Used to calculate cost per call for cost tracking COST_PER_INPUT_TOKEN = 3.00 / 1_000_000 # $3.00 per million input tokens COST_PER_OUTPUT_TOKEN = 15.00 / 1_000_000 # $15.00 per million output tokens def call_llm_with_tracing( user_message: str, session_id: str = "default-session", user_id: str = "anonymous" ) -> str: """ Make a traced LLM call. Every call creates a Langfuse trace with: - Full input and output - Token usage (input, output, total) - Calculated cost in USD - Latency in milliseconds - Model used and session context Parameters: user_message : The message from the user session_id : Groups related calls into one conversation in Langfuse user_id : Associates the call with a specific user for analytics Returns: The LLM response as a string """ # Create a top-level trace for this user interaction # The trace appears in the Langfuse dashboard as one unit of work trace = langfuse_client.trace( name="customer-support-call", session_id=session_id, user_id=user_id, input={"user_message": user_message, "system_prompt": SYSTEM_PROMPT} ) # Create a generation span inside the trace # This captures model-specific details: model name, tokens, cost generation = trace.generation( name="claude-completion", model=MODEL, input={ "system": SYSTEM_PROMPT, "messages": [{"role": "user", "content": user_message}] } ) start_time = time.time() try: # Make the API call response = anthropic_client.messages.create( model=MODEL, max_tokens=1024, system=SYSTEM_PROMPT, messages=[{"role": "user", "content": user_message}] ) latency_ms = int((time.time() - start_time) * 1000) # Extract the response text response_text = response.content[0].text # Extract token usage from the response input_tokens = response.usage.input_tokens output_tokens = response.usage.output_tokens total_tokens = input_tokens + output_tokens # Calculate cost for this call cost_usd = ( input_tokens * COST_PER_INPUT_TOKEN + output_tokens * COST_PER_OUTPUT_TOKEN ) # Update the generation span with results # This data populates the Langfuse cost and token dashboards generation.end( output=response_text, usage={ "input": input_tokens, "output": output_tokens, "total": total_tokens, "unit": "TOKENS" }, metadata={ "latency_ms": latency_ms, "cost_usd": round(cost_usd, 6), "model": MODEL } ) # Update the trace with the final output trace.update( output={"response": response_text}, metadata={"total_cost_usd": round(cost_usd, 6)} ) # Print a summary to stdout for local visibility print(f"\n{'─' * 60}") print(f"User: {user_message}") print(f"Claude: {response_text}") print(f"Tokens: {input_tokens} in / {output_tokens} out / {total_tokens} total") print(f"Cost: ${cost_usd:.6f}") print(f"Latency: {latency_ms}ms") print(f"Trace: {langfuse_client.base_url}/trace/{trace.id}") print(f"{'─' * 60}\n") return response_text except Exception as e: # Record the error in the trace so it shows up in Langfuse generation.end( output=None, metadata={"error": str(e), "latency_ms": int((time.time() - start_time) * 1000)} ) trace.update(output={"error": str(e)}) # Always flush before raising -- ensures the error trace is sent langfuse_client.flush() raise finally: # Flush sends all buffered events to Langfuse # In a long-running service, Langfuse flushes automatically. # In a script, you must flush manually before the process exits. langfuse_client.flush() # ── Run a demonstration ──────────────────────────────────────────────────────── if __name__ == "__main__": # Simulate two turns of a customer support conversation test_messages = [ "What is your return policy for electronics?", "Can I return an item I bought 45 days ago?" ] session = "demo-session-001" for i, message in enumerate(test_messages): print(f"\nCall {i + 1}/{len(test_messages)}") try: call_llm_with_tracing( user_message=message, session_id=session, user_id="test-user-42" ) except Exception as e: print(f"Error on call {i + 1}: {e}") |
How to run:
|
1 2 3 4 5 6 7 8 9 10 11 12 13 |
# 1. Create your .env file cat > .env << 'EOF' LANGFUSE_PUBLIC_KEY=pk-lf-your-key-here LANGFUSE_SECRET_KEY=sk-lf-your-key-here LANGFUSE_HOST=https://cloud.langfuse.com ANTHROPIC_API_KEY=sk-ant-your-key-here EOF # 2. Install dependencies pip install langfuse anthropic python-dotenv # 3. Run the script python llm_with_tracing.py |
What this code does:
- Every call creates a two-level structure in Langfuse: a trace representing the full user interaction, and a generation span inside it representing the specific model call. This separation matters because complex applications eventually have multiple model calls per user interaction — the trace groups them together, while individual generation spans capture per-call costs and token counts.
- The generation.end() call posts token usage in the format Langfuse expects to populate its cost dashboards automatically.
- The langfuse_client.flush() in the finally block is required in scripts — without it, buffered events never leave the process before Python exits.
After running this, open your Langfuse dashboard. You will see both calls logged with full inputs, outputs, token counts, and cost per call. That cost-per-call number is your baseline for everything that follows.
Phase 2: RAG Pipelines and Evaluation
Most production LLM applications are not raw chatbots — they are RAG systems. A user asks a question, relevant documents are retrieved from a vector store, and the model synthesizes an answer grounded in those documents. Building this is relatively straightforward. Knowing whether it actually works is the hard part.
What to Build
A document Q&A system: ingest PDFs or text files, chunk them, embed them into a vector store, and retrieve relevant chunks at query time. Connect that retrieval step to your traced LLM call from Phase 1. Then build the evaluation layer that tells you whether the system is actually answering questions correctly.
RAG Evaluation Metrics That Matter
RAGAS provides four metrics that cover the main failure modes of RAG systems:
- Faithfulness: Is the answer grounded in the retrieved context, or is the model making things up? This catches hallucinations where the model goes beyond what the documents say.
- Answer relevance: Does the response actually address the question asked? A faithful answer can still miss the point.
- Context precision: Are the retrieved chunks actually relevant to the question, or is retrieval pulling in noise?
- Context recall: Does the retrieved context contain enough information to answer the question? If recall is low, your chunking or retrieval strategy is losing important information.
Install prerequisites:
|
1 |
pip install ragas langchain-openai chromadb datasets python-dotenv |
You will need:
- An OpenAI API key for RAGAS’s default LLM-as-judge evaluation.
- The .env file from Phase 1 with OPENAI_API_KEY=sk-… added.
Code: RAGAS Evaluation Pipeline
|
1 2 3 4 5 6 7 8 9 10 11 12 13 14 15 16 17 18 19 20 21 22 23 24 25 26 27 28 29 30 31 32 33 34 35 36 37 38 39 40 41 42 43 44 45 46 47 48 49 50 51 52 53 54 55 56 57 58 59 60 61 62 63 64 65 66 67 68 69 70 71 72 73 74 75 76 77 78 79 80 81 82 83 84 85 86 87 88 89 90 91 92 93 94 95 96 97 98 99 100 101 102 103 104 105 106 107 108 109 110 111 112 113 114 115 116 117 118 119 120 121 122 123 124 125 126 127 128 129 130 131 132 133 134 135 136 137 138 139 140 141 142 143 144 145 146 147 148 149 150 151 152 153 154 155 156 157 158 159 160 161 162 163 164 165 166 167 168 169 170 171 172 173 174 175 176 177 178 179 180 181 182 183 |
# rag_evaluation.py # Purpose: Evaluate a RAG pipeline using RAGAS metrics. # Measures faithfulness, answer relevance, context precision, and recall. # Use this to establish a baseline before any change ships to production. # # Prerequisites: # pip install ragas langchain-openai chromadb datasets python-dotenv # # Setup: # Add OPENAI_API_KEY to your .env file # (RAGAS uses GPT-4 as the default judge model) # # Run: # python rag_evaluation.py import os from dotenv import load_dotenv from datasets import Dataset from ragas import evaluate from ragas.metrics import ( faithfulness, answer_relevancy, context_precision, context_recall, ) from langchain_openai import ChatOpenAI, OpenAIEmbeddings load_dotenv() # ── Sample evaluation dataset ────────────────────────────────────────────────── # In a real project, this is your "golden dataset" -- 50-100 questions # with ground-truth answers, built from your actual use case. # Every member of the team should agree these answers are correct. # This dataset is what you run against before every production deployment. # # Format required by RAGAS: # question : The user's question # answer : What your RAG system actually returned # contexts : List of document chunks that were retrieved # ground_truth : The correct answer (used for recall and relevancy scoring) EVALUATION_DATASET = { "question": [ "What is the return window for electronics?", "How long does standard shipping take?", "Can I return a used item?", ], "answer": [ # These are the answers your RAG system returned -- replace with real outputs "Electronics must be returned within 15 days of purchase in original packaging.", "Standard shipping takes 5-7 business days for most locations.", "Items must be in original, unused condition to qualify for a return.", ], "contexts": [ # These are the document chunks your retriever returned for each question # Each question gets a list of chunks (you may retrieve multiple chunks per query) [ "Electronics and peripherals have a shorter return window of 15 days " "and must be returned in original, unopened packaging to qualify.", "Most standard items may be returned within 30 days of purchase." ], [ "Standard shipping typically takes 5-7 business days. " "Express options are available at checkout for faster delivery.", ], [ "To be eligible for a return, items must be unused and in the same " "condition that you received them, in original packaging." ], ], "ground_truth": [ # The correct answer according to your documentation "Electronics must be returned within 15 days in original packaging.", "Standard shipping takes 5-7 business days.", "Items must be unused and in original condition for a return.", ] } def run_ragas_evaluation(dataset_dict: dict) -> dict: """ Run RAGAS evaluation on a RAG pipeline's outputs. Parameters: dataset_dict : Dict with keys: question, answer, contexts, ground_truth Returns: Dict with metric scores (faithfulness, answer_relevancy, etc.) """ # Convert the dict to a HuggingFace Dataset -- required format for RAGAS dataset = Dataset.from_dict(dataset_dict) # Configure the LLM and embeddings RAGAS uses to judge outputs # RAGAS uses LLM-as-judge: it prompts GPT-4 to score each answer judge_llm = ChatOpenAI(model="gpt-4o-mini") # gpt-4o-mini is cheaper, still reliable embeddings = OpenAIEmbeddings(model="text-embedding-3-small") print("Running RAGAS evaluation...") print(f"Evaluating {len(dataset)} question-answer pairs\n") # Run all four metrics in one call # RAGAS sends multiple LLM requests to score each metric per sample results = evaluate( dataset=dataset, metrics=[ faithfulness, # Is the answer grounded in retrieved context? answer_relevancy, # Does the answer address the question? context_precision, # Are retrieved chunks relevant to the question? context_recall, # Does the context contain enough to answer? ], llm=judge_llm, embeddings=embeddings, ) return results def print_evaluation_report(results) -> None: """ Print a readable evaluation report with scores and interpretation. In production, write these scores to a database or dashboard instead. """ # Convert results to a pandas DataFrame for easy display df = results.to_pandas() print("=" * 60) print("RAGAS EVALUATION REPORT") print("=" * 60) # Aggregate scores across all samples metrics = ["faithfulness", "answer_relevancy", "context_precision", "context_recall"] thresholds = { "faithfulness": 0.85, # Below this: hallucination risk "answer_relevancy": 0.80, # Below this: answers miss the question "context_precision": 0.75, # Below this: retrieval pulling irrelevant noise "context_recall": 0.80, # Below this: retrieval missing key information } print("\nAggregate Scores:") all_pass = True for metric in metrics: if metric in df.columns: score = df[metric].mean() threshold = thresholds[metric] status = "PASS" if score >= threshold else "FAIL" if status == "FAIL": all_pass = False print(f" {metric:<22}: {score:.3f} [{status}] (threshold: {threshold})") print("\nPer-Question Breakdown:") for i, row in df.iterrows(): print(f"\n Q{i+1}: {row['question']}") print(f" Answer: {row['answer'][:80]}...") for metric in metrics: if metric in df.columns: print(f" {metric:<22}: {row[metric]:.3f}") print("\n" + "=" * 60) if all_pass: print("RESULT: All metrics above threshold -- safe to deploy") else: print("RESULT: One or more metrics below threshold -- DO NOT deploy") print("Review failing questions before shipping to production") print("=" * 60) return all_pass if __name__ == "__main__": try: results = run_ragas_evaluation(EVALUATION_DATASET) all_pass = print_evaluation_report(results) # In a CI/CD pipeline, exit with a non-zero code to block deployment # when evaluation fails. Your pipeline checks this exit code. if not all_pass: exit(1) except Exception as e: print(f"Evaluation failed with error: {e}") print("Check your OPENAI_API_KEY and dataset format.") exit(1) |
How to run:
|
1 2 3 4 5 6 7 8 |
# Add your OpenAI key to .env echo "OPENAI_API_KEY=sk-your-key-here" >> .env # Install RAGAS and dependencies pip install ragas langchain-openai chromadb datasets python-dotenv # Run evaluation python rag_evaluation.py |
What this code does:
- The EVALUATION_DATASET is your golden test set — the 50–100 questions and correct answers that define what “working” means for your specific application. In this example it has three entries to keep the demo runnable; in production you want at least 50.
- The run_ragas_evaluation function converts this dataset to the HuggingFace format RAGAS expects, then runs all four metrics in one call.
- RAGAS uses GPT-4 internally as a judge model — it sends each answer and context pair to the LLM and asks it to score quality along specific dimensions.
- The print_evaluation_report function adds threshold checks: if any metric falls below its threshold, the script exits with a non-zero code. In a GitHub Actions or CI/CD pipeline, that exit code blocks the deployment. This is how you prevent prompt regressions from shipping to production.
Phase 3: Guardrails, Cost Control, and Production Hardening
By this point you have a working, evaluated RAG system. Phase 3 is about making it safe and economically viable at real traffic volume.
Guardrails
Input guardrails detect prompt injection attacks, PII, and malicious intent before the request reaches the model. Output guardrails check responses for PII leakage, hallucinations, toxic content, and format compliance before delivery to the user. They are the primary tool for preventing harmful outputs and the minimum requirement for any customer-facing LLM deployment.
Guardrails AI and NeMo Guardrails are the two main options. Guardrails AI is more flexible and code-first — you define validators in Python. NeMo Guardrails is more conversational-flow focused and better suited for systems where you want to control what topics the model will and will not engage with.
Cost Control
LLMOps has become a full production stack. Cost is one of its most actionable layers. Three patterns that work:
- Semantic caching: Cache responses for semantically similar queries. “What are your hours?” and “When are you open?” should return the same cached response rather than making two API calls. LiteLLM handles semantic caching with a single configuration option.
- Model routing: Route simple, short queries to cheaper and faster models. Route complex, multi-step queries to frontier models. A support bot that handles both “What is your phone number?” and “Explain why my invoice is wrong” does not need to use the same model for both.
- Token auditing: Pull your Langfuse cost data weekly. Find the queries with the highest token counts. Nine times out of ten, there is unnecessary context being passed — long system prompts with content that never matters, retrieved chunks that are too large, or conversation history that is not being trimmed.
LiteLLM Setup with Model Routing
|
1 2 |
# Install LiteLLM pip install litellm python-dotenv |
|
1 2 3 4 5 6 7 8 9 10 11 12 13 14 15 16 17 18 19 20 21 22 23 24 25 26 27 28 29 30 31 32 33 34 35 36 37 38 39 40 41 42 43 44 45 46 47 48 49 50 51 52 53 54 55 56 57 58 59 60 61 62 63 64 65 66 67 68 69 70 71 72 73 74 75 76 77 78 79 80 81 82 83 84 85 86 87 88 89 90 91 92 93 94 95 96 97 98 99 100 101 |
# cost_control.py # Purpose: Demonstrate model routing and semantic caching with LiteLLM. # Routes simple queries to cheaper models, complex ones to frontier models. # # Prerequisites: # pip install litellm python-dotenv # # Run: # python cost_control.py import os from dotenv import load_dotenv import litellm from litellm import completion load_dotenv() # ── Model routing logic ──────────────────────────────────────────────────────── # A simple heuristic: route short queries to a cheaper model. # In production, replace this with a lightweight classifier trained on your data, # or use LiteLLM Router's built-in load balancing and fallback configuration. CHEAP_MODEL = "claude-haiku-4-5-20251001" # Fast, cheap -- good for simple queries FRONTIER_MODEL = "claude-sonnet-4-20250514" # Slower, more expensive -- for complex ones # Token threshold: queries under this estimated token count go to the cheap model # Adjust based on your cost/quality trade-off analysis ROUTING_THRESHOLD_CHARS = 200 # Rough proxy: ~200 chars ≈ ~50 tokens def route_query(user_message: str) -> str: """ Route a query to the appropriate model based on complexity. Returns the model string to use for this query. """ # Simple length-based routing -- replace with a trained classifier in production if len(user_message) < ROUTING_THRESHOLD_CHARS: print(f" → Routing to cheap model (message length: {len(user_message)} chars)") return CHEAP_MODEL else: print(f" → Routing to frontier model (message length: {len(user_message)} chars)") return FRONTIER_MODEL def call_with_routing( user_message: str, system_prompt: str = "You are a helpful customer support assistant." ) -> dict: """ Make an LLM call with automatic model routing. Returns a dict with the response text, model used, and token counts. """ model = route_query(user_message) response = completion( model=model, messages=[ {"role": "system", "content": system_prompt}, {"role": "user", "content": user_message} ], max_tokens=512 ) result = { "model_used": model, "response": response.choices[0].message.content, "input_tokens": response.usage.prompt_tokens, "output_tokens": response.usage.completion_tokens, "total_tokens": response.usage.total_tokens, } print(f"Model: {result['model_used']}") print(f"Tokens: {result['input_tokens']} in / {result['output_tokens']} out") print(f"Response: {result['response'][:100]}...") return result # ── Demonstrate routing ──────────────────────────────────────────────────────── if __name__ == "__main__": queries = [ # Short query -- routes to cheap model "What are your business hours?", # Long, complex query -- routes to frontier model """I purchased a product three weeks ago and it arrived with a defective power supply unit. I have tried the standard troubleshooting steps from your documentation but the issue persists. I need to understand my options for either a replacement unit or a refund, and what the process looks like given that I am outside the standard 15-day return window for electronics.""" ] for i, query in enumerate(queries, 1): print(f"\n{'─' * 60}") print(f"Query {i}: {query[:60]}...") call_with_routing(query) print(f"\n{'─' * 60}") print("Cost control configured. Next steps:") print(" 1. Set cost alerts in Langfuse at 120% of your weekly baseline") print(" 2. Enable semantic caching in LiteLLM for your top query types") print(" 3. Audit your highest-token calls weekly and trim unnecessary context") |
Phase 4: Agents and Advanced Evaluation (Step 6 and Beyond)
Today’s ML engineers must become architects of intelligent systems, orchestrators of complex inference pipelines, and guardians of AI reliability and safety. Agent systems — where the model decides which tools to call and in what order — are where that complexity compounds.
A single-call RAG system has one main failure mode: retrieval quality. An agent that uses tools has many: it can call the wrong tool, pass bad parameters, loop indefinitely, fail to recognize when a task is complete, or compound an error from step three into a catastrophic outcome by step seven. Evaluation gets harder because you are no longer scoring one response — you are scoring a trajectory.
Evaluation Approaches for Agents
The practical approach most production teams land on: run heuristic evals on 100% of production traces to catch obvious failures cheaply, run LLM-as-judge on a 10–20% sample to score semantic quality at reasonable cost, and use human annotation periodically to rebuild and validate the ground-truth evaluation dataset.
Heuristic evals are things you can check programmatically: did the agent finish within the iteration limit? Did it call the right tools? Did the output match the expected format? These are cheap and fast — run them on every trace. LLM-as-judge is more expensive: you send the full agent trajectory to a stronger model and ask it to score whether the agent achieved the goal. Run this on a sample. Human annotation is the most expensive and most accurate: a human reviews a set of agent runs and flags what the automated evals missed. Use it to keep your evaluation dataset accurate as the system evolves.
Tools for This Phase
LangGraph for building stateful, multi-step agent workflows with durable state that can resume after failures. DeepEval for comprehensive LLM evaluation that goes beyond RAGAS — it covers agent evaluation, tool call correctness, and multi-turn conversation quality. LangSmith Fleet for deploying and tracing agent runs in production.
The Production LLMOps Stack
The real question is not which platform has the nicest dashboard, but which one matches the constraint that actually drives your stack. Here is the stack mapped by category, with the options that matter.
For early-stage teams, the minimum viable stack at low cost:
- Tracing: Langfuse self-hosted (MIT licensed, full features, data stays in your infrastructure)
- Evaluation: RAGAS for RAG quality + DeepEval for general LLM quality
- Cost and routing: LiteLLM (open source, handles routing and caching across all major providers)
- Safety: Guardrails AI for input/output validation
Full production stack by category:
| Category | Leading Options |
|---|---|
| Tracing and observability | Langfuse, LangSmith, Arize Phoenix |
| Prompt management | LangSmith, Humanloop, PromptLayer |
| Evaluation | RAGAS, DeepEval, Braintrust |
| Cost and routing | LiteLLM, Portkey, Helicone |
| Model serving | vLLM, BentoML, Baseten |
| Safety and guardrails | Guardrails AI, NeMo Guardrails, Lakera Guard |
| Experiment tracking | MLflow, Weights and Biases |
If you are using LangChain or LangGraph extensively, LangSmith has the deepest native integration. If open source and data sovereignty are non-negotiable, Langfuse self-hosted is the best choice. For teams running both traditional ML models and LLM applications, Arize AI provides unified monitoring across model types.
Step-by-Step Learning Plan
This is the concrete sequence. Each step builds on the previous one. Do not skip ahead — the skills in later steps do not make sense without the foundation from earlier ones.
- Step 1: Python and cloud basics, then your first LLM API project. Build a summarizer, a classifier, and a simple chatbot. The goal is to become fluent with the API — understanding how tokens work, what temperature does, how errors surface, and how to structure calls cleanly. No LLMOps tooling yet.
- Step 2: Add observability to what you built in step 1. Wire Langfuse into your project using the code in phase 1. Log every call. Build a cost dashboard. Know your baseline cost per request and your average latency before you move on.
- Step 3: Build a RAG system. Ingest 20–50 documents, chunk them, embed them into ChromaDB or Pinecone, and wire retrieval into your traced LLM call. Make it work before you make it evaluate. Understanding how retrieval fails is the most important thing you learn this step.
- Step 4: Add evaluation to your RAG system. Build a golden dataset of 50 questions with correct answers. Run RAGAS using the code in Phase 2. Establish baseline scores. Then deliberately break something — change your chunking strategy, modify the prompt — and confirm your evals catch the regression. This is the step where evaluation becomes real.
- Step 5: Harden for production. Add input and output guardrails with Guardrails AI. Configure semantic caching and model routing with LiteLLM. Set a cost alert at 120% of your weekly baseline. Run a load test against your API endpoint. Find the breaking point before your users do.
- Step 6 and beyond: Implement the ReAct loop using LangGraph. Build a tool-using agent that can search, retrieve, and synthesize across multiple sources. Add LLM-as-judge evaluation. Wire your eval suite into a CI/CD pipeline that blocks deployment when scores regress. This is the work that separates practitioners from beginners.
Conclusion
LLMOps is not a separate career track from AI engineering — it is the production discipline that determines whether AI systems built by AI engineers actually work at scale. The skills covered in this roadmap are not optional add-ons for teams that have “finished” building. They are the foundation that makes everything else reliable, auditable, and improvable.
The path is sequential for a reason. You cannot evaluate a system you have not instrumented. You cannot harden a system you have not evaluated. You cannot build agents you do not know how to debug. The step-by-step plan above is designed around that dependency order. Start with step 1, build something real, and move forward when each milestone is genuinely complete. The tooling is mature enough in 2026 to support this path from day one — the only thing that produces an LLMOps engineer is building and shipping real systems.


No comments yet.