
We have just learned about ControlNet. Now, let’s explore the most effective way to control your character based on human pose. OpenPose is a great tool that can detect body keypoint locations in images and video. By integrating OpenPose with Stable Diffusion, we can guide the AI in generating images that match specific poses.
In this post, you will learn about ControlNet’s OpenPose and how to use it to generate similar pose characters. Specifically, we will cover:
- What is Openpose, and how does it work?
- How to use ControlNet Hugging Face Spaces to generate precise images using the reference image.
- How to set up OpenPose in Stable Diffusion WebUI and use it to create high-quality images.
- Various OpenPose processors focus on certain parts of the body.
Let’s get started.
Using OpenPose with Stable Diffusion
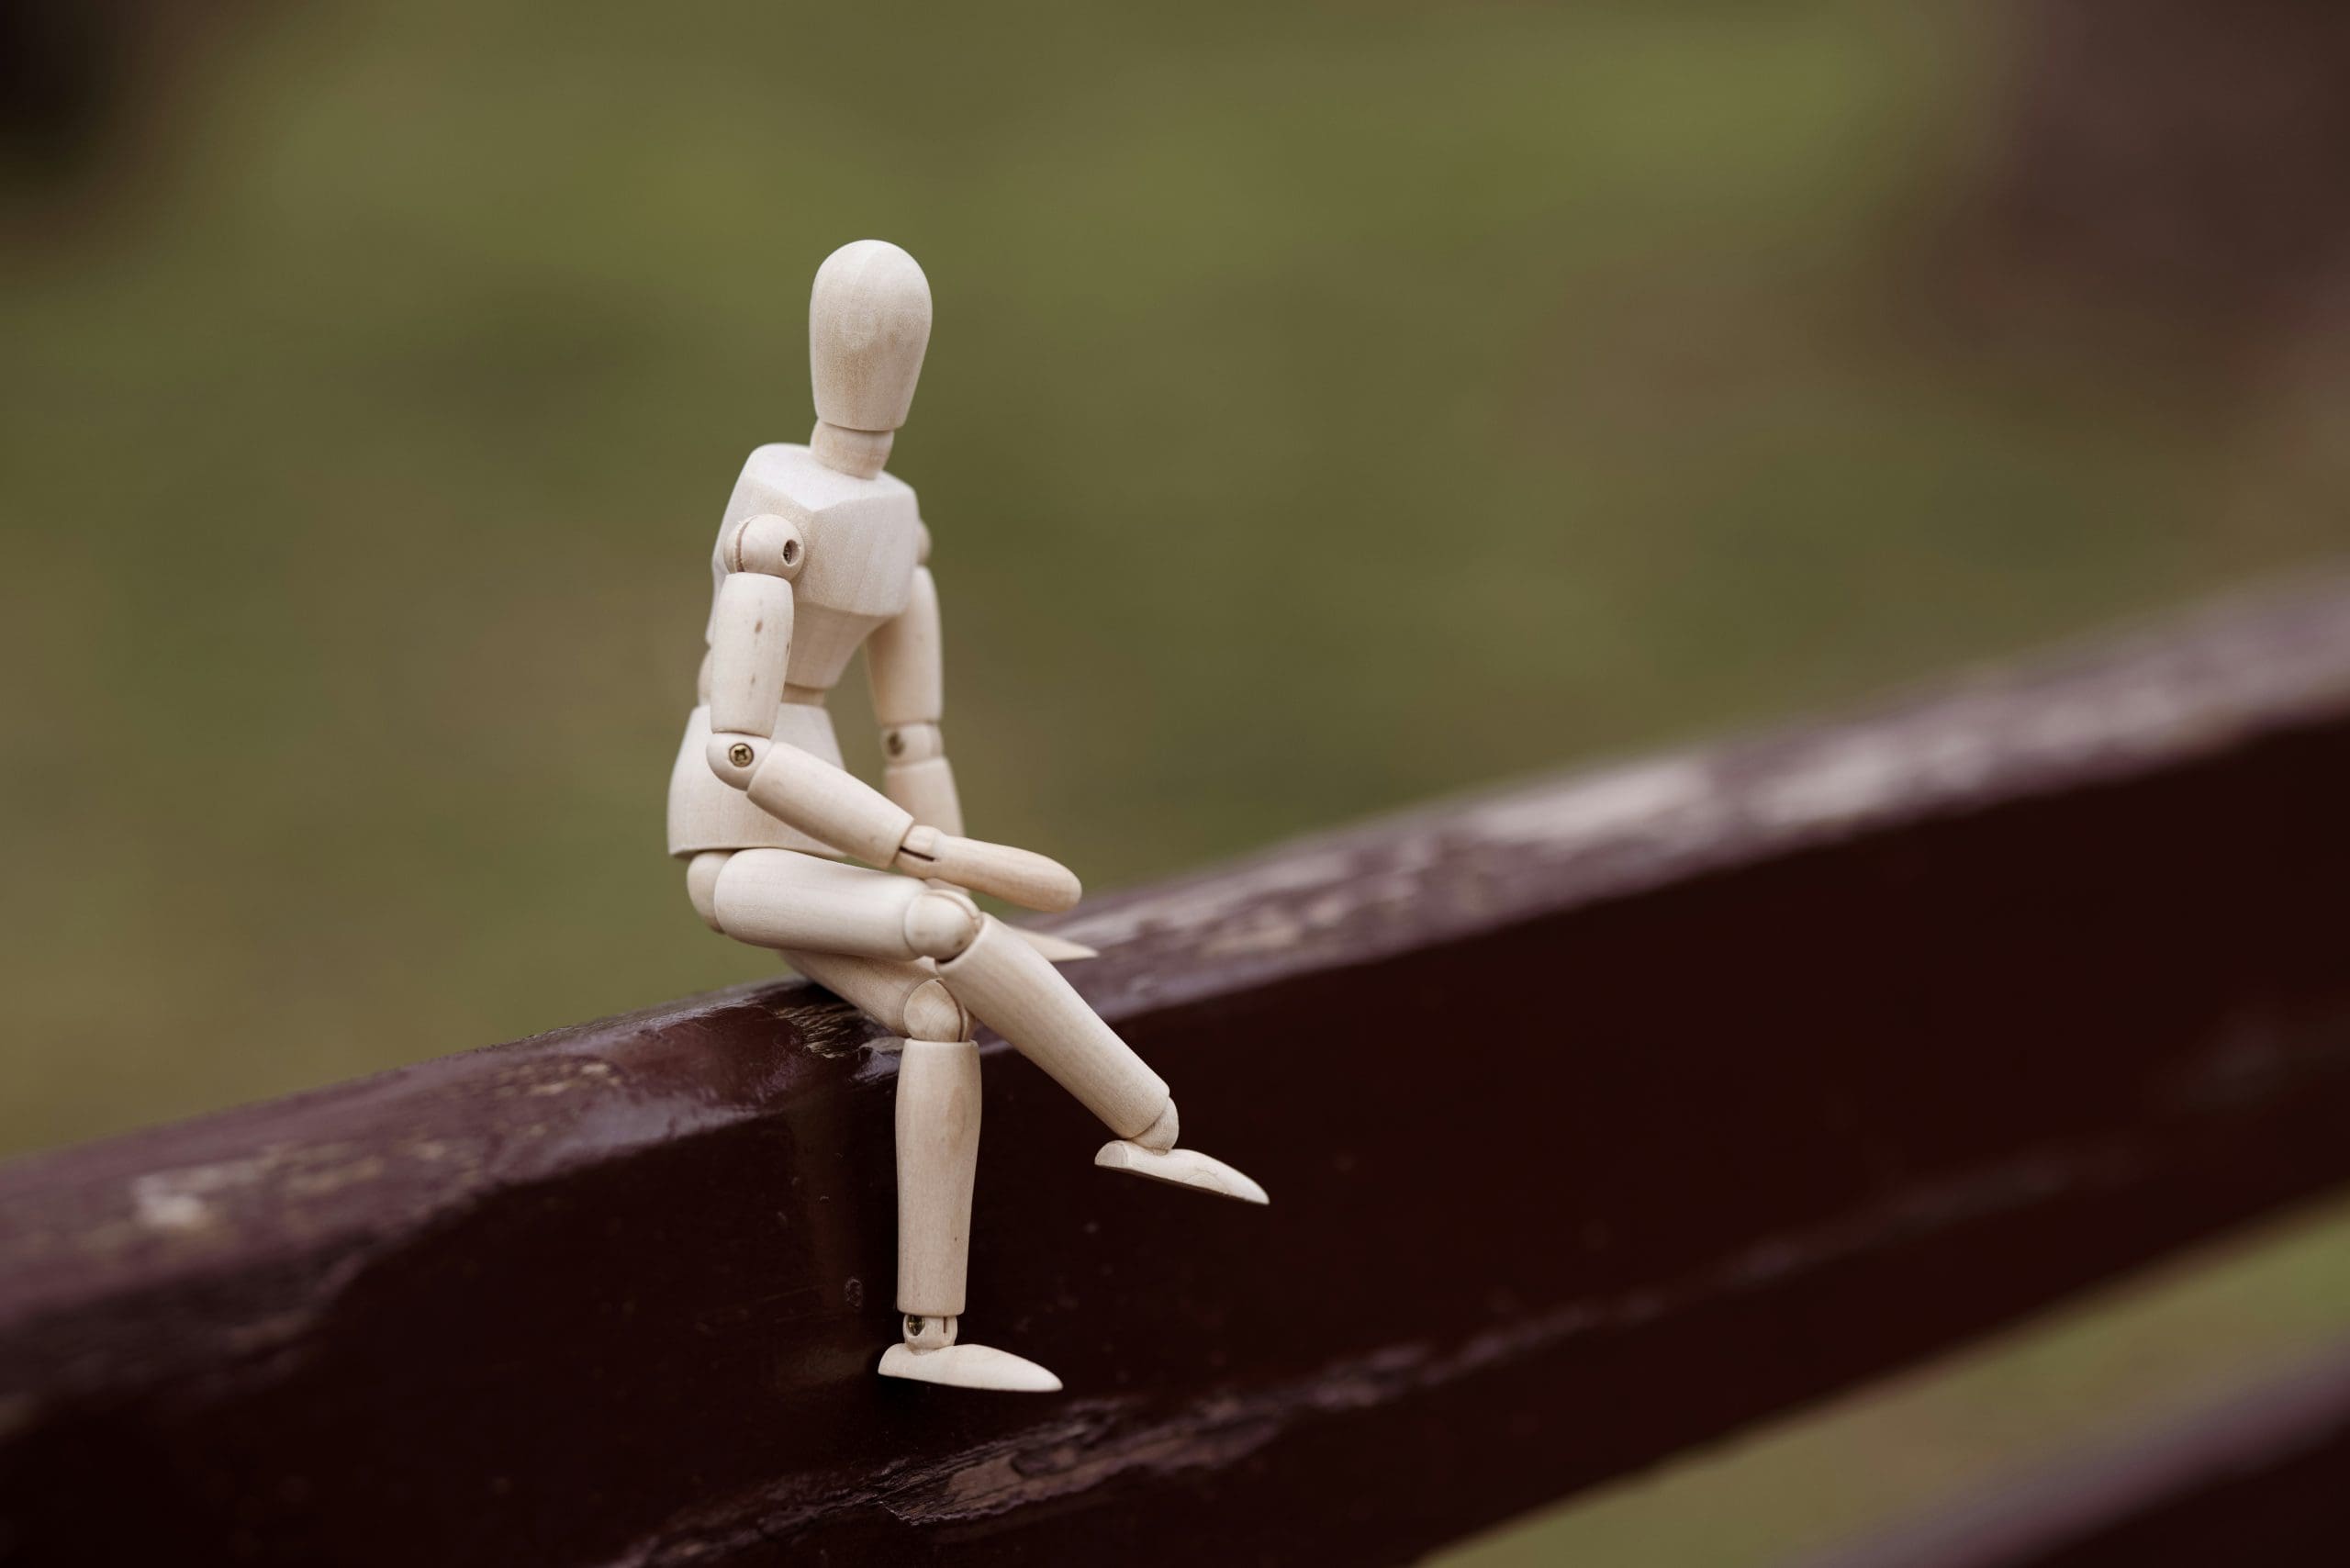
Photo by engin akyurt. Some rights reserved.
Overview
This post is in four parts; they are:
- What is ControlNet OpenPose?
- ControlNet in Hugging Face Space
- OpenPose Editor in Stable Diffusion Web UI
- Image to Image Generation
What is ControlNet OpenPose?
OpenPose is a deep learning model to detect human pose from an image. Its output are the positions of several keypoints (such as elbows, wrists, and knees) of the human in the picture. The OpenPose model in ControlNet is to accept the keypoints as the additional conditioning to the diffusion model and produce the output image with human aligned with those keypoints. Once you can specify the precise position of keypoints, it allows you to generate realistic images of human poses based on a skeleton image. You can use it to create artistic photos, animations, or illustrations of different poses.
ControlNet in Hugging Face Spaces
To try out the capability of ControlNet OpenPose model, you can use the free online demo on Hugging Face Spaces:
To start, you need to create the pose keypoints. This can be done easily by uploading an image and let the OpenPose model to detect them. First, you can download Yogendra Singh‘s photo and then upload it to the ControlNet Spaces. This ControlNet helps you to pin down the pose, but you still need to provide a text prompt to generate a picture. Let’s write the simple prompt “A woman is dancing in the rain.” and press the run button.

Using OpenPose ControlNet model on Hugging Face Spaces
Due to the random nature of image generation, you may want to do multiple attempts. You may also polish the prompt to give more details, such as the lighting, the scene, and the outfit that the woman is wearing. You can even expand the “Advanced options” panel at the bottom to provide more settings, such as negative prompts.

Settings in the “Advanced options” panel
In the example above, you can see that a high quality image of a woman dancing in the rain from a skeleton image is generated, in the similar pose as your uploaded image. Below are three other generations under the same prompt, all are exceptional and accurately follow the pose of the reference image.
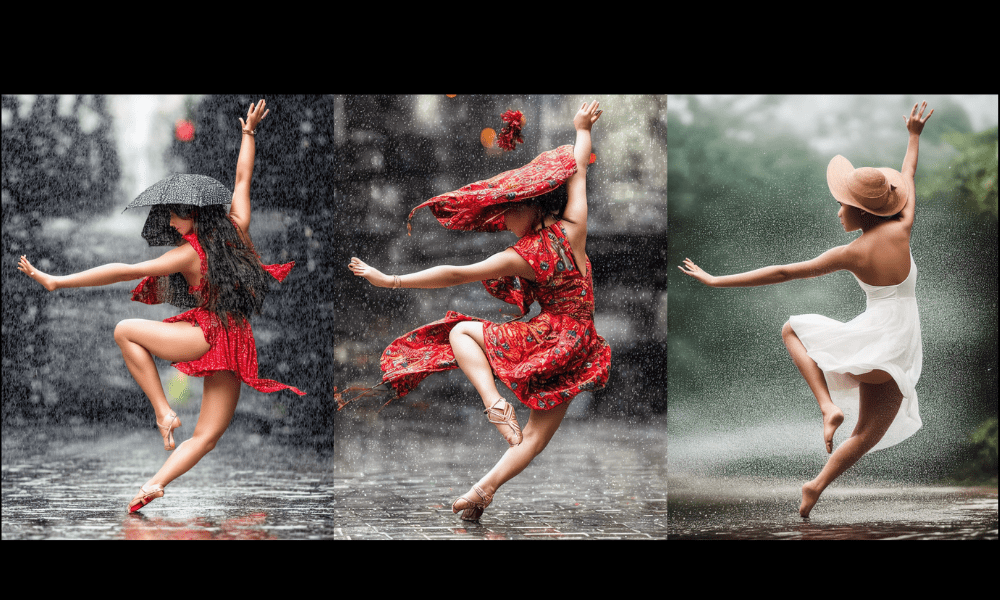
Other generated images from the same prompt
OpenPose Editor from Stable Diffusion Web UI
You can also use the OpenPose ControlNet model from the Stable Diffusion Web UI. Indeed, not only you can upload an image to get the pose, you can edit the pose before applying to the diffusion model. In this section, you will learn how to set up OpenPose locally and generate images using OpenPose Editor.
Before you start using the OpenPose editor, you have to install it and download the model file.
- Make sure you have installed the ControlNet extension, if not please check the previous post.
- Install OpenPose Editor extension: At the “Extensions” tab on WebUI, click on “Install from URL” and enter the following URL to install:
- https://github.com/fkunn1326/openpose-editor
- Go to Hugging Face repository: https://hf.co/lllyasviel/ControlNet-v1-1/tree/main
- Download the OpenPose model “control_v11p_sd15_openpose.pth”
- Put the model file in the the SD WebUI directory in stable-diffusion-webui/extensions/sd-webui-controlnet/models or stable-diffusion-webui/models/ControlNet
Now that you have everything set up and a new tab named “OpenPose Editor” is added to the Web UI. Navigate to the “OpenPose Editor” tab and adjust the canvas width and height to your preference. Next, you can start modifying the skeleton image on the right using your mouse. It’s a straightforward process.
Let’s try to create a picture of a man carrying a large gun. You can make changes to the skeleton image to make it looks like the following:
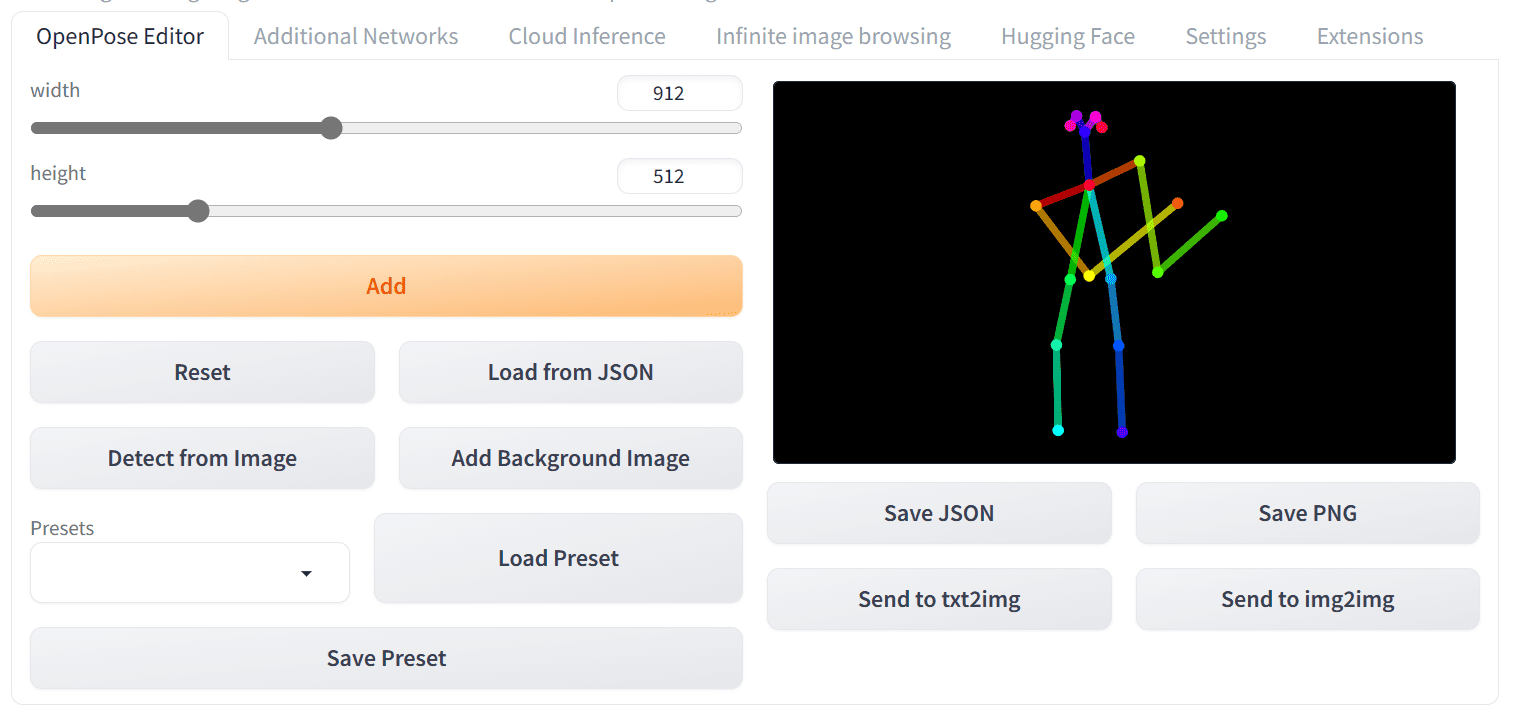
Creating a pose with the OpenPose Editor
Then, click on the “Send to text2img” button. It will take you to text2img with the skeleton image added to the ControlNet panel.
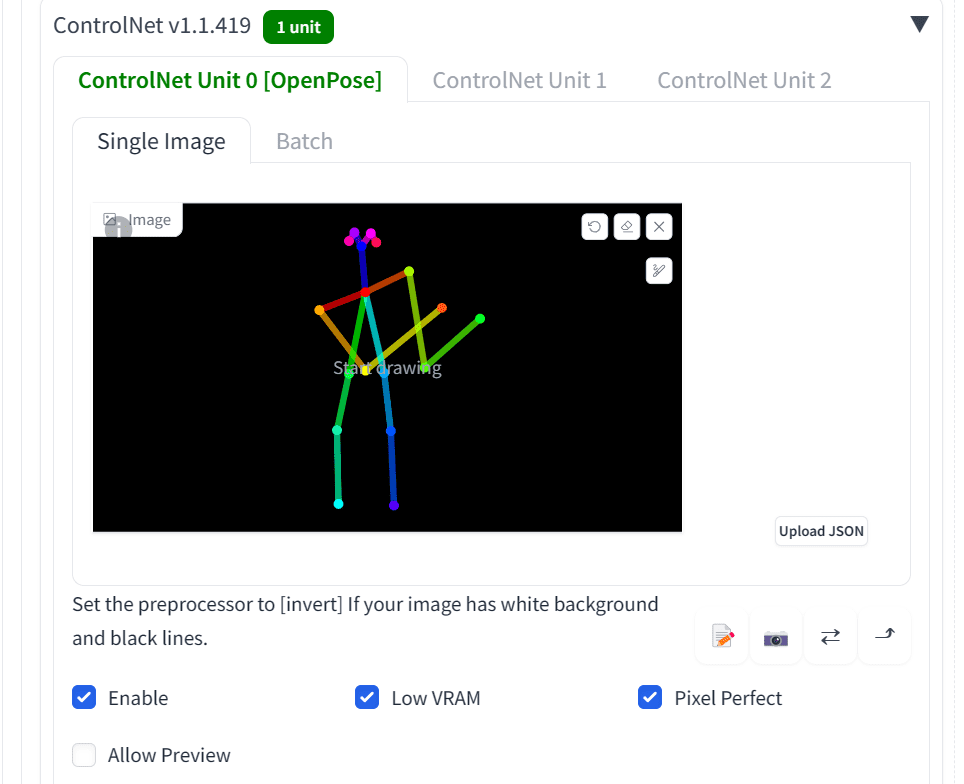
The created pose on the ControlNet panel
Then, select “Enable” for this ControlNet model and make sure the “OpenPose” option is checked. You can also check “Low VRAM” and “Pixel Perfect”. The former is useful if your computer does not have enough memory on the GPU and the latter is to ask the ControlNet model to use the optimal resolution to match the output.
Next, you set up the positive and negative prompt, make changes to the size of the output image, the sampling method, and sampling steps. For example, the positive prompt can be
detailed, masterpiece, best quality, Astounding, Enchanting, Striking, tom clancy’s the division, man_holding_gun, us_marine, beach background
and the negative prompt can be
worst quality, low quality, lowres, monochrome, greyscale, multiple views, comic, sketch, bad anatomy, deformed, disfigured, watermark, multiple_views, mutation hands, watermark, bad facial
The image below, using size 912×512 and sampler DDIM for 30 steps, turned out to be perfectly matching the similar pose, with good details.
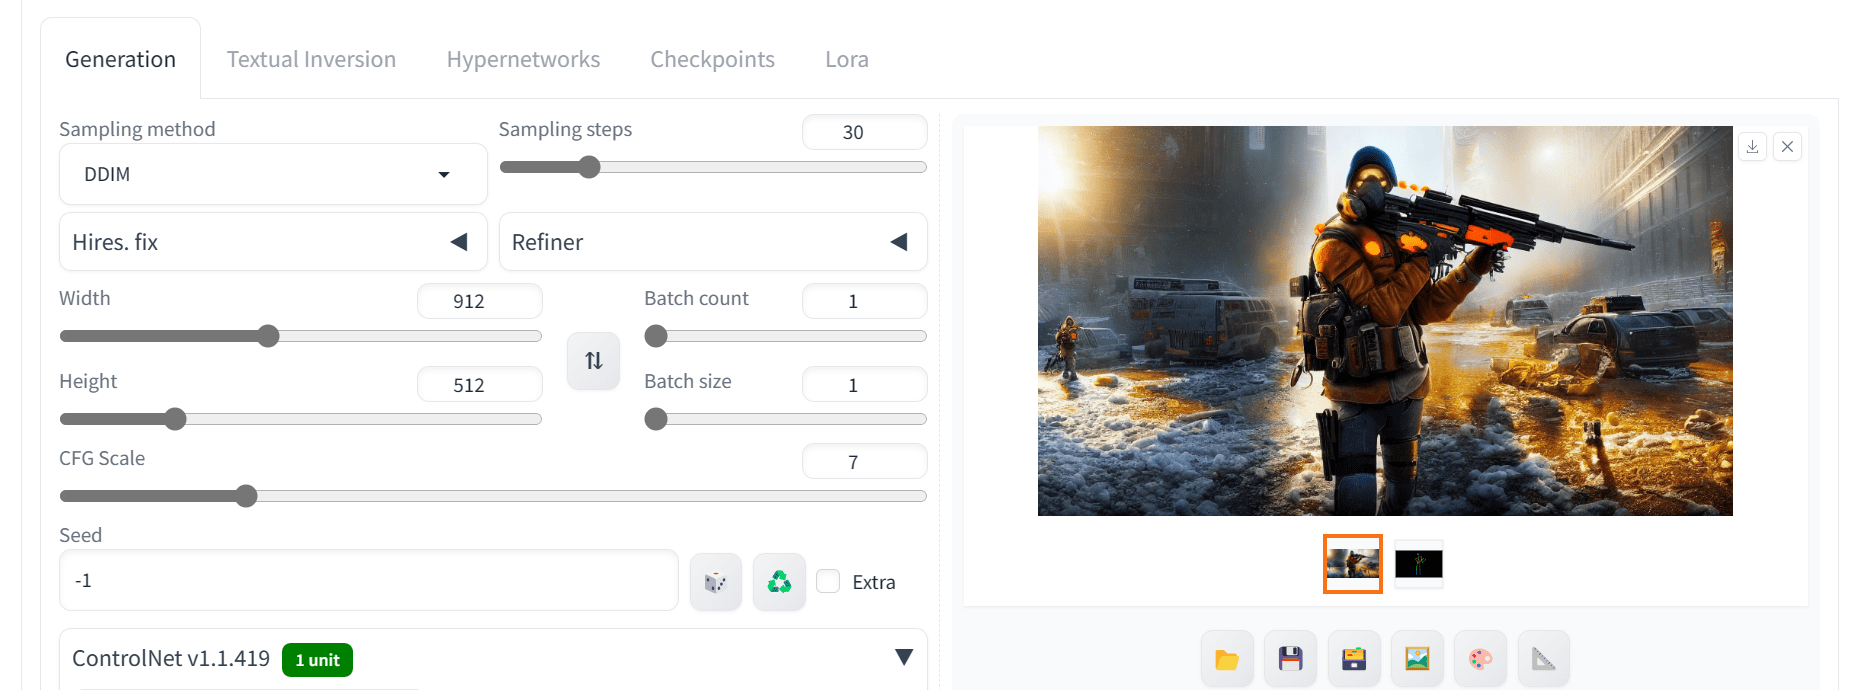
Output using OpenPose ControlNet model
Image to Image Generation
If you tried the ControlNet model in the Web UI, you should notice there are multiple OpenPose preprocessors. In the following, let’s explore some of them to focus on the face and upper body.
We will use the photo by Andrea Piacquadio from Pexels.com as a reference image. In the Web UI, let’s switch to the “img2img” tab and upload the reference image. Then at the ControlNet panel, enable and select “OpenPose” as the control type. By default in img2img, you will share the reference image with ControlNet. Next, change the Preprocessor to “openpose_face” in the ControNet panel, as follows:
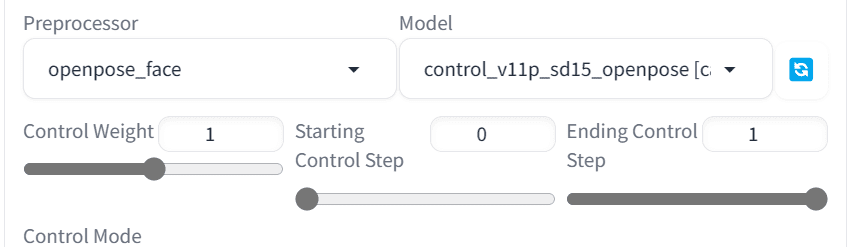
Using “openpose_face” as the preprocessor
Afterward, set the positive prompt to match the style of the reference image and generate the image. Instead of a picture holding a tablet, let’s make the woman holding a phone:
detailed, best quality, Astounding, Enchanting, Striking, new_york, buildings, city, phone on the ear
Below is what you might get:
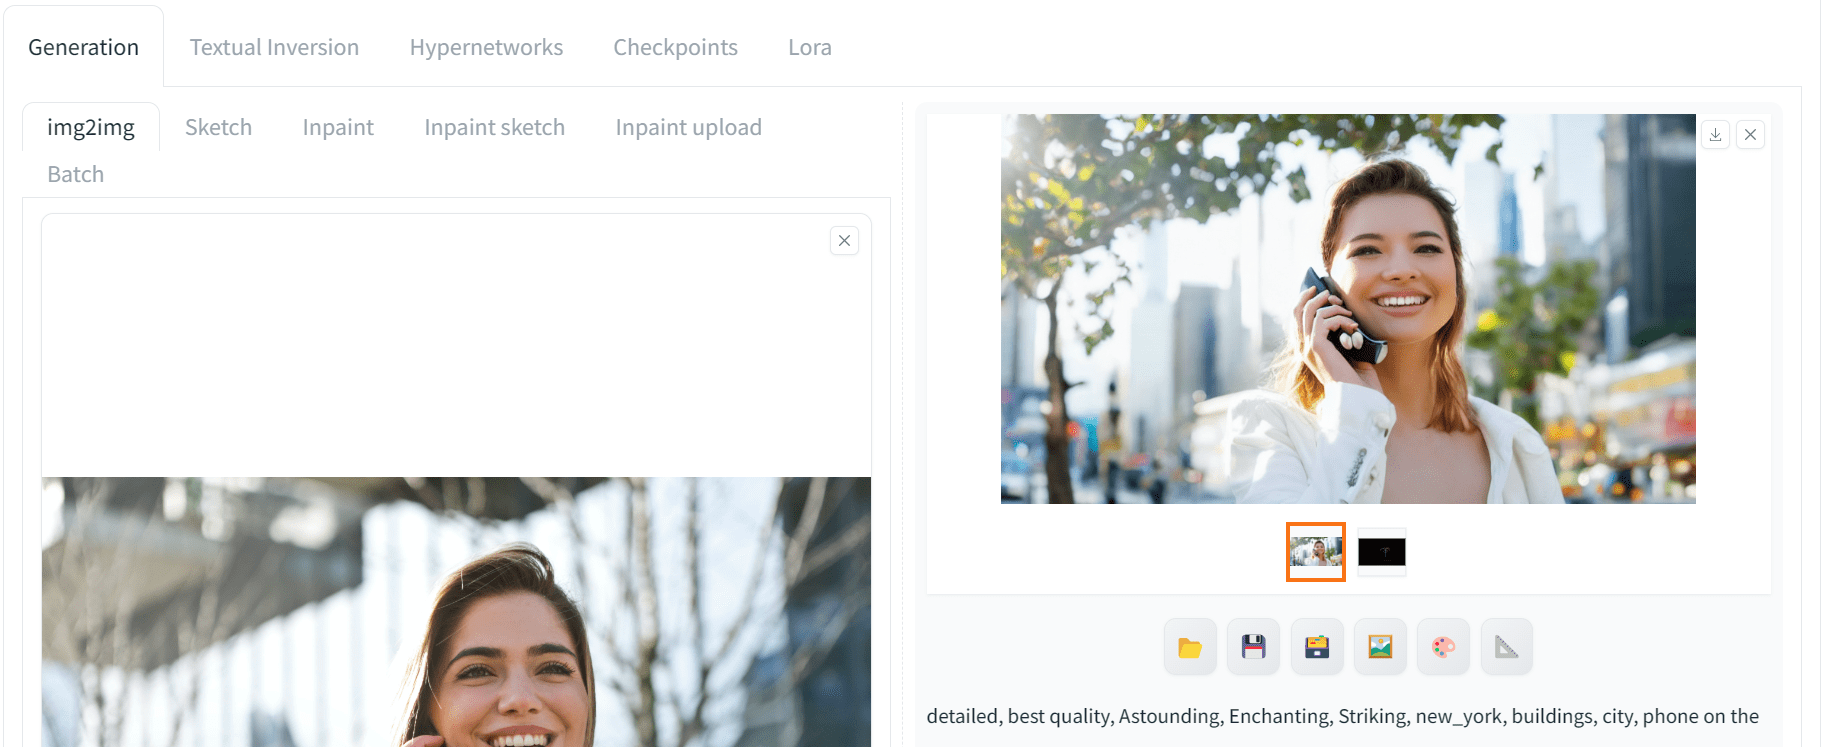
Image generated with img2img
We got a high quality result with the similar pose. You have to play around the prompt to match the pose. The preprocessor used here is “openpose_face” which means the pose as well as the face. Therefore, the generated picture matched the reference in the limb positions as well as facial expression.
Let’s change the Preprocessor to “openpose_faceonly” to focus on facial features only. In this way, only the keypoints on the face are recognized and no information about the body pose will be applied from the ControlNet model. Now, set the prompt to
detailed, best quality, Astounding, Enchanting, Striking, new_york, buildings, city
An improved result is generated accurately by following each keyword in the prompt, but the body pose is vastly different from the previous:
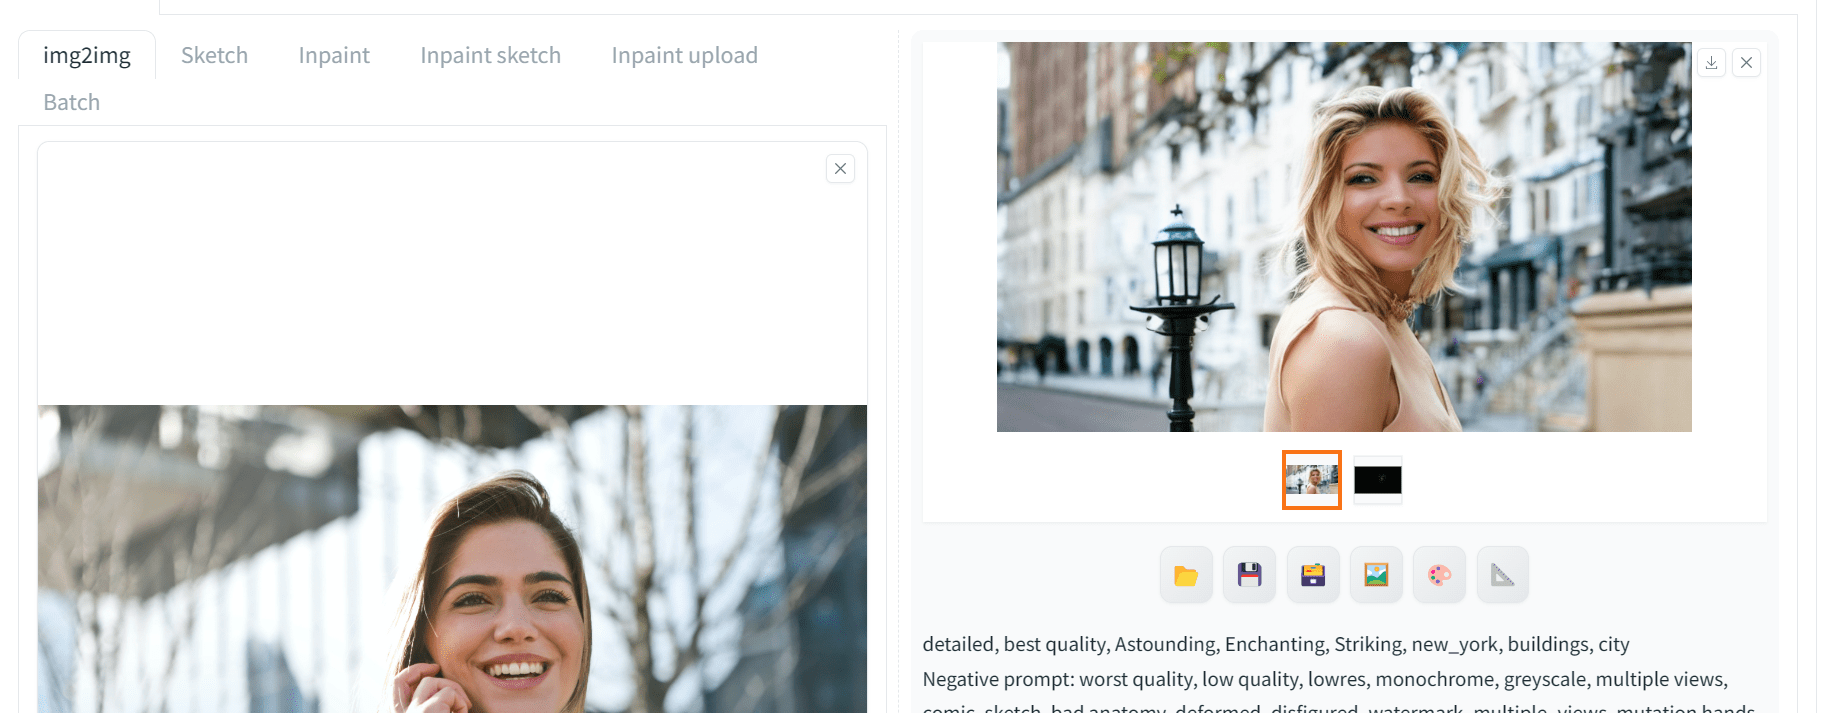
Image generated with the ControlNet provided only the facial keypoints
To understand why this is the case, you can check the output image from the preprocessor, as follows. The top image was generated using the “openpose_face” preprocessor, while the bottom image was generated using “openpose_faceonly”. Similarly, you can understand the output of various preprocessors by analyzing both skeleton structures.
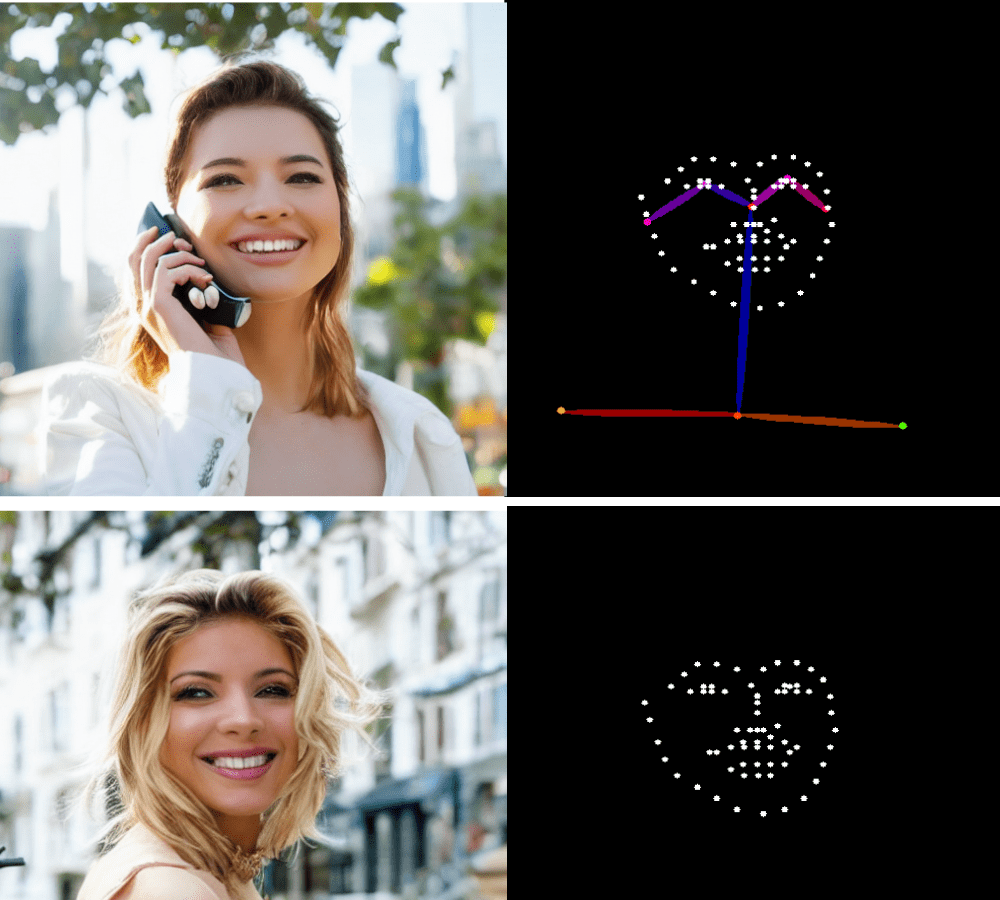
Keypoints generated from different OpenPose preprocessors
Further Readings
This section provides more resources on the topic if you are looking to go deeper.
- OpenPose: Realtime Multi-Person 2D Pose Estimation using Part Affinity Fields by Cao et al (2019)
- OpenPose on GitHub
- Controlnet – Human Pose Version on Hugging Face
- Openpose Controlnets (V1.1): Using poses and generating new ones
Summary
In this post, we delved deeper into the world of ControlNet OpenPose and how we can use it to get precise results. Specifically, we covered:
- What is OpenPose, and how can it generate images immediately without setting up anything?
- How to use Stable Diffusion WebUI and OpenPose Editor to generate an image of a custom pose by modifying the prompt and skeleton image.
- Multiple OpenPose preprocessors to generate the image using full-face and face-only preprocessors in Stable Diffusion WebUI.


No comments yet.