Face recognition is a computer vision task of identifying and verifying a person based on a photograph of their face.
Recently, deep learning convolutional neural networks have surpassed classical methods and are achieving state-of-the-art results on standard face recognition datasets. One example of a state-of-the-art model is the VGGFace and VGGFace2 model developed by researchers at the Visual Geometry Group at Oxford.
Although the model can be challenging to implement and resource intensive to train, it can be easily used in standard deep learning libraries such as Keras through the use of freely available pre-trained models and third-party open source libraries.
In this tutorial, you will discover how to develop face recognition systems for face identification and verification using the VGGFace2 deep learning model.
After completing this tutorial, you will know:
- About the VGGFace and VGGFace2 models for face recognition and how to install the keras_vggface library to make use of these models in Python with Keras.
- How to develop a face identification system to predict the name of celebrities in given photographs.
- How to develop a face verification system to confirm the identity of a person given a photograph of their face.
Kick-start your project with my new book Deep Learning for Computer Vision, including step-by-step tutorials and the Python source code files for all examples.
Let’s get started.
- Update Nov/2019: Updated for TensorFlow v2.0, VGGFace v0.6, and MTCNN v0.1.0.
How to Perform Face Recognition With VGGFace2 Convolutional Neural Network in Keras
Photo by Joanna Pędzich-Opioła, some rights reserved.
Tutorial Overview
This tutorial is divided into six parts; they are:
- Face Recognition
- VGGFace and VGGFace2 Models
- How to Install the keras-vggface Library
- How to Detect Faces for Face Recognition
- How to Perform Face Identification With VGGFace2
- How to Perform Face Verification With VGGFace2
Face Recognition
Face recognition is the general task of identifying and verifying people from photographs of their face.
The 2011 book on face recognition titled “Handbook of Face Recognition” describes two main modes for face recognition, as:
- Face Verification. A one-to-one mapping of a given face against a known identity (e.g. is this the person?).
- Face Identification. A one-to-many mapping for a given face against a database of known faces (e.g. who is this person?).
A face recognition system is expected to identify faces present in images and videos automatically. It can operate in either or both of two modes: (1) face verification (or authentication), and (2) face identification (or recognition).
— Page 1, Handbook of Face Recognition. 2011.
We will explore both of these face recognition tasks in this tutorial.
Want Results with Deep Learning for Computer Vision?
Take my free 7-day email crash course now (with sample code).
Click to sign-up and also get a free PDF Ebook version of the course.
VGGFace and VGGFace2 Models
The VGGFace refers to a series of models developed for face recognition and demonstrated on benchmark computer vision datasets by members of the Visual Geometry Group (VGG) at the University of Oxford.
There are two main VGG models for face recognition at the time of writing; they are VGGFace and VGGFace2. Let’s take a closer look at each in turn.
VGGFace Model
The VGGFace model, named later, was described by Omkar Parkhi in the 2015 paper titled “Deep Face Recognition.”
A contribution of the paper was a description of how to develop a very large training dataset, required to train modern-convolutional-neural-network-based face recognition systems, to compete with the large datasets used to train models at Facebook and Google.
… [we] propose a procedure to create a reasonably large face dataset whilst requiring only a limited amount of person-power for annotation. To this end we propose a method for collecting face data using knowledge sources available on the web (Section 3). We employ this procedure to build a dataset with over two million faces, and will make this freely available to the research community.
— Deep Face Recognition, 2015.
This dataset is then used as the basis for developing deep CNNs for face recognition tasks such as face identification and verification. Specifically, models are trained on the very large dataset, then evaluated on benchmark face recognition datasets, demonstrating that the model is effective at generating generalized features from faces.
They describe the process of training a face classifier first that uses a softmax activation function in the output layer to classify faces as people. This layer is then removed so that the output of the network is a vector feature representation of the face, called a face embedding. The model is then further trained, via fine-tuning, in order that the Euclidean distance between vectors generated for the same identity are made smaller and the vectors generated for different identities is made larger. This is achieved using a triplet loss function.
Triplet-loss training aims at learning score vectors that perform well in the final application, i.e. identity verification by comparing face descriptors in Euclidean space. […] A triplet (a, p, n) contains an anchor face image as well as a positive p != a and negative n examples of the anchor’s identity. The projection W’ is learned on target datasets
— Deep Face Recognition, 2015.
A deep convolutional neural network architecture is used in the VGG style, with blocks of convolutional layers with small kernels and ReLU activations followed by max pooling layers, and the use of fully connected layers in the classifier end of the network.
VGGFace2 Model
Qiong Cao, et al. from the VGG describe a follow-up work in their 2017 paper titled “VGGFace2: A dataset for recognizing faces across pose and age.”
They describe VGGFace2 as a much larger dataset that they have collected for the intent of training and evaluating more effective face recognition models.
In this paper, we introduce a new large-scale face dataset named VGGFace2. The dataset contains 3.31 million images of 9131 subjects, with an average of 362.6 images for each subject. Images are downloaded from Google Image Search and have large variations in pose, age, illumination, ethnicity and profession (e.g. actors, athletes, politicians).
— VGGFace2: A dataset for recognising faces across pose and age, 2017.
The paper focuses on how this dataset was collected, curated, and how images were prepared prior to modeling. Nevertheless, VGGFace2 has become the name to refer to the pre-trained models that have provided for face recognition, trained on this dataset.
Models are trained on the dataset, specifically a ResNet-50 and a SqueezeNet-ResNet-50 model (called SE-ResNet-50 or SENet), and it is variations of these models that have been made available by the authors, along with the associated code. The models are evaluated on standard face recognition datasets, demonstrating then state-of-the-art performance.
… we demonstrate that deep models (ResNet-50 and SENet) trained on VGGFace2, achieve state-of-the-art performance on […] benchmarks.
— VGGFace2: A dataset for recognising faces across pose and age, 2017.
Specifically, the SqueezeNet-based model offers better performance in general.
The comparison between ResNet-50 and SENet both learned from scratch reveals that SENet has a consistently superior performance on both verification and identification. […] In addition, the performance of SENet can be further improved by training on the two datasets VGGFace2 and MS1M, exploiting the different advantages that each offer.
— VGGFace2: A dataset for recognising faces across pose and age, 2017.
A face embedding is predicted by a given model as a 2,048 length vector. The length of the vector is then normalized, e.g. to a length of 1 or unit norm using the L2 vector norm (Euclidean distance from the origin). This is referred to as the ‘face descriptor‘. The distance between face descriptors (or groups of face descriptors called a ‘subject template’) is calculated using the Cosine similarity.
The face descriptor is extracted from from the layer adjacent to the classifier layer. This leads to a 2048 dimensional descriptor, which is then L2 normalized
— VGGFace2: A dataset for recognising faces across pose and age, 2017.
How to Install the keras-vggface Library
The authors of VGFFace2 provide the source code for their models, as well as pre-trained models that can be downloaded with standard deep learning frameworks such as Caffe and PyTorch, although there are not examples for TensorFlow or Keras.
We could convert the provided models to TensorFlow or Keras format and develop a model definition in order to load and use these pre-trained models. Thankfully, this work has already been done and can be used directly by third-party projects and libraries.
Perhaps the best-of-breed third-party library for using the VGGFace2 (and VGGFace) models in Keras is the keras-vggface project and library by Refik Can Malli.
Given that this is a third-party open-source project and subject to change, I have created a fork of the project here.
This library can be installed via pip; for example:
|
1 |
sudo pip install git+https://github.com/rcmalli/keras-vggface.git |
After successful installation, you should then see a message like the following:
|
1 |
Successfully installed keras-vggface-0.6 |
You can confirm that the library was installed correctly by querying the installed package:
|
1 |
pip show keras-vggface |
This will summarize the details of the package; for example:
|
1 2 3 4 5 6 7 8 9 10 |
Name: keras-vggface Version: 0.6 Summary: VGGFace implementation with Keras framework Home-page: https://github.com/rcmalli/keras-vggface Author: Refik Can MALLI Author-email: mallir@itu.edu.tr License: MIT Location: ... Requires: numpy, scipy, h5py, pillow, keras, six, pyyaml Required-by: |
You can also confirm that the library loads correctly by loading it in a script and printing the current version; for example:
|
1 2 3 4 |
# check version of keras_vggface import keras_vggface # print version print(keras_vggface.__version__) |
Running the example will load the library and print the current version.
|
1 |
0.6 |
How to Detect Faces for Face Recognition
Before we can perform face recognition, we need to detect faces.
Face detection is the process of automatically locating faces in a photograph and localizing them by drawing a bounding box around their extent.
In this tutorial, we will also use the Multi-Task Cascaded Convolutional Neural Network, or MTCNN, for face detection, e.g. finding and extracting faces from photos. This is a state-of-the-art deep learning model for face detection, described in the 2016 paper titled “Joint Face Detection and Alignment Using Multitask Cascaded Convolutional Networks.”
We will use the implementation provided by Iván de Paz Centeno in the ipazc/mtcnn project. This can also be installed via pip as follows:
|
1 |
sudo pip install mtcnn |
We can confirm that the library was installed correctly by importing the library and printing the version; for example.
|
1 2 3 4 |
# confirm mtcnn was installed correctly import mtcnn # print version print(mtcnn.__version__) |
Running the example prints the current version of the library.
|
1 |
0.1.0 |
We can use the mtcnn library to create a face detector and extract faces for our use with the VGGFace face detector models in subsequent sections.
The first step is to load an image as a NumPy array, which we can achieve using the Matplotlib imread() function.
|
1 2 |
# load image from file pixels = pyplot.imread(filename) |
Next, we can create an MTCNN face detector class and use it to detect all faces in the loaded photograph.
|
1 2 3 4 |
# create the detector, using default weights detector = MTCNN() # detect faces in the image results = detector.detect_faces(pixels) |
The result is a list of bounding boxes, where each bounding box defines a lower-left-corner of the bounding box, as well as the width and height.
If we assume there is only one face in the photo for our experiments, we can determine the pixel coordinates of the bounding box as follows.
|
1 2 3 |
# extract the bounding box from the first face x1, y1, width, height = results[0]['box'] x2, y2 = x1 + width, y1 + height |
We can use these coordinates to extract the face.
|
1 2 |
# extract the face face = pixels[y1:y2, x1:x2] |
We can then use the PIL library to resize this small image of the face to the required size; specifically, the model expects square input faces with the shape 224×224.
|
1 2 3 4 |
# resize pixels to the model size image = Image.fromarray(face) image = image.resize((224, 224)) face_array = asarray(image) |
Tying all of this together, the function extract_face() will load a photograph from the loaded filename and return the extracted face.
It assumes that the photo contains one face and will return the first face detected.
|
1 2 3 4 5 6 7 8 9 10 11 12 13 14 15 16 17 18 |
# extract a single face from a given photograph def extract_face(filename, required_size=(224, 224)): # load image from file pixels = pyplot.imread(filename) # create the detector, using default weights detector = MTCNN() # detect faces in the image results = detector.detect_faces(pixels) # extract the bounding box from the first face x1, y1, width, height = results[0]['box'] x2, y2 = x1 + width, y1 + height # extract the face face = pixels[y1:y2, x1:x2] # resize pixels to the model size image = Image.fromarray(face) image = image.resize(required_size) face_array = asarray(image) return face_array |
We can test this function with a photograph.
Download a photograph of Sharon Stone taken in 2013 from Wikipedia released under a permissive license.
Download the photograph and place it in your current working directory with the filename ‘sharon_stone1.jpg‘.
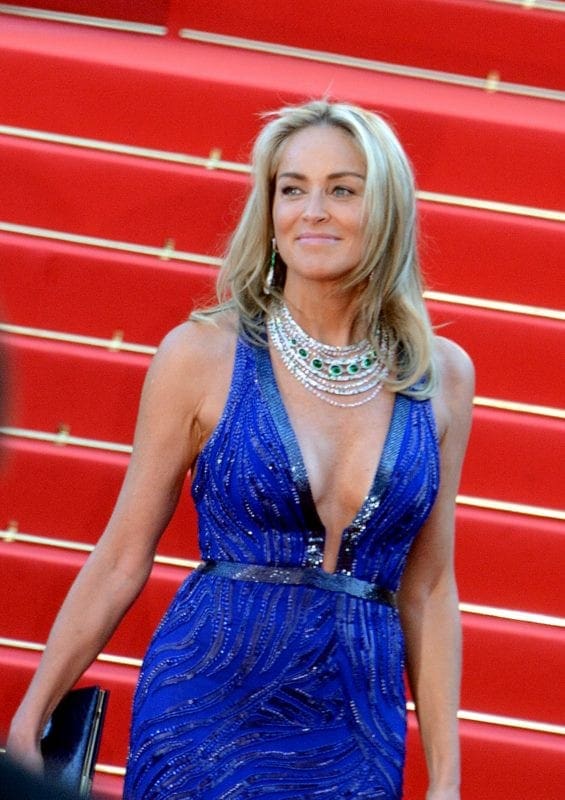
Photograph of Sharon (sharon_stone1.jpg)
Stone, from Wikipedia.
The complete example of loading the photograph of Sharon Stone, extracting the face, and plotting the result is listed below.
|
1 2 3 4 5 6 7 8 9 10 11 12 13 14 15 16 17 18 19 20 21 22 23 24 25 26 27 28 29 30 31 |
# example of face detection with mtcnn from matplotlib import pyplot from PIL import Image from numpy import asarray from mtcnn.mtcnn import MTCNN # extract a single face from a given photograph def extract_face(filename, required_size=(224, 224)): # load image from file pixels = pyplot.imread(filename) # create the detector, using default weights detector = MTCNN() # detect faces in the image results = detector.detect_faces(pixels) # extract the bounding box from the first face x1, y1, width, height = results[0]['box'] x2, y2 = x1 + width, y1 + height # extract the face face = pixels[y1:y2, x1:x2] # resize pixels to the model size image = Image.fromarray(face) image = image.resize(required_size) face_array = asarray(image) return face_array # load the photo and extract the face pixels = extract_face('sharon_stone1.jpg') # plot the extracted face pyplot.imshow(pixels) # show the plot pyplot.show() |
Running the example loads the photograph, extracts the face, and plots the result.
We can see that the face was correctly detected and extracted.
The results suggest that we can use the developed extract_face() function as the basis for examples with the VGGFace face recognition model in subsequent sections.
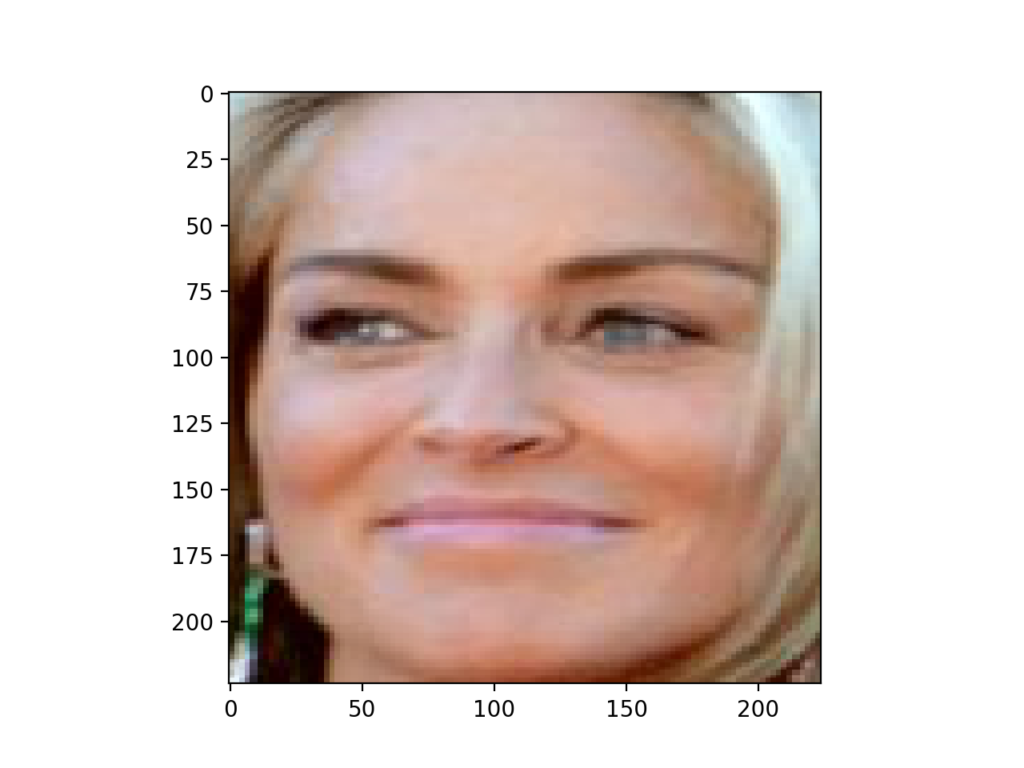
Face Detected From a Photograph of Sharon Stone Using an MTCNN Model
How to Perform Face Identification With VGGFace2
In this section, we will use the VGGFace2 model to perform face recognition with photographs of celebrities from Wikipedia.
A VGGFace model can be created using the VGGFace() constructor and specifying the type of model to create via the ‘model‘ argument.
|
1 |
model = VGGFace(model='...') |
The keras-vggface library provides three pre-trained VGGModels, a VGGFace1 model via model=’vgg16′ (the default), and two VGGFace2 models ‘resnet50‘ and ‘senet50‘.
The example below creates a ‘resnet50‘ VGGFace2 model and summarizes the shape of the inputs and outputs.
|
1 2 3 4 5 6 7 |
# example of creating a face embedding from keras_vggface.vggface import VGGFace # create a vggface2 model model = VGGFace(model='resnet50') # summarize input and output shape print('Inputs: %s' % model.inputs) print('Outputs: %s' % model.outputs) |
The first time that a model is created, the library will download the model weights and save them in the ./keras/models/vggface/ directory in your home directory. The size of the weights for the resnet50 model is about 158 megabytes, so the download may take a few minutes depending on the speed of your internet connection.
Running the example prints the shape of the input and output tensors of the model.
We can see that the model expects input color images of faces with the shape of 244×244 and the output will be a class prediction of 8,631 people. This makes sense given that the pre-trained models were trained on 8,631 identities in the MS-Celeb-1M dataset (listed in this CSV file).
|
1 2 |
Inputs: [<tf.Tensor 'input_1:0' shape=(?, 224, 224, 3) dtype=float32>] Outputs: [<tf.Tensor 'classifier/Softmax:0' shape=(?, 8631) dtype=float32>] |
This Keras model can be used directly to predict the probability of a given face belonging to one or more of more than eight thousand known celebrities; for example:
|
1 2 |
# perform prediction yhat = model.predict(samples) |
Once a prediction is made, the class integers can be mapped to the names of the celebrities, and the top five names with the highest probability can be retrieved.
This behavior is provided by the decode_predictions() function in the keras-vggface library.
|
1 2 3 4 5 |
# convert prediction into names results = decode_predictions(yhat) # display most likely results for result in results[0]: print('%s: %.3f%%' % (result[0], result[1]*100)) |
Before we can make a prediction with a face, the pixel values must be scaled in the same way that data was prepared when the VGGFace model was fit. Specifically, the pixel values must be centered on each channel using the mean from the training dataset.
This can be achieved using the preprocess_input() function provided in the keras-vggface library and specifying the ‘version=2‘ so that the images are scaled using the mean values used to train the VGGFace2 models instead of the VGGFace1 models (the default).
|
1 2 3 4 5 |
# convert one face into samples pixels = pixels.astype('float32') samples = expand_dims(pixels, axis=0) # prepare the face for the model, e.g. center pixels samples = preprocess_input(samples, version=2) |
We can tie all of this together and predict the identity of our Shannon Stone photograph downloaded in the previous section, specifically ‘sharon_stone1.jpg‘.
The complete example is listed below.
|
1 2 3 4 5 6 7 8 9 10 11 12 13 14 15 16 17 18 19 20 21 22 23 24 25 26 27 28 29 30 31 32 33 34 35 36 37 38 39 40 41 42 43 44 45 |
# Example of face detection with a vggface2 model from numpy import expand_dims from matplotlib import pyplot from PIL import Image from numpy import asarray from mtcnn.mtcnn import MTCNN from keras_vggface.vggface import VGGFace from keras_vggface.utils import preprocess_input from keras_vggface.utils import decode_predictions # extract a single face from a given photograph def extract_face(filename, required_size=(224, 224)): # load image from file pixels = pyplot.imread(filename) # create the detector, using default weights detector = MTCNN() # detect faces in the image results = detector.detect_faces(pixels) # extract the bounding box from the first face x1, y1, width, height = results[0]['box'] x2, y2 = x1 + width, y1 + height # extract the face face = pixels[y1:y2, x1:x2] # resize pixels to the model size image = Image.fromarray(face) image = image.resize(required_size) face_array = asarray(image) return face_array # load the photo and extract the face pixels = extract_face('sharon_stone1.jpg') # convert one face into samples pixels = pixels.astype('float32') samples = expand_dims(pixels, axis=0) # prepare the face for the model, e.g. center pixels samples = preprocess_input(samples, version=2) # create a vggface model model = VGGFace(model='resnet50') # perform prediction yhat = model.predict(samples) # convert prediction into names results = decode_predictions(yhat) # display most likely results for result in results[0]: print('%s: %.3f%%' % (result[0], result[1]*100)) |
Running the example loads the photograph, extracts the single face that we know was present, and then predicts the identity for the face.
The top five highest probability names are then displayed.
Note: Your results may vary given the stochastic nature of the algorithm or evaluation procedure, or differences in numerical precision. Consider running the example a few times and compare the average outcome.
We can see that the model correctly identifies the face as belonging to Sharon Stone with a likelihood of 99.642%.
|
1 2 3 4 5 |
b' Sharon_Stone': 99.642% b' Noelle_Reno': 0.085% b' Elisabeth_R\xc3\xb6hm': 0.033% b' Anita_Lipnicka': 0.026% b' Tina_Maze': 0.019% |
We can test the model with another celebrity, in this case, a male, Channing Tatum.
A photograph of Channing Tatum taken in 2017 is available on Wikipedia under a permissive license.
Download the photograph and save it in your current working directory with the filename ‘channing_tatum.jpg‘.

Photograph of Channing Tatum, From Wikipedia (channing_tatum.jpg).
Change the code to load the photograph of Channing Tatum instead; for example:
|
1 |
pixels = extract_face('channing_tatum.jpg') |
Running the example with the new photograph, we can see that the model correctly identifies the face as belonging to Channing Tatum with a likelihood of 94.432%.
|
1 2 3 4 5 |
b' Channing_Tatum': 94.432% b' Eoghan_Quigg': 0.146% b' Les_Miles': 0.113% b' Ibrahim_Afellay': 0.072% b' Tovah_Feldshuh': 0.070% |
You might like to try this example with other photographs of celebrities taken from Wikipedia. Try a diverse set of genders, races, and ages. You will discover that the model is not perfect, but for those celebrities that it does know well, it can be effective.
You might like to try other versions of the model, such as ‘vgg16‘ and ‘senet50‘, then compare results. For example, I found that with a photograph of Oscar Isaac, that the ‘vgg16‘ is effective, but the VGGFace2 models are not.
The model could be used to identify new faces. One approach would be to re-train the model, perhaps just the classifier part of the model, with a new face dataset.
How to Perform Face Verification With VGGFace2
A VGGFace2 model can be used for face verification.
This involves calculating a face embedding for a new given face and comparing the embedding to the embedding for the single example of the face known to the system.
A face embedding is a vector that represents the features extracted from the face. This can then be compared with the vectors generated for other faces. For example, another vector that is close (by some measure) may be the same person, whereas another vector that is far (by some measure) may be a different person.
Typical measures such as Euclidean distance and Cosine distance are calculated between two embeddings and faces are said to match or verify if the distance is below a predefined threshold, often tuned for a specific dataset or application.
First, we can load the VGGFace model without the classifier by setting the ‘include_top‘ argument to ‘False‘, specifying the shape of the output via the ‘input_shape‘ and setting ‘pooling‘ to ‘avg‘ so that the filter maps at the output end of the model are reduced to a vector using global average pooling.
|
1 2 |
# create a vggface model model = VGGFace(model='resnet50', include_top=False, input_shape=(224, 224, 3), pooling='avg') |
This model can then be used to make a prediction, which will return a face embedding for one or more faces provided as input.
|
1 2 |
# perform prediction yhat = model.predict(samples) |
We can define a new function that, given a list of filenames for photos containing a face, will extract one face from each photo via the extract_face() function developed in a prior section, pre-processing is required for inputs to the VGGFace2 model and can be achieved by calling preprocess_input(), then predict a face embedding for each.
The get_embeddings() function below implements this, returning an array containing an embedding for one face for each provided photograph filename.
|
1 2 3 4 5 6 7 8 9 10 11 12 13 |
# extract faces and calculate face embeddings for a list of photo files def get_embeddings(filenames): # extract faces faces = [extract_face(f) for f in filenames] # convert into an array of samples samples = asarray(faces, 'float32') # prepare the face for the model, e.g. center pixels samples = preprocess_input(samples, version=2) # create a vggface model model = VGGFace(model='resnet50', include_top=False, input_shape=(224, 224, 3), pooling='avg') # perform prediction yhat = model.predict(samples) return yhat |
We can take our photograph of Sharon Stone used previously (e.g. sharon_stone1.jpg) as our definition of the identity of Sharon Stone by calculating and storing the face embedding for the face in that photograph.
We can then calculate embeddings for faces in other photographs of Sharon Stone and test whether we can effectively verify her identity. We can also use faces from photographs of other people to confirm that they are not verified as Sharon Stone.
Verification can be performed by calculating the Cosine distance between the embedding for the known identity and the embeddings of candidate faces. This can be achieved using the cosine() SciPy function. The maximum distance between two embeddings is a score of 1.0, whereas the minimum distance is 0.0. A common cut-off value used for face identity is between 0.4 and 0.6, such as 0.5, although this should be tuned for an application.
The is_match() function below implements this, calculating the distance between two embeddings and interpreting the result.
|
1 2 3 4 5 6 7 8 |
# determine if a candidate face is a match for a known face def is_match(known_embedding, candidate_embedding, thresh=0.5): # calculate distance between embeddings score = cosine(known_embedding, candidate_embedding) if score <= thresh: print('>face is a Match (%.3f <= %.3f)' % (score, thresh)) else: print('>face is NOT a Match (%.3f > %.3f)' % (score, thresh)) |
We can test out some positive examples by downloading more photos of Sharon Stone from Wikipedia.
Specifically, a photograph taken in 2002 (download and save as ‘sharon_stone2.jpg‘), and a photograph taken in 2017 (download and save as ‘sharon_stone3.jpg‘)
We will test these two positive cases and the Channing Tatum photo from the previous section as a negative example.
The complete code example of face verification is listed below.
|
1 2 3 4 5 6 7 8 9 10 11 12 13 14 15 16 17 18 19 20 21 22 23 24 25 26 27 28 29 30 31 32 33 34 35 36 37 38 39 40 41 42 43 44 45 46 47 48 49 50 51 52 53 54 55 56 57 58 59 60 61 62 63 64 65 |
# face verification with the VGGFace2 model from matplotlib import pyplot from PIL import Image from numpy import asarray from scipy.spatial.distance import cosine from mtcnn.mtcnn import MTCNN from keras_vggface.vggface import VGGFace from keras_vggface.utils import preprocess_input # extract a single face from a given photograph def extract_face(filename, required_size=(224, 224)): # load image from file pixels = pyplot.imread(filename) # create the detector, using default weights detector = MTCNN() # detect faces in the image results = detector.detect_faces(pixels) # extract the bounding box from the first face x1, y1, width, height = results[0]['box'] x2, y2 = x1 + width, y1 + height # extract the face face = pixels[y1:y2, x1:x2] # resize pixels to the model size image = Image.fromarray(face) image = image.resize(required_size) face_array = asarray(image) return face_array # extract faces and calculate face embeddings for a list of photo files def get_embeddings(filenames): # extract faces faces = [extract_face(f) for f in filenames] # convert into an array of samples samples = asarray(faces, 'float32') # prepare the face for the model, e.g. center pixels samples = preprocess_input(samples, version=2) # create a vggface model model = VGGFace(model='resnet50', include_top=False, input_shape=(224, 224, 3), pooling='avg') # perform prediction yhat = model.predict(samples) return yhat # determine if a candidate face is a match for a known face def is_match(known_embedding, candidate_embedding, thresh=0.5): # calculate distance between embeddings score = cosine(known_embedding, candidate_embedding) if score <= thresh: print('>face is a Match (%.3f <= %.3f)' % (score, thresh)) else: print('>face is NOT a Match (%.3f > %.3f)' % (score, thresh)) # define filenames filenames = ['sharon_stone1.jpg', 'sharon_stone2.jpg', 'sharon_stone3.jpg', 'channing_tatum.jpg'] # get embeddings file filenames embeddings = get_embeddings(filenames) # define sharon stone sharon_id = embeddings[0] # verify known photos of sharon print('Positive Tests') is_match(embeddings[0], embeddings[1]) is_match(embeddings[0], embeddings[2]) # verify known photos of other people print('Negative Tests') is_match(embeddings[0], embeddings[3]) |
The first photo is taken as the template for Sharon Stone and the remaining photos in the list are positive and negative photos to test for verification.
Running the example, we can see that the system correctly verified the two positive cases given photos of Sharon Stone both earlier and later in time.
Note: Your results may vary given the stochastic nature of the algorithm or evaluation procedure, or differences in numerical precision. Consider running the example a few times and compare the average outcome.
We can also see that the photo of Channing Tatum is correctly not verified as Sharon Stone. It would be an interesting extension to explore the verification of other negative photos, such as photos of other female celebrities.
|
1 2 3 4 5 |
Positive Tests >face is a Match (0.418 <= 0.500) >face is a Match (0.295 <= 0.500) Negative Tests >face is NOT a Match (0.709 > 0.500) |
Note: the embeddings generated from the model are not specific to the photos of celebrities used to train the model. The model is believed to produce useful embeddings for any faces; perhaps try it out with photos of yourself compared to photos of relatives and friends.
Further Reading
This section provides more resources on the topic if you are looking to go deeper.
Papers
- Deep Face Recognition, 2015.
- VGGFace2: A dataset for recognising faces across pose and age, 2017.
- Joint Face Detection and Alignment Using Multitask Cascaded Convolutional Networks, 2016.
Books
- Handbook of Face Recognition, Second Edition, 2011.
API
- Visual Geometry Group (VGG) Homepage.
- VGGFace Homepage.
- VGGFace2 Homepage.
- Official VGGFace2 Project, GitHub.
- keras-vggface Project, GitHub.
- MS-Celeb-1M Dataset Homepage.
- scipy.spatial.distance.cosine API
Summary
In this tutorial, you discovered how to develop face recognition systems for face identification and verification using the VGGFace2 deep learning model.
Specifically, you learned:
- About the VGGFace and VGGFace2 models for face recognition and how to install the keras_vggface library to make use of these models in Python with Keras.
- How to develop a face identification system to predict the name of celebrities in given photographs.
- How to develop a face verification system to confirm the identity of a person given a photograph of their face.
Do you have any questions?
Ask your questions in the comments below and I will do my best to answer.
Develop Deep Learning Models for Vision Today!

Develop Your Own Vision Models in Minutes
...with just a few lines of python code
Discover how in my new Ebook:
Deep Learning for Computer Vision
It provides self-study tutorials on topics like:
classification, object detection (yolo and rcnn), face recognition (vggface and facenet), data preparation and much more...
Finally Bring Deep Learning to your Vision Projects
Skip the Academics. Just Results.


Dear Dr Jason,
While this tutorial is about recognizing the difference between person A (Channing Tatum) and person B (Sharon Stone), my question is whether the face recognition system can recognize the variations within a person and the algorithm identifies the correct person.
By variations, I mean, if the person has facial hair, has a fatter face or has an emaciated face has spectacles on or off or a scar.
To illustrate this again. A particular person registers his/her face. Later on, the person may have variations in the face; getting fatter or thinner, has/has not facial hair or has spectacles, what additional work is needed to handle variations.
Thank you,
Anthony of Sydney
Ideally, yes, the embeddings for the same person across time will be closer than the embeddings for different people, in general.
Hi,
On another topic, are you planning any blogs on analysis of videos from the aspect of perspective work and perspective meshes.
I am interested in analysing horse racing video and other sports.
Thank you,
Joe
Great suggestion, I hope to cover that topic in the future.
Hi sir,
I am getting following error:
from keras.applications.imagenet_utils import _obtain_input_shape
ImportError: cannot import name ‘_obtain_input_shape’ from ‘keras.applications.imagenet_utils’
Perhaps check that you have the latest version of Keras installed, e.g. 2.2.4+
Hi Jason,
thank you for this great post! very useful!
i have a question, in order to recognize people, can i use a classifier like SVM or KNN over the face encodings? if yes, which of these is better?
i’m working with over a lot of people (near thousand) and i’m not sure that working with classifier is the correct approach.
thank you
Paolo
Yes.
Test a suite of algorithms in order to discover what works best for your specific dataset.
SVM works quite well.
I got an error in decode_prediction
saying
ValueError:
decode_predictionsexpects a batch of predictions (i.e. a 2D array of shape (samples, 1000)). Found array with shape: (1, 8631)I’m sorry to hear that, I have some suggestions here:
https://machinelearningmastery.com/faq/single-faq/why-does-the-code-in-the-tutorial-not-work-for-me
Hi sir,
i am getting the following error:
cannot import name ‘_obtain_input_shape’ from ‘keras.applications.imagenet_utils’ (C:\Users\user\Anaconda3\lib\site-packages\keras\applications\imagenet_utils.py)
Sorry to hear that, ensure you are using Keras 2.2.4 or higher and TensorFlow 1.14 or higher.
> They describe the process of training a face classifier first that uses a softmax activation function in the output layer to classify faces as people. This layer is then removed so that the output of the network is a vector feature representation of the face, called a face embedding. The model is then further trained, via fine-tuning, in order that the Euclidean distance between vectors generated for the same identity are made smaller and the vectors generated for different identities is made larger. This is achieved using a triplet loss function.
You make it sound so easy & understandable, brilliant tutorial Jason.
Thanks, I’m happy that it helps.
“… The model is then further trained, via fine-tuning, in order that the Euclidean distance between vectors generated for the same identity are made smaller and the vectors generated for different identities is made larger. …”
What has been done in this step?
We don’t train a facenet model in this tutorial, we use a pre-trained model.
I want to use vgg face2 model in the same way you described the facenet model in the following website:
https://machinelearningmastery.com/how-to-develop-a-face-recognition-system-using-facenet-in-keras-and-an-svm-classifier/
How can I use that?
I believe it is a drop in replacement.
I cannot write a custom example for you sorry.
Ok, thank you. In this website, the vggface2 is used for a single image. How can it be used for a dataset of 9 persons?
By using the same model multiple times to generate an embedding for each image.
thank you. If I use
model = VGGFace(model=’resnet50′, include_top=False, input_shape=(224, 224, 3), pooling=’avg’)
in
https://machinelearningmastery.com/how-to-develop-a-face-recognition-system-using-facenet-in-keras-and-an-svm-classifier/
then the training and testing accuracy becomes very poor. Why is that so?
Sorry to hear that.
I believe some experimentation will be required to adapt the model for the example.
Dear Dr Jason,
I’m searching for weights of pretrained VGGFaceV2 MobileNet, but Keras just support weights of pretrained VGGFaceV2 for VGGNet16, ResNet50, SeNet50.
Do you know where to find and download it or if you have ever trained MobileNet on VGGFaceV2 dataset, can you share the weights?
Thank you.
Not off hand, sorry.
How can we store the face data in database ?
Perhaps check the documentation for your database and how to store binary data?
Thank you for this gift Mr Jason Brownlee
You’re welcome, I’m happy the tutorial is helpful!
Hello sir when i run this code
# example of face detection with mtcnn
from matplotlib import pyplot
from PIL import Image
from numpy import asarray
from mtcnn.mtcnn import MTCNN
# extract a single face from a given photograph
def extract_face(filename, required_size=(224, 224)):
# load image from file
pixels = pyplot.imread(filename)
# create the detector, using default weights
detector = MTCNN()
# detect faces in the image
results = detector.detect_faces(pixels)
# extract the bounding box from the first face
x1, y1, width, height = results[0][‘box’]
x2, y2 = x1 + width, y1 + height
# extract the face
face = pixels[y1:y2, x1:x2]
# resize pixels to the model size
image = Image.fromarray(face)
image = image.resize(required_size)
face_array = asarray(image)
return face_array
# load the photo and extract the face
pixels = extract_face(‘sharon_stone1.jpg’)
# plot the extracted face
pyplot.imshow(pixels)
# show the plot
pyplot.show()
It gives error : –
Using TensorFlow backend.
Illegal instruction (core dumped)
Sorry to hear that, perhaps there is a problem with your development environment. If so, this might help:
https://machinelearningmastery.com/setup-python-environment-machine-learning-deep-learning-anaconda/
how do i train the model for my own images
See this tutorial:
https://machinelearningmastery.com/how-to-develop-a-face-recognition-system-using-facenet-in-keras-and-an-svm-classifier/
Hi Jason,
I have been using https://github.com/vudung45/FaceRec (Facenet) for a while, but its accuracy is low.
Can you please suggest me which is better (Facenet or VGGFace2)
Perhaps try both on your problem and see what works best.
Hi Jason,
I have only one face for each person. In this case, should i go with model based like SVM or should i directly compute the difference with the encoding computed.
One face for each person, for this case, what would you suggest go with, Facenet or VGGface2.
Try a few approaches and see what works best for your specific dataset.
Thanks for this tutorial.
The question I have however is, how do I calculate the cosine similarity as a percentage of accuracy?
Good question. I hope to cover this topic in the future.
Hi…I just want to ask can I use the same model for live stream face recognition…?
Perhaps try it.
Hi Jason. I tried your code and I have an error. 🙂
For yhat = model.predict(samples);
ValueError: Error when checking input: expected input_427 to have 4 dimensions, but got array with shape (224, 224, 3)
Sorry to hear that, I have some suggestions here:
https://machinelearningmastery.com/faq/single-faq/why-does-the-code-in-the-tutorial-not-work-for-me
Confirm TensorFlow 2 and Keras 2.3 at least.
hey man! thanks for your post, i was wondering if it really works on tensorflow2.0? i just need to install tensorflow-gpu 2.0, keras 2.2.4 cuda toolkit 10.0 and cudnn 7.6?(im using conda) or there is another special considerations to install keras_vggface on tensorflow2.0?
It works with TensorFlow 2 and Keras 2.3 n Python 3.6.
This will help you with your environment:
https://machinelearningmastery.com/setup-python-environment-machine-learning-deep-learning-anaconda/
dear jason, i am trying to figure out how to make it run, i guess it is something on my environment set up, but i get this error:
TypeError: The added layer must be an instance of class Layer. Found:
i asked about this problem on stackoverflow:
https://stackoverflow.com/questions/59763562/canot-use-vggface-keras-on-tensorflow-2-0
i was wondering if you can helpme on this, thanks in advance
I believe the comment on that stackoverflow post is a good start.
Also, update to TF 2.1 and Keras 2.3.1.
working on that, thanks a lot. also i want to ask you if should i use the rcmalli librarie or yours?
What is rcmalli?
is the user from github who owns the project that you mentioned up there in the post, let me remind you the link,
sudo pip install git+https://github.com/rcmalli/keras-vggface.git
now i should use that or these:
https://github.com/jbrownlee/keras-vggface
thanks for the help fellow!
You can install from the original github project or from my clone of the project.
Either one is fine.
Hi, have you a model that works with tensorflow 2.0?
All code examples use Keras 2.4 running on top of TensorFlow 2.
Thank you for this tutorial.
I tried your code and it works perfectly. But when I used my own images, in the following code
# Example of face detection with a vggface2 model
…..
# extract the bounding box from the first face
x1, y1, width, height = results[0][‘box’]
In the above line, the following error comes:
IndexError: list index out of range
Please help.
You may have to debug the error. Perhaps confirm your image was loaded correctly?
Thank you Sir, the code works fine. I added my own images and run the code. I got the following output:
b’ Downtown_Julie_Brown’: 0.295%
b’ Layne_Staley’: 0.282%
b’ Eugene_H\xc3\xbctz’: 0.260%
b’ Fito_Cabrales’: 0.226%
b’ Stevie_Ray’: 0.204%
Running the last code, gives me this output.
Positive Tests
>face is a Match (0.009 face is a Match (0.026 face is NOT a Match (0.876 > 0.500)
It does confirm that the face in my image is neither of the names which are shown above but how can I get this kind of output
b’ Channing_Tatum’: 94.432%
b’ Eoghan_Quigg’: 0.146%
b’ Les_Miles’: 0.113%
b’ Ibrahim_Afellay’: 0.072%
b’ Tovah_Feldshuh’: 0.070%
where, the correctly recognized face is getting 94.432% of likelihood. How can I see my image name here like, for example:
image xyz ‘: 94.432%
You can get good predictions for faces the model knows well.
thank you for your reply. I tried the code with my own images and it works fine. The code is calculating the embedding and then comparing it in run time. I wanted to know that how can I save the embedding of a class. So, that I can use it to just compare it with new image’s calculated embedding?
Secondly, could you please, clarify my concept about CNN. We usually have a large data set for CNN but here, we are just calculating the embedding using a single image and then, comparing the embedding. Will we get accurate results in the presence of occlusions or different light intensity etc? Though I am getting accurate results while, testing the images with different light intensities. I am not getting why a large data set isn’t used here.
You can get the embedding vector and save the numpy array to file:
https://machinelearningmastery.com/how-to-save-a-numpy-array-to-file-for-machine-learning/
The CNN was already trained, we are just using it.
Thank you so much. The code in the link worked perfectly.
Happy to hear that!
About my second question, I think I have found the answer. We are using one shot learning here, using siamese network. Correct me if I am wrong.
No, we are using a pre-trained model to classify known faces.
I had another query.
How can we reduce computation time while, testing?
Use less data.
Use a smaller model.
Use a faster machine.
Thank you for your reply.
I was looking into MTCNN face detector. Its last stage creates 5 dots on the face. Why is the above algorithm not outputting the detected face with 5 dots? Perhaps, is something missing in the code? Can you point out what is missing and what is the reason behind ignoring the code which creates these dots? Isn’t it a fundamental part of MTCNN?
It can, in this code we only use the bounding box. You can change it to do anything you wish.
Ok thank you so much.
Hi,
I am using VGGFACE2 model with this tutorial ( https://machinelearningmastery.com/how-to-develop-a-face-recognition-system-using-facenet-in-keras-and-an-svm-classifier/ )
– when I use small dataset, vggface2 faster than facenet to predict
– when I use big dataset, vggface2 slower than facenet to predict
Is that ok or there is a mistake?
Nice work.
I don’t know if that is an accurate finding or not, sorry.
For this project, how do you trained the model? I can’t seem to find the part where you trained the model. I want to train the model with my own image dataset using this project.
We don’t train a model in this tutorial, we use a pre-trained model that knows about celebrities.
You can train your own model here:
https://machinelearningmastery.com/how-to-develop-a-face-recognition-system-using-facenet-in-keras-and-an-svm-classifier/
If i want to use my trained model, can i just replace the path to get the model for this tutorial?
Yes. Try it and see.
I tried using this and it gives a random result based on the validation dataset. Is it possible to use my own trained model from https://machinelearningmastery.com/how-to-develop-a-face-recognition-system-using-facenet-in-keras-and-an-svm-classifier/ into this tutorial
The other tutorial already shows you, see the end of the tutorial.
Okay noted, thank you.
Hi Sir, i have the following error after follow your code above, my laptop do not have any gpu.
ImportError: DLL load failed while importing _pywrap_tensorflow_internal: The specified module could not be found.
Failed to load the native TensorFlow runtime.
Please help!
Thank you.
Perhaps this tutorial will help you setup your development environment:
https://machinelearningmastery.com/setup-python-environment-machine-learning-deep-learning-anaconda/
I am using PyCharm, and i think your code is using Tensorflow. How do i use Theano here after i have installed it?
You can configure Keras to use TensorFlow or Theano by changing the backend:
https://keras.io/backend/
Library Versions
Keras v2.2.4
Tensorflow v1.14.0
Warning: Theano backend is not supported/tested for now
Well done!
I just used face_recognition (https://github.com/ageitgey/face_recognition/tree/master/examples) library to identify the face names. so what is the difference between vggface2 vs face_recognition library?
Which one is the best one?
Thanks!!
I’m not familiar with that library, sorry.
Generally, a library will use a model internally.
Hi,
While running precompute_features.py, this model “batch_fvecs = resnet50_features.predict(images)” performs inference on cpu, any Idea how can this be run on GPU.
I’ve tensorflow-gpu 1.14, Nvidia 1050i, the CUDA and CUDNN libs in place. Infect for MTCNN face detection it performs inference on GPU only.
Am I missing some thing? why is it not performing inference on GPU?
I don’t know sorry. Perhaps you need to debug your development environment?
Hello Dr. Brownell. Thanks your nice tutorial.
Is there any keras implementations for others architectures of SENet such as:
– SE-ResNet-50-256D
– SE-ResNet-50-256D
– SE-ResNet-50-128D
Maybe, I don’t know sorry. Perhaps try a google search?
Hi Jason,
Thank you for your posts. I had two questions:
Perhaps, VGG won’t work on Raspberry pi due to memory constraints, so, which controller can i use to build a stand alone system?? And how would i know the limit of the number of different faces that can be recognized?
If instead of VGG I am using Haar cascade on raspberry pi?
What is the limit of the number of different faces that can be recognized using Raspberry pi 4? Does using a bigger memory micro SD card increase this limit or is it the Raspberry pi’s RAM which affects it?
Regards,
Mahnoor
I don’t know about that platform, perhaps test a suite of approaches and discover what is most appropriate for your project requirements.
Hi Jason,
FAB post.
I am using your code by creating the pickle file with known embedding and known names while training the VGGFace2 model on my dataset and then using that pickle file on test data (image files) is working great.
But if I am trying to applying the pickle file output on the live feed webcam data, it’s doesn’t work. There is some preprocessing issue with the way I am trying to read the live data.
Have you come across to implementation of VGGFace2 and MTCNN on live feed data, if yes, would you please share?
Re,
Twarit
You will need to prepare new data/images in an identical manner as the training data.
Hi.
why there is no VGGface2 model like the VGGface1, why using other models like resnet trained on VGGface2 dataset?
please correct me here : VGGface is both a dataset and a VGG model trained on this dataset. VGGface2 is just a dataset with no VGG model trained on it.
They are both models, the latter is better.
It is really good.. i am using this for face authentication since previous year… with weight imprinting technology.. even give good FAR compared with dlib….
Results here : https://github.com/Bhanuchander210/reality_of_one_shot_learning/blob/master/evaluate_results.md
Thanks.
Well done.
Hey Jason, I have usecase of classifying emoji images. They are not exactly face but do resemble some features like expressions. I am confused on whether I should go ahead and retrain pretrained CNN on Imagenet data or I should retrain this Facenet model on new emoji images? Please guide on what do you think would be better?
I would guess that a new model is required. Perhaps inspired by well performing image classification models like vgg.
You mean training new model from scratch? Can’t I fine tune inception/resnet/vgg already trained on Imagenet?
I guess is no, but perhaps try it and see.
Sure thanks, will try!
Hi,
Very useful post!
Just a short question, why don’t you normalize image pixels before using the net? I thought it was recommended to always normalize the inputs. In case it’s not, when we should normalize and when not?
Thank you very much!
We do, in the call to the preprocess_input() function.
It substracts the train means but there’s no transformation to normalize the pixels between 0 and 1, am I right? Is it not necessary?
And another question, should the input images be in RGB or BGR to use the keras-vggface library? I think is RGB but I would like to confirm it.
Thanks!!
You must prepare data for the model by calling the preprocess_input() function which standardizes the pixel values.
We do this in the tutorial.
Images are in RGB format.
I think they should be BGR because this tensorflow release is based of CAFFE and CAFFE is BGR
Thanks for this great article!
I am surprised that vggface2 can also recognise some of my local celebrities!
However it still couldn’t recognise some of the youtubers i tested.
I will be exploring to use transfer learning to recognise these personalities that are previously not recognised using vggface2 to improve my understanding.
Any pointers will be greatly appreciated!
Nice work!
This may help:
https://machinelearningmastery.com/how-to-develop-a-face-recognition-system-using-facenet-in-keras-and-an-svm-classifier/
Thanks! it was very helpful!
i will try to see if i can use different images to predict the identify using the trained models for the 5 celebrities
You’re welcome.
Hi Dr. Jason,
With this code for finding difference between two persons – is it safe to assume that it can be used to distinguish between identical twins as well. I am doing my research to distinguish between identical twins – could you please suggest me something I can proceed.
thanks,
Rita
I would not expect it to work for identical twins.
Which one will perform better? VGGface or FaceNet
Depends on your problem. Perhaps test each and select the approach that works best for you.
Looks like the detector brings out upper left corner. The Y axis starts with 0 at the top and goes down to max height at the origin. The X axis of the picture starts at 0 at the origin and max width right side. If it was lower left corner then the face would be from [y2:y1] (top to bottom), but we see face cropped by [y1:y2] height wise. Please correct me if i am wrong.
I don’t recall, sorry.
can models like these be used commercially? For VGGFACE2 it says dataset is under cerative commons but nothing about the model itself. For VGGFACE it clearly calls out prohibiting commercial use.
Good question, I guess it is a case by case basis for each model and business. Perhaps you can contact the author of a given model and request a commercial license or use their procedure to generate a new model that you own.
Hi, incredible work, thank you so much for this tutorial, it’s helped a huge amount!
You’re welcome!
Very nice helpful explanation.
I would like to train a new model like VGGface2, which works both for face verification and identification.
My training dataset doesn’t have label, and I would like to train it in unsupervised manner. How can I achieve this?
Thanks.
If you’re images are not labeled, I don’t know how you would prepare a model for verification or identification.
Hello Jason
Your blog is amazing.
In “How to Perform Face Identification With VGGFace2” section you use SoftMax layer for face identification. (one to many)
But in “How to Perform Face Verification With VGGFace2”, you use the last layer before SoftMax layer for face verification (one to one). You get embeddings and compute similarity(one to one). So my question is we didn’t use the same principle for face identification, get the embeddings and compute similarity to many (one to many). Why we didn’t do these way.
Thank you for your response
Thanks.
Use of the model is adapted based on different applications.
In the first case we use the pre-trained model to classify images, e.g. multi-class classification.
In the second case we use the pretrained model with just embeddings in a binary classification type problem.
You can adapt the usage of the model anyway you like.
Hello Jason
I’m using this model to find similarity between two faces in images.
model = VGGFace(model=’resnet50′, include_top=False, input_shape=(224, 224, 3), pooling=’avg’)
# perform prediction
yhat = model.predict(samples)
why the dimension of predict is 2048?
That is the output of the model, e.g. the number of nodes in the layer prior to the output layer.
Hi,
thank you for the great tutorial. I have a short question: Does the face verification in the section “How to Perform Face Verification With VGGFace2” work equally well when the persons on the images are not among the 8631 celebrities used for training? That is, does it work equally well when I want to check whether two images of non-celebrities depict the same person?
Best,
Stefan
No, a new model must be created for that problem, such as:
https://machinelearningmastery.com/how-to-develop-a-face-recognition-system-using-facenet-in-keras-and-an-svm-classifier/
Hi,
Thanks for the good explanation.
between ‘face verification’ and ‘face identification’, which one is better and which one is used mostly?
does this all depend on dataset and condition?
It depends on the problem you are trying to solve, then choose a solution that addresses your problem.
Hi,
Thanks for help us with this explanation.
I hope you can help me with this doubt: because I have to map range value of output in other range, I have to know which is the range of output value. Can you say me which is?
The last output layer function shoud be softmax right? But the range I have is something like [-0.99, 0.99]. How is it possibile?
Thank you for help.
The range if 0-1 for each output.
If you need a different range you can modify the output function or scale the output to the new range after the fact.
runfile(‘C:/Users/Thananyaa/.spyder-py3/vggface1.py’, wdir=’C:/Users/Thananyaa/.spyder-py3′)
Traceback (most recent call last):
File “C:\Users\Thananyaa\.spyder-py3\vggface1.py”, line 7, in
from keras_vggface.vggface import VGG16
File “C:\Users\Thananyaa\anaconda3\lib\site-packages\keras_vggface\__init__.py”, line 1, in
from keras_vggface.vggface import VGGFace
File “C:\Users\Thananyaa\anaconda3\lib\site-packages\keras_vggface\vggface.py”, line 9, in
from keras_vggface.models import RESNET50, VGG16, SENET50
File “C:\Users\Thananyaa\anaconda3\lib\site-packages\keras_vggface\models.py”, line 20, in
from keras.engine.topology import get_source_inputs
ModuleNotFoundError: No module named ‘keras.engine.topology’
Sorry to hear that, these tips may help:
https://machinelearningmastery.com/faq/single-faq/why-does-the-code-in-the-tutorial-not-work-for-me
please edit the /usr/local/lib/python3.7/dist-packages/keras_vggface/models.py file, in this file please replace below mentioned line
from keras.engine.topology import get_source_inputs
with
from keras.utils.layer_utils import get_source_inputs
This file can be opened using colab terminal if you are using colab pro
or
once you get the error (which you mentioned) , look for the file where the error is showing. Usually it shows error in “from keras_vggface.vggface import VGGFace” at first step,
just below this there will be one more error pointing to /usr/local/lib/python3.7/dist-packages/keras_vggface/models.py file, click on this link and comment the line as specified above and replace with new one
Thanks for the update. Keras has changed due to Tensorflow 2.x made it official module. Hence some functions are relocated.
Hi Rohith A K.
Were you able to figure out the solution to the exact problem you mentioned concerning replacing keras.engine.topology with keras.utils.layer_utils on Colab to resolving it on jupyter notebook?
If i download my colab notebook to my jupyter notebook, I’d still get that error. How do we fix that?
Hello
I have a question about the algorithm behind face embedding.
I am currently on a project about predicting BMI from the face.
After MTCNN, the aligned faces have different sizes and resize to 224×224(required by the VGG) even distort the ratio. Do you think directly resizing matters? Or VGG still can give it correct embedding?
Or I should fix the ratio and then resize to 224×224, but this way, it will leave black margin surrounding the face…
I think leaving black margin should not matter. But I would believe a heavily distorted aspect ratio will impact more negatively. My reasoning is that, with the fixed convolution size, you are now putting more (or less) amount of data into each convolution operation and the feature you extracted may not be the same any more.
Hello,
I have tried following both this and the Facenet tutorial, but I run into issues related to using Python 3 rather than 2. In this case in particular, in this case when importing the pre trained model, I get a str object has no decode attribute error. (In the case of the facenet the issue was also when trying to load the models). Could you perhaps give me some advice regarding this?
Can you point out which line of code causing the error?
I have lost it, and was unable to recreate it, it seems to have occured from using older versions of the packages required. I rebuilt my environment which took care of most of the issues with a slight edit to the models.py file in vgg_kerasface to let it work for tensorflow 2.
Hi Jason.
As I understood, VGGFace2 is trained for classification the celebrities and then is further trained with the triplet loss function. Am I right?
Hi
i tried to execute pip install git+https://github.com/rcmalli/keras-vggface.git in anaconda prompt but i get this error massage:
ERROR: Error [WinError 2] The system cannot find the file specified while executing command git clone -q https://github.com/rcmalli/keras-vggface.git ‘C:\Users\Nuha\AppData\Local\Temp\pip-req-build-ffiv6mrk’
ERROR: Cannot find command ‘git’ – do you have ‘git’ installed and in your PATH?
do you know how i can fix it ?
You need to install git. https://git-scm.com/download/win
Hi, thank you for your great tutorial. It helps me a lot. I am wondering why did you use the cosine distance instead of simple distance like euclidean distance? Is there any objectives for it?
Hi win…You are very welcome! The choice was simply to illustrate the process. You may certainly try other options. If you do, please let us know what you find.
Hi James,
Thank you very much for this very useful blog.
I am getting error as ValueError: Input 0 of layer “model” is incompatible with the layer: expected shape=(None, None, None, 3), found shape=(None, 183, 230, 4)
do we need to reshape the image before using detector.detect_faces ()