Linux is an excellent environment for machine learning development with Python.
The tools can be installed quickly and easily and you can develop and run large models directly.
In this tutorial, you will discover how to create and setup a Linux virtual machine for machine learning with Python.
After completing this tutorial, you will know:
How to download and install VirtualBox for managing virtual machines.
How to download and setup Fedora Linux.
How to install a SciPy environment for machine learning in Python 3.
This tutorial is suitable if your base operating system is Windows, Mac OS X, and Linux.
Kick-start your project with my new book Machine Learning Mastery With Python, including step-by-step tutorials and the Python source code files for all examples.
Let’s get started.
Benefits of a Linux Virtual Machine
There are a number of reasons that you may want to use a Linux virtual machine for Python machine learning development.
For example, below is a list of 5 top benefits for using a virtual machine:
To use tools not available on your system (if you’re on Windows).
To install and use machine learning tools without impacting your local environment (e.g. use Python 3 tools).
To have highly customized environments for different projects (Python2 and Python3).
To save the state of the machine and pick up exactly where you left off (jump from machine to machine).
To share development environment with other developers (set-up once and reuse many times).
Perhaps the most beneficial point is the first, being able to easily use machine learning tools not supported on your environment.
I’m an OS X user, and even though machine learning tools can be installed using brew and macports, I still find it easier to setup and use Linux virtual machines for machine learning development.
Overview
This tutorial is broken down into 3 parts:
Download and Install VirtualBox.
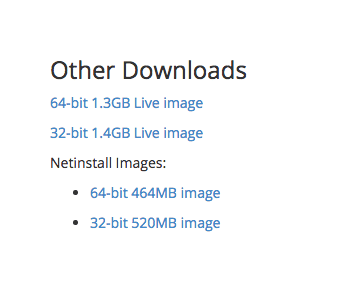
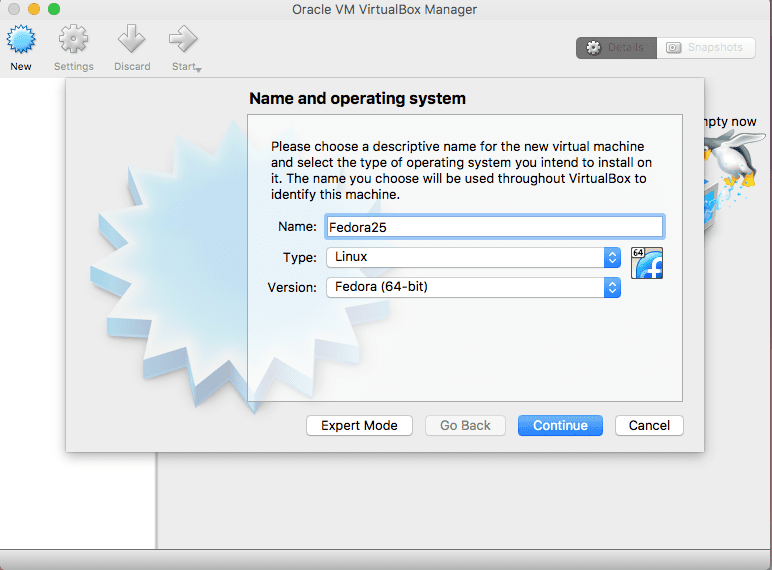
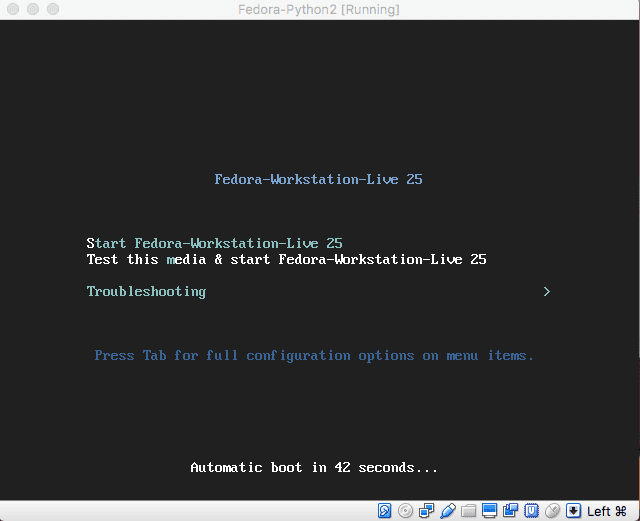
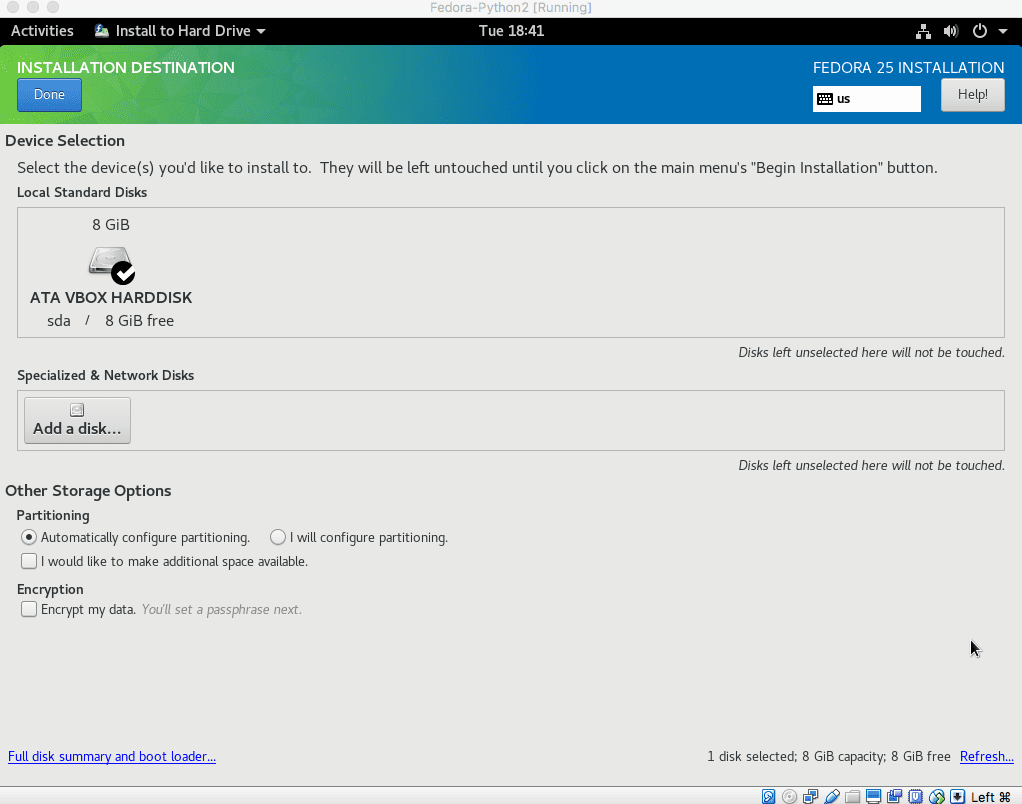
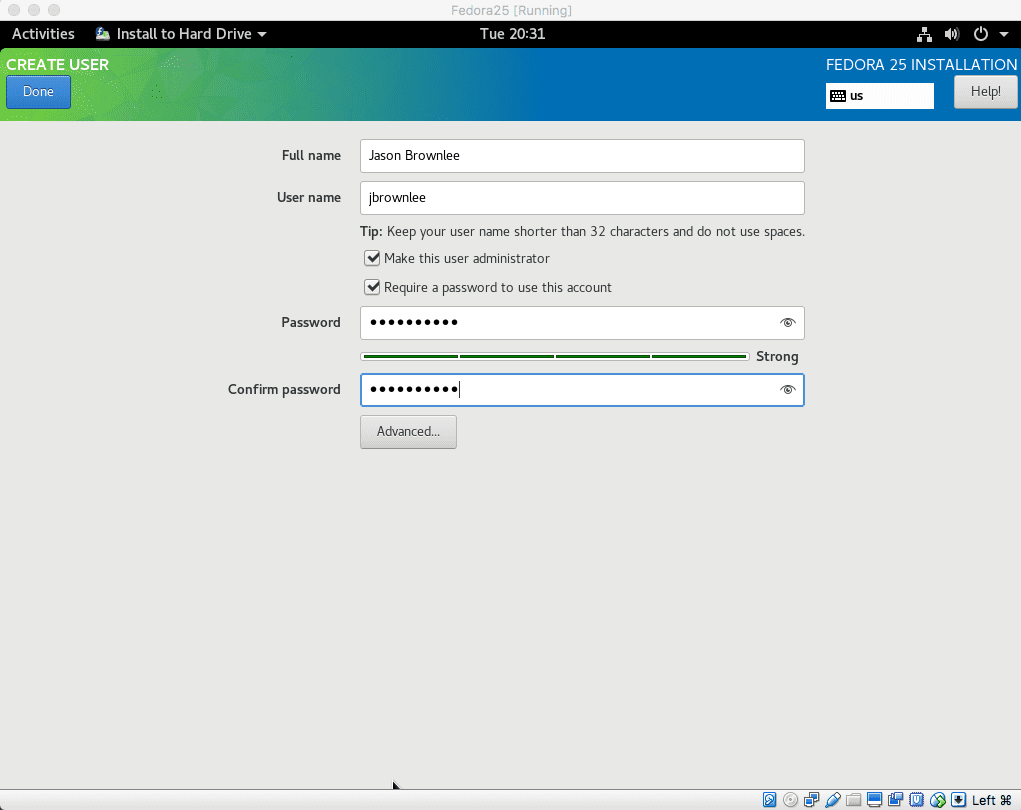
Download and Install Fedora Linux in a Virtual Machine.
Install Python Machine Learning Environment
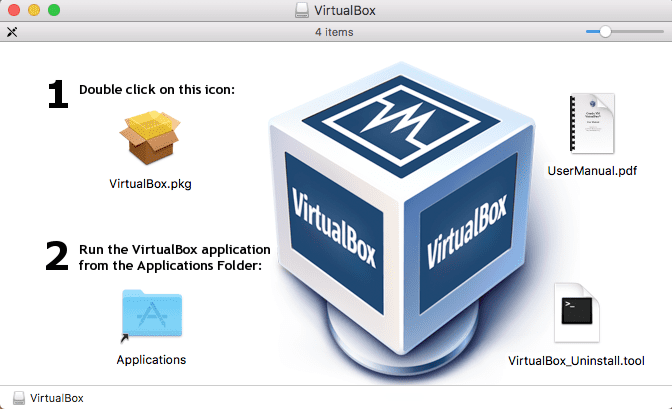
1. Download and Install VirtualBox
VirtualBox is a free open source platform for creating and managing virtual machines.
Once installed, you can create all the virtual machines you like, as long as you have the ISO images or CDs to install from.
Confirm the installation when prompted by pressing “y” and “enter“.
3.2 Confirm Python Environment
Now that the environment is installed, we can confirm it by printing the versions of each required library.
1. Open Gedit.
Click “Activities“
Type “gedit“
Click icon or press enter
2. Type the following script and save it as versions.py in the home directory.
1
2
3
4
5
6
7
8
9
10
11
12
13
14
15
16
17
18
# scipy
import scipy
print('scipy: %s'%scipy.__version__)
# numpy
import numpy
print('numpy: %s'%numpy.__version__)
# matplotlib
import matplotlib
print('matplotlib: %s'%matplotlib.__version__)
# pandas
import pandas
print('pandas: %s'%pandas.__version__)
# scikit-learn
import sklearn
print('sklearn: %s'%sklearn.__version__)
# statsmodels
import statsmodels
print('statsmodels: %s'%statsmodels.__version__)
There is no copy-paste support; you may want to open Firefox within the VM and navigate to this page and copy paste the script into your Gedit window.
Write Versions Script
3. Run the script in the terminal.
Type:
1
python3 versions.py
Python3 Check Library Versions
Tips For Using the VM
This section lists some tips using the VM for machine learning development.
Copy-paste and Folder Sharing. These features require the installation of “Guest Additions” in the Linux VM. I have not been able to get this to install correctly and therefore do not use these features. You can try if you like; let me know how you do in the comments.
Use GitHub. I recommend storing all of your code in GitHub and checking the code in and out from the VM. It makes life a lot easier for getting code and assets in and out of the VM.
Use Sublime. I think sublime is a great text editor on Linux for development, better than Gedit at least.
Use AWS for large jobs. You can use the same procedure to setup Fedora Linux on Amazon Web Services for running large models in the cloud.
VM Tools. You can save the VM at any point by closing the window. You can also take a snapshot of the VM at any point and return to the snapshot. This can be helpful if you are making large changes to the file system.
Python2. You can easily install Python2 alongside Python 3 in Linux and use the python (rather than python3) binary or use alternatives to switch between the two.
Notebooks. Consider running a notebook server inside the VM and opening up the firewall so that you can connect and run from your main workstation outside of the VM.
Do you have any tips to share? Let me know in the comments.
Further Reading
Below are some resources for further reading if you are new to the tools used in this tutorial.
The key for VBox Guest Adds is compiling the “kernel modules” into the virtual machine:
-Just ALT+F2 and type “gnome-terminal”
-Type “sudo yum install kernel-devel-4.8.9-300.fc25.x86_64”
-Set iso file with VBox guest add at VirtualBox.
-Just open the “cd” from Fedora and execute “runasroot.sh” (or use “sudo” in “/run/media/VIRTUALBOX…”).
-Wait for compiling “kernel modules” (take a while determining your “hardware” and compiling)
-Share file and folders from real machine to virtual machine by set in VitualBox.
-Done!
I would like to know more about how to run a notebook server inside the VM so that you can connect and run fro your main workstation outside of the VM. Where I can start?
I am really curious and would love to get your perspective on the following:
1) What are your thoughts on VMware with Ubuntu on it? As Ubuntu claims to be ML centric in its build structure and VMware is often pitted against VirtualBox (are there any distinct advantages?)
2) Also do you have any recommendation on how much ram i should set aside for
the VirtualBox or VMware?
I built a Virtual Machine with Anaconda and shared as OVA file on GitHub (click my name).
The page has a description of the machine, photos and a video.


Maybe the same but with Docker?
Thanks
Great suggestion, thanks!
You forgot to actually install Python 3; you go from Step 1: open a terminal to Step 2: confirm Python installation…?
It’s was already installed for me. I think it would be same for you
Hi Jason, I am using Macbook pro with two operating systems installed already OS X and Microsoft window 7, what am I to do ?
I would suggest using Mac OS X.
You could install and use Python Anaconda, or if you are more advanced, explore using a package manager like macports (my personal preference).
That means, I can uninstall the window 7 and use only the Mac OSX.
Great article!
The key for VBox Guest Adds is compiling the “kernel modules” into the virtual machine:
-Just ALT+F2 and type “gnome-terminal”
-Type “sudo yum install kernel-devel-4.8.9-300.fc25.x86_64”
-Set iso file with VBox guest add at VirtualBox.
-Just open the “cd” from Fedora and execute “runasroot.sh” (or use “sudo” in “/run/media/VIRTUALBOX…”).
-Wait for compiling “kernel modules” (take a while determining your “hardware” and compiling)
-Share file and folders from real machine to virtual machine by set in VitualBox.
-Done!
Fantastic Jimmy, thanks for the note.
I’ll give it a try to confirm and maybe even update the tutorial.
Really interesting article!
I would like to know more about how to run a notebook server inside the VM so that you can connect and run fro your main workstation outside of the VM. Where I can start?
Thanks
Great idea. Sorry I don’t have an example at hand.
This presentation about how to use Docker in a data science context is interesting. It would be great to see a blog post about this.
The presentation is here: https://www.youtube.com/watch?v=GOW6yQpxOIg
Thanks for sharing.
I love your post, thanks for your help in my Data Science Career
Thanks!
Tried the above steps in Windows 10 machine and they worked like a charm. Great post. Thanks.
I’m glad to hear that!
why not make the virtual machine available for download? basically it’s all open source 🙂
Good suggestion. The main reason is because it is massive, e.g. Gigabytes.
I had done the same using your instructions using VMWare Workstation and it works perfect. Thanks
Nice work!
Just a note: Fedora 28 no longer gets you to create a user or set a root password during the install. I found some information on Reddit: https://www.reddit.com/r/Fedora/comments/8g0ggh/question_about_fedora_28s_new_install_no_root/
Thanks.
Good information. How to do this on windows 7? It would be great if you share the information.
You can follow this same procedure on windows!
Or, you can install Python on windows directly:
https://machinelearningmastery.com/setup-python-environment-machine-learning-deep-learning-anaconda/
This was a great help.
I am really curious and would love to get your perspective on the following:
1) What are your thoughts on VMware with Ubuntu on it? As Ubuntu claims to be ML centric in its build structure and VMware is often pitted against VirtualBox (are there any distinct advantages?)
2) Also do you have any recommendation on how much ram i should set aside for
the VirtualBox or VMware?
Thanks,
I’ve not used vmware, sorry.
Nice tutorial.
I built a Virtual Machine with Anaconda and shared as OVA file on GitHub (click my name).
The page has a description of the machine, photos and a video.
Hope it helps.
Well done, thanks.
Does VirtualBox support the use of GPU (Cuda)?
I don’t know, sorry.
Great to see such a good presentation which was more than guidable to create a Linux Virtual Machine for Machine Learning Development with Python 3.
Thanks, I’m glad it helped.