
There are many ways you can access Stable Diffusion models and generate high-quality images. One popular method is using the Diffusers Python library. It provides a simple interface to Stable Diffusion, making it easy to leverage these powerful AI image generation models. The diffusers lowers the barrier to using cutting-edge generative AI, enabling rapid experimentation and development. This library is very powerful. Not only you can use it to generate pictures from text prompts, but also to leverage LoRA and ControlNet to create a better picture.
In this post, you will learn about Hugging Face’s Diffusers, how to generate images, and how to apply various image generation techniques similar to Stable Diffusion WebUI. Specifically, you will learn how to:
- Build a Diffusers Pipeline and generate a simple image with a prompt.
- Loading LoRA weights of fine-tuned models and generating IKEA-style images.
- Build ControlNet OpenPose pipeline to generate an image using a reference image.
Let’s get started.
Further Stable Diffusion Pipeline with Diffusers
Photo by Felicia Buitenwerf. Some rights reserved.
Overview
This post is in three parts; they are:
- Using Diffusers on Google Colab
- Loading LoRA Weights
- ControlNet OpenPose
Using Diffusers on Google Colab
Hugging Face’s diffusers is a Python library that allows you to access pre-trained diffusion models for generating realistic images, audio, and 3D molecular structures. You can use it for simple inference or train your own diffusion model. What’s special about this library is that with just a few lines of code, you can download the model from Hugging Face Hub and use it to generate images, similar to the Stable Diffusion WebUI.
Instead of setting up locally, you will use Google Colab’s free GPU-based Notebook. To do so, go to https://colab.research.google.com/ and create a new notebook. To access the GPU, you must head to “Runtime” → “Change runtime type” and select “T4 GPU” option.
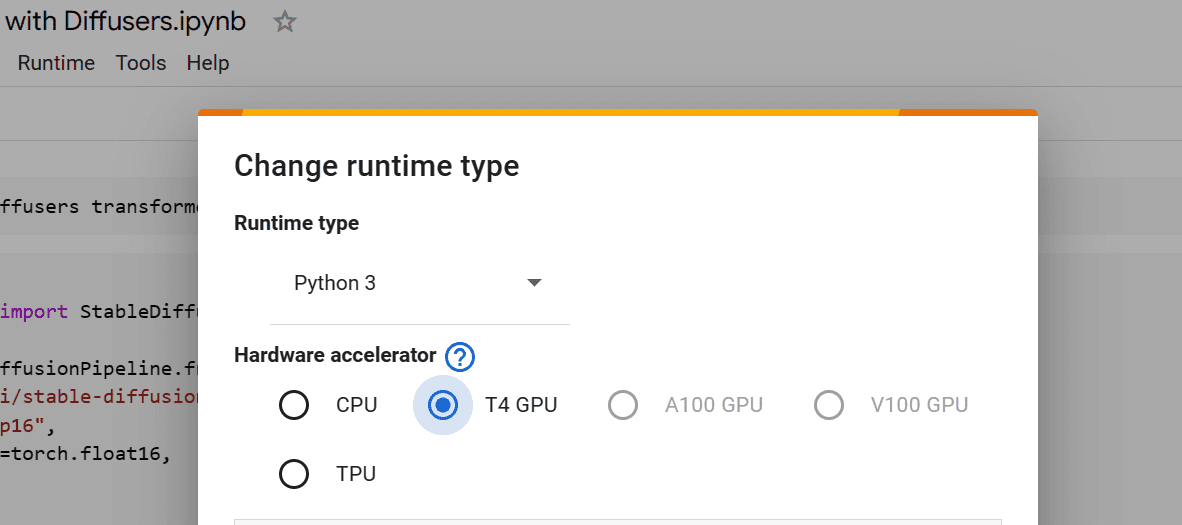
Selecting a GPU on Google Colab
Using Colab saves you from the burden of owning a GPU device to run Stable Diffusion efficiently. By the nature of a Jupyter notebook, you just need to keep all the following code in their own cell to run. It would be convenient for you to experiment.
After that, install all necessary Python libraries to run diffusers pipeline. You need to create a notebook cell with the following line:
|
1 |
!pip install diffusers transformers scipy ftfy peft accelerate -q |
In the colab notebook, the ! at the beginning of the line means this is a system command, not a Python code.
To generate an image using a prompt, you must first create a Diffusion pipeline. In the following, you will download and use Stable Diffusion XL with “float 16” type to save memory. Then, you will set up a pipeline to use the GPU as an accelerator.
|
1 2 3 4 5 6 |
from diffusers import DiffusionPipeline import torch pipe_id = "stabilityai/stable-diffusion-xl-base-1.0" pipe = DiffusionPipeline.from_pretrained(pipe_id, torch_dtype=torch.float16) pipe.to("cuda"); |
To generate the image of a young woman, you will provide the same generic prompt to the pipeline.
|
1 2 3 4 5 6 |
prompt = "photo of young woman, sitting outside restaurant, color, wearing dress, " \ "rim lighting, studio lighting, looking at the camera, up close, perfect eyes" image = pipe(prompt).images[0] image |
As you can see, you got exceptional results with a few lines of code:
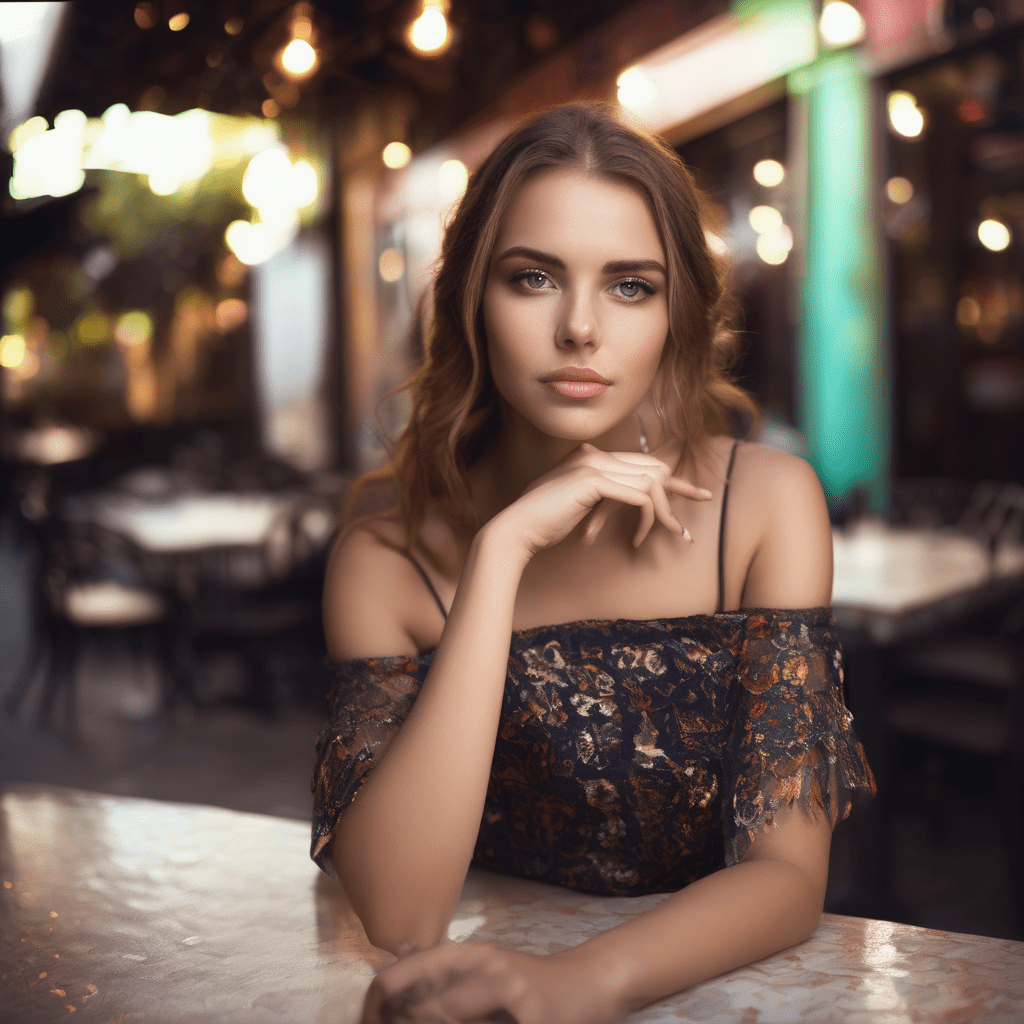
Image as generated using diffusers library with Stable Diffusion XL pipeline
Similar to Stable Diffusion WebUI, you can provide a positive prompt, a negative prompt, inference steps, set random seed, change the size, and guidance scale to generate the image as you wished:
|
1 2 3 4 5 6 7 8 9 10 11 12 13 14 15 |
prompt = "Astronaut in space, realistic, detailed, 8k" neg_prompt = "ugly, deformed, disfigured, poor details, bad anatomy" generator = torch.Generator("cuda").manual_seed(127) image = pipe( prompt, num_inference_steps=50, generator=generator, negative_prompt=neg_prompt, height=512, width=912, guidance_scale=6, ).images[0] image |
The image is perfect, and it looks like a digital artist spent almost 200 hours creating it:

Another picture generated by the Stable Diffusion XL pipeline
Loading LoRA Weights
Not only you can invoke the pipeline directly, you can also load LoRA weights into your pipeline. LoRA weights are model adapters that are fine-tuned for specific types of images. They can be attached to the base model to produce custom results. In the following, you will use LoRA weights to generate images in the style of IKEA instructional images.
You will download and load the LoRA adapter ostris/ikea-instructions-lora-sdxl by providing the Hugging Face link, the location of the adapter in the repository, and the name of the adapter.
|
1 2 3 4 5 |
pipe.load_lora_weights( "ostris/ikea-instructions-lora-sdxl", weight_name="ikea_instructions_xl_v1_5.safetensors", adapter_name="ikea", ) |
To generate an IKEA-style image, you will provide a simple prompt, inference step, scale argument, and manual seed to the pipeline.
|
1 2 3 4 5 6 7 8 9 10 |
prompt = "super villan" image = pipe( prompt, num_inference_steps=30, cross_attention_kwargs={"scale": 0.9}, generator=torch.manual_seed(125), ).images[0] image |
You created a super villain that comes with instructions. Although not perfect, it can be used to generate custom images for your work:

An IKEA style picture generated using a LoRA
ControlNet OpenPose
Let’s see another extension. You will now use the ControlNet OpenPose model to generate a control image using the reference image. ControlNet is a type of neural network architecture that controls diffusion models by adding extra conditions.
You will install controlnet_aux for the detecting pose of the body in the image.
|
1 |
!pip install controlnet_aux -q |
You will then build the ControlNet pipeline by loading the model from Hugging Face Hub in fp16 type. After that, you will load the free image from Pexels.com into our environment using the link.
|
1 2 3 4 5 6 7 8 9 10 11 12 13 |
from diffusers import ControlNetModel, AutoPipelineForText2Image from diffusers.utils import load_image import torch controlnet = ControlNetModel.from_pretrained( "lllyasviel/control_v11p_sd15_OpenPose", torch_dtype=torch.float16, variant="fp16", ).to("cuda") original_image = load_image( "https://images.pexels.com/photos/1701194/pexels-photo-1701194.jpeg?auto=compress&cs=tinysrgb&w=1260&h=750&dpr=2" ) |
To display a grid of images, you will create a Python function that takes a list of images and displays them in a grid in a Colab notebook.
|
1 2 3 4 5 6 7 8 9 10 11 12 13 14 15 16 |
from PIL import Image def image_grid(imgs, rows, cols, resize=256): assert len(imgs) == rows * cols if resize is not None: imgs = [img.resize((resize, resize)) for img in imgs] w, h = imgs[0].size grid_w, grid_h = cols * w, rows * h grid = Image.new("RGB", size=(grid_w, grid_h)) for i, img in enumerate(imgs): x = i % cols * w y = i // cols * h grid.paste(img, box=(x, y)) return grid |
In the next step, you will build the OpenPose detector pipeline and feed it the image that you loaded. To see the original image and OpenPose image side by side, you will use the image_grid function.
|
1 2 3 4 5 6 |
from controlnet_aux import OpenPoseDetector model = OpenPoseDetector.from_pretrained("lllyasviel/ControlNet") pose_image = model(original_image) image_grid([original_image,pose_image], 1, 2) |
The detector has successfully generated the structure of the human pose.
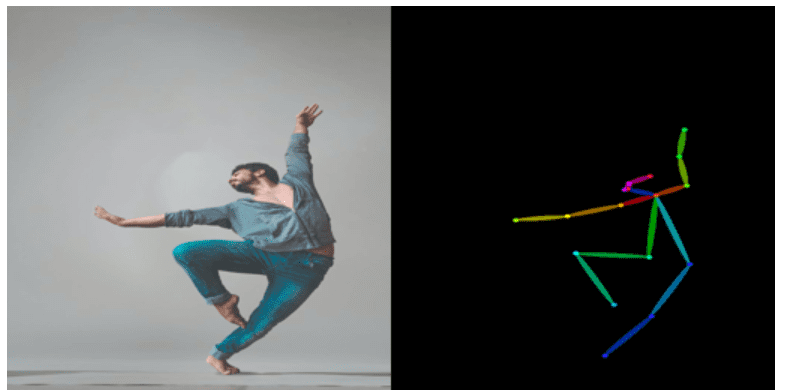
The original image and the detected pose. Note both pictures are in 1:1 aspect ratio to match the default in Stable Diffusion
Now, you will combine everything together. You will create Stable Diffusion 1.5 text to image pipeline and provide a ControlNet OpenPose model. You are using the fp16 variant for memory optimization.
|
1 2 3 4 5 6 |
controlnet_pipe = AutoPipelineForText2Image.from_pretrained( "runwayml/stable-diffusion-v1-5", controlnet=controlnet, torch_dtype=torch.float16, variant="fp16", ).to("cuda") |
You will generate four images using the same positive and negative prompts and display them in a grid. Note that you provide the pose image instead of the original image.
|
1 2 3 4 5 6 7 8 9 10 11 12 13 |
prompt = "a woman dancing in the rain, masterpiece, best quality, enchanting, " \ "striking, beach background" neg_prompt = "worst quality, low quality, lowres, monochrome, greyscale, " \ "multiple views, comic, sketch, bad anatomy, deformed, disfigured, " \ "watermark, multiple_views, mutation hands, watermark, bad facial" image = controlnet_pipe( prompt, negative_prompt=neg_prompt, num_images_per_prompt = 4, image=pose_image, ).images image_grid(image, 1, 4) |
The results are fantastic. All of the women are dancing in the same pose. There are a few deformities, but you cannot expect much from stable diffusion 1.5.
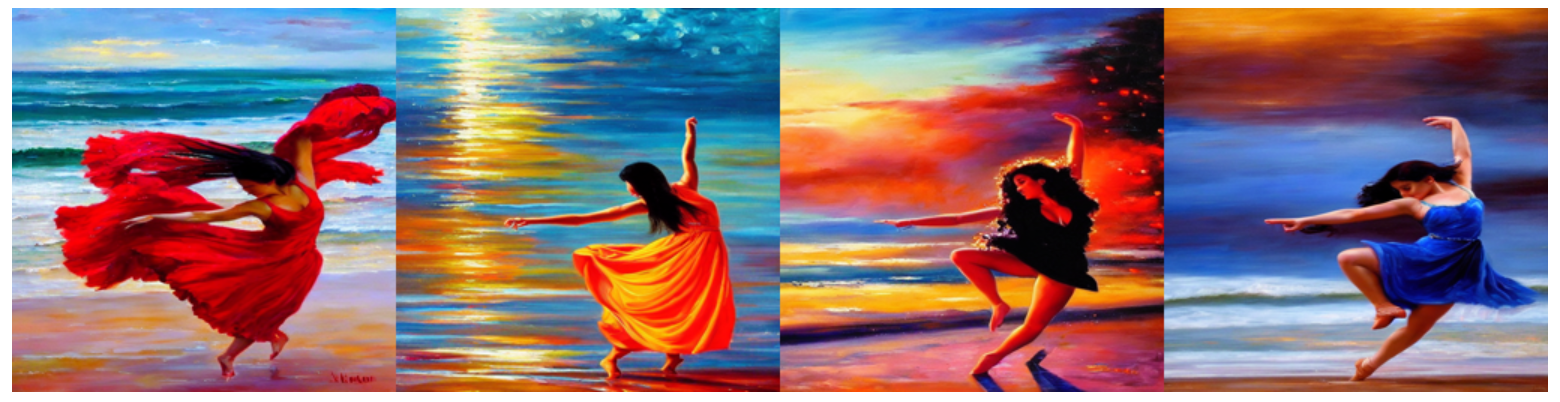
Four images were generated using ControlNet pipeline
Further Readings
This section provides more resources on the topic if you want to go deeper.
- diffusers API manual
- DiffusionPipeline API
- AutoPipelineForText2Image API
- controlnet_aux Python package
Summary
In this post, you learned about the Hugging Face Diffuser library and how to use it to generate high quality and custom images. Specifically, you covered:
- What is Diffusers, and how does it work?
- How to apply advanced settings and negative prompts to generate consistent images.
- How to load LoRA weights to generate IKEA-style images.
- How to control Stable Diffusion output using the ControlNet OpenPose model.


Sorry this is not working on google, with this error message, following the pipe = DiffusionPipeline.from_pretrained(pipe_id, torch_dtype=torch.float16)pipe.to(“cuda”); command. Basically there is no “cuda”. The error message “RuntimeError: Found no NVIDIA driver on your system” indicates that the PyTorch CUDA extension is unable to detect a compatible NVIDIA GPU or its driver on your system. This usually happens when:No NVIDIA GPU: Your system does not have an NVIDIA GPU installed.Missing Drivers: You have an NVIDIA GPU, but the appropriate drivers are not installed.
CUDA Toolkit Issues: The CUDA Toolkit, which is necessary for PyTorch to interact with the GPU, might not be installed or configured properly.
Hi Thomas…It seems like you are trying to use a PyTorch model with GPU acceleration, but your system does not have a compatible NVIDIA GPU or the necessary drivers and CUDA toolkit installed. Here are some steps to resolve this issue:
1. **Check for NVIDIA GPU**:
– Ensure that your system has an NVIDIA GPU installed. You can check this by looking at your system’s hardware specifications or by using commands like
nvidia-smiin the terminal, which should display GPU details if an NVIDIA GPU is present.2. **Install NVIDIA Drivers**:
– If you have an NVIDIA GPU but no drivers installed, you can download and install the appropriate drivers from the [NVIDIA website](https://www.nvidia.com/Download/index.aspx). Follow the installation instructions specific to your operating system.
3. **Install CUDA Toolkit**:
– The CUDA Toolkit is required for PyTorch to interact with your NVIDIA GPU. You can download the CUDA Toolkit from the [NVIDIA CUDA Toolkit website](https://developer.nvidia.com/cuda-downloads). Ensure you install the version compatible with your GPU and operating system.
4. **Verify Installation**:
– After installing the drivers and CUDA Toolkit, verify the installation by running
nvidia-smiin the terminal to check the status of the GPU and its driver.5. **Reinstall PyTorch with CUDA Support**:
– Ensure that you have installed the correct version of PyTorch with CUDA support. You can reinstall it using the following command:
sh

pip install torch torchvision torchaudio --extra-index-url https://download.pytorch.org/whl/cuXX
Replace
cuXXwith the appropriate CUDA version (e.g.,cu113for CUDA 11.3).6. **Check CUDA Path**:
– Make sure the CUDA binaries are in your system’s PATH. You can add them to your PATH by editing your shell configuration file (e.g.,
.bashrc,.zshrc):sh
export PATH=/usr/local/cuda-X.X/bin${PATH:+:${PATH}}
export LD_LIBRARY_PATH=/usr/local/cuda-X.X/lib64${LD_LIBRARY_PATH:+:${LD_LIBRARY_PATH}}
Replace
X.Xwith your CUDA version.If your system does not have an NVIDIA GPU, you will not be able to use CUDA. In this case, you can run your model on the CPU instead by modifying your code to remove the
.to("cuda")part:python
pipe = DiffusionPipeline.from_pretrained(pipe_id, torch_dtype=torch.float16)
# pipe.to("cuda") # Remove this line to use CPU
Running models on the CPU will be slower than using a GPU, but it will work without requiring CUDA.
If you are using a cloud service or a specific environment like Google Colab, ensure that you have enabled GPU support in the settings of that environment. For example, in Google Colab, you can enable GPU support by going to
Runtime>Change runtime typeand selectingGPUas the hardware accelerator.