
Photography has been around for more than a century. There are many old photos around, and probably your family has some, too. Limited by the camera and film of the time, you may have photos of low resolution, blurry, or with folds or scratches. Restoring these old photos and making them like new ones taken with today’s camera is a challenging task, but even you can do that with photo editing software such as Photoshop.
In this post, you will see how you can use Stable Diffusion to fix old photos and bring a new life to them. After finishing this post, you will learn:
- How to clean up defects in scanned photo
- How to colorize a black and white photo
Let’s get started.
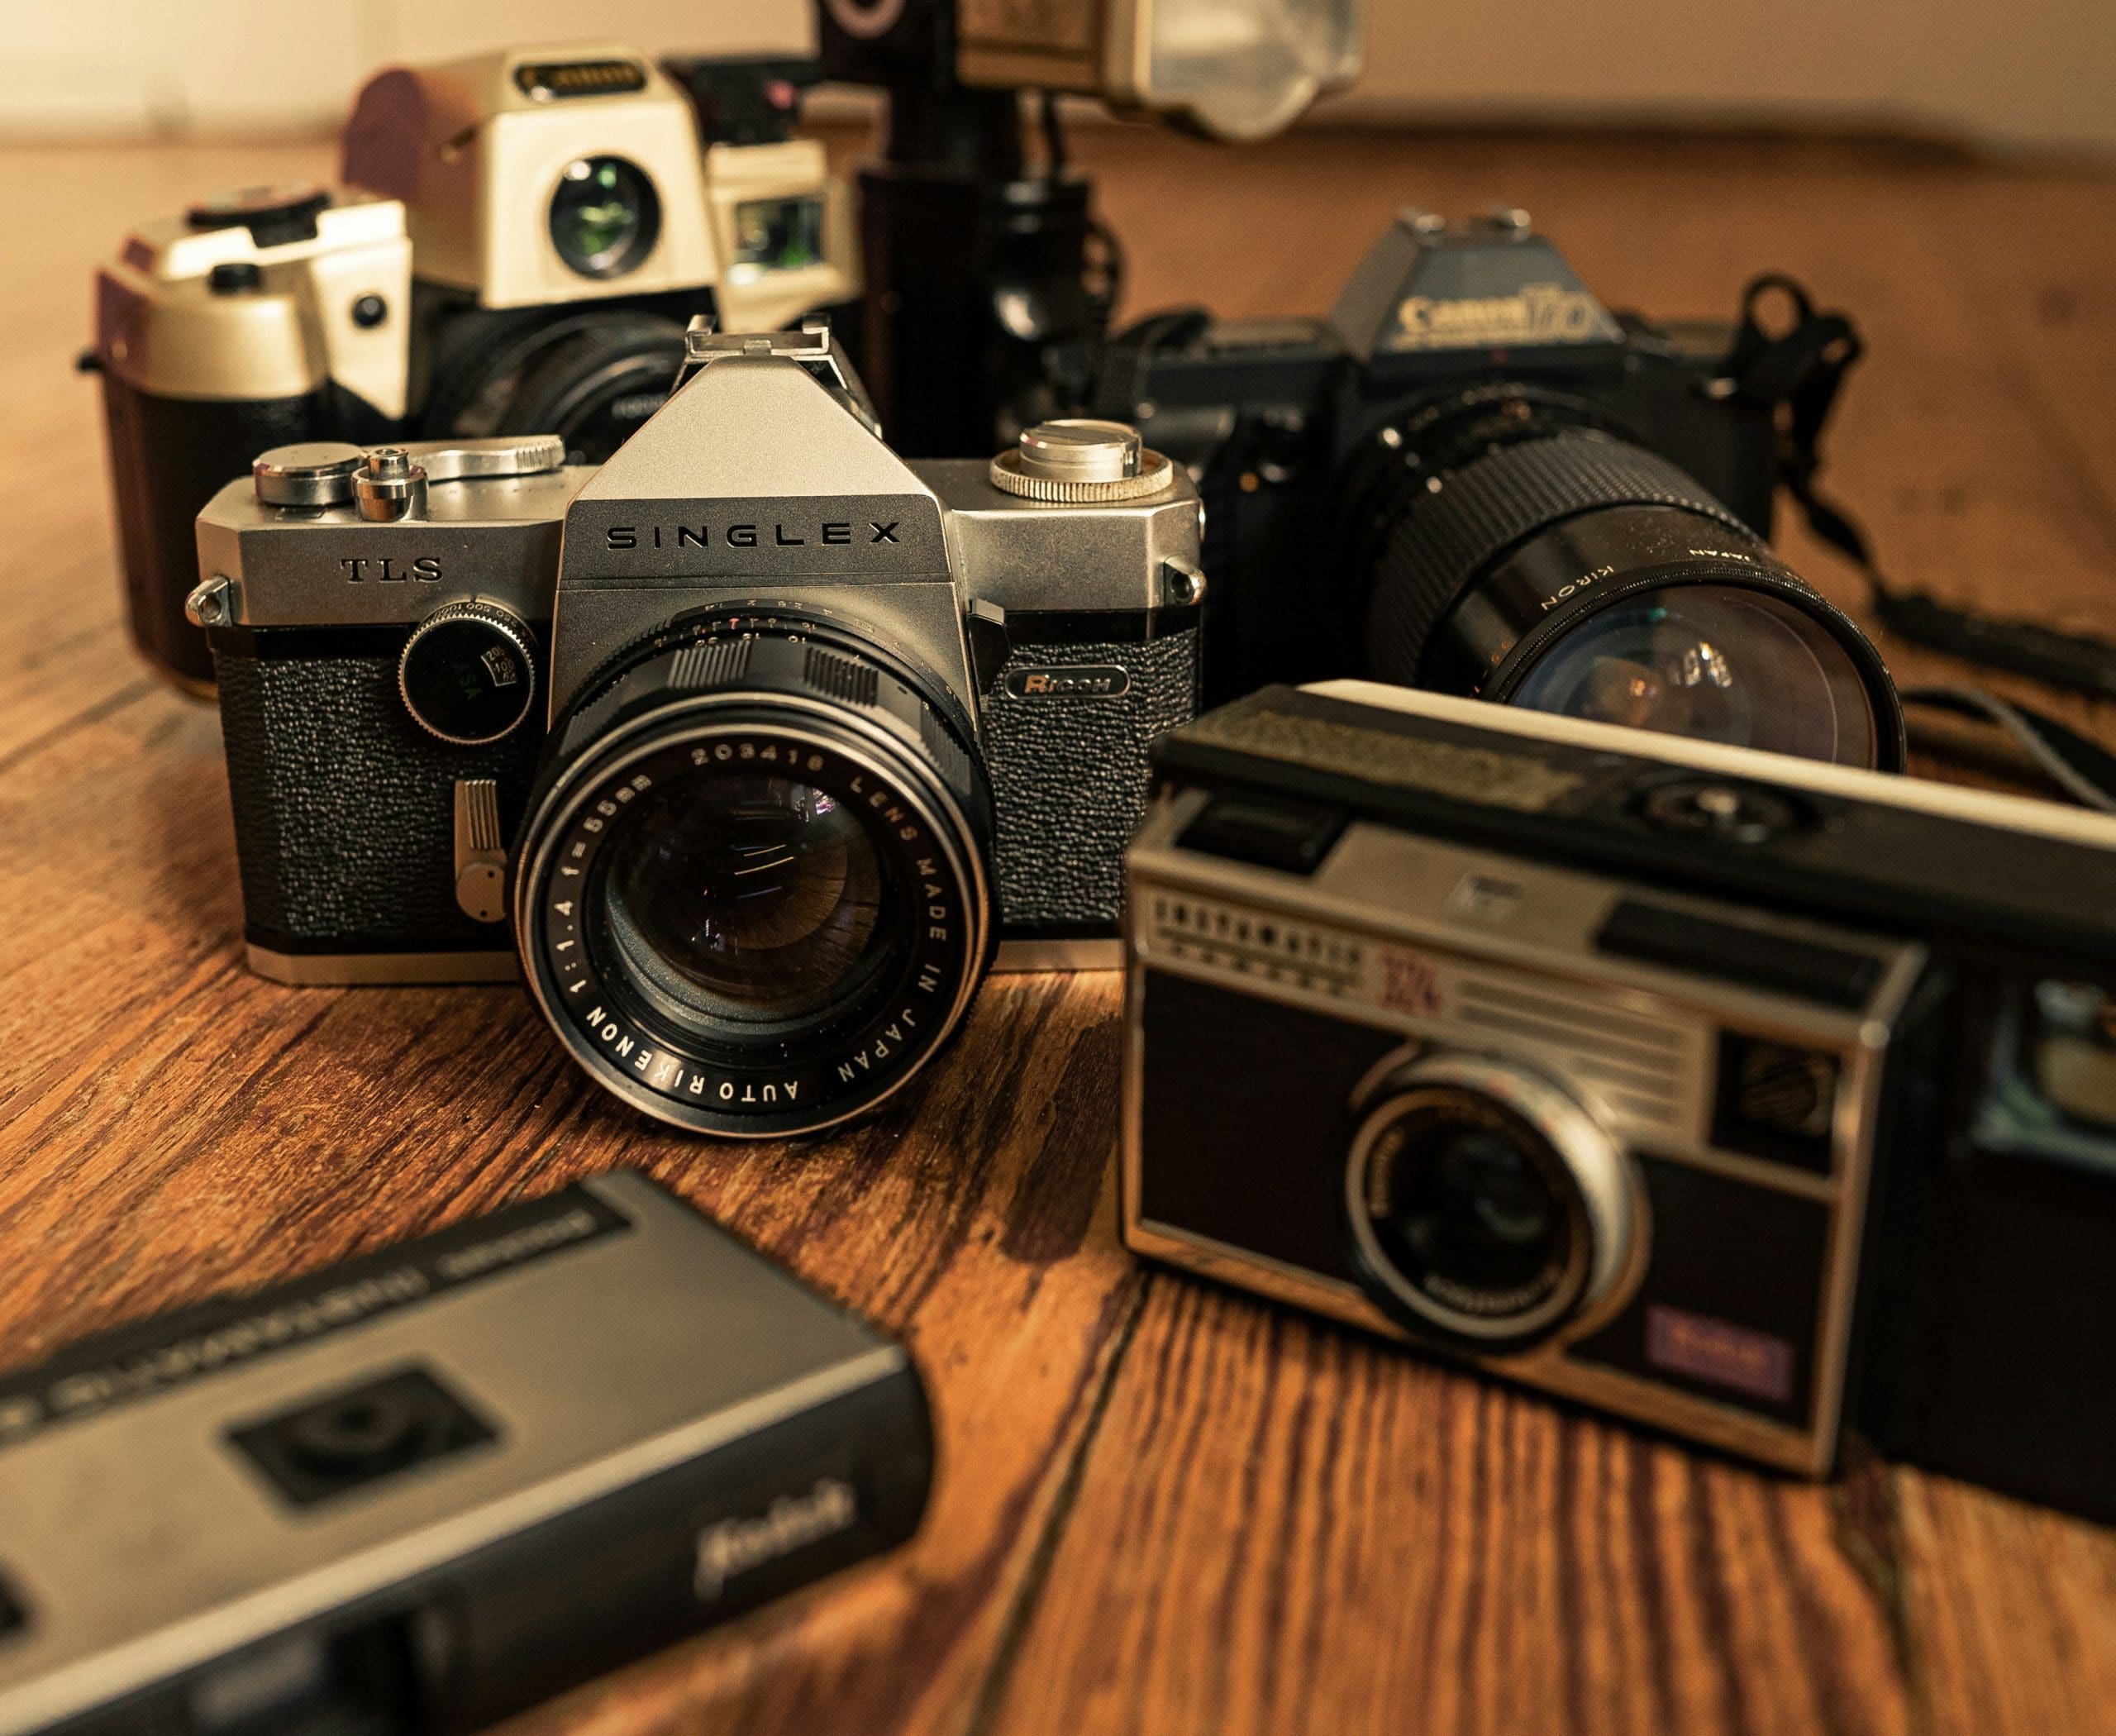
Stable Diffusion Project: Reviving Old Photos
Photo by Antonio Scant. Some rights reserved.
Overview
This tutorial is in three parts; they are
- Project Idea
- Superresolution
- Reconstruction
Project Idea
Let’s consider an old photo from the New York Public Library:
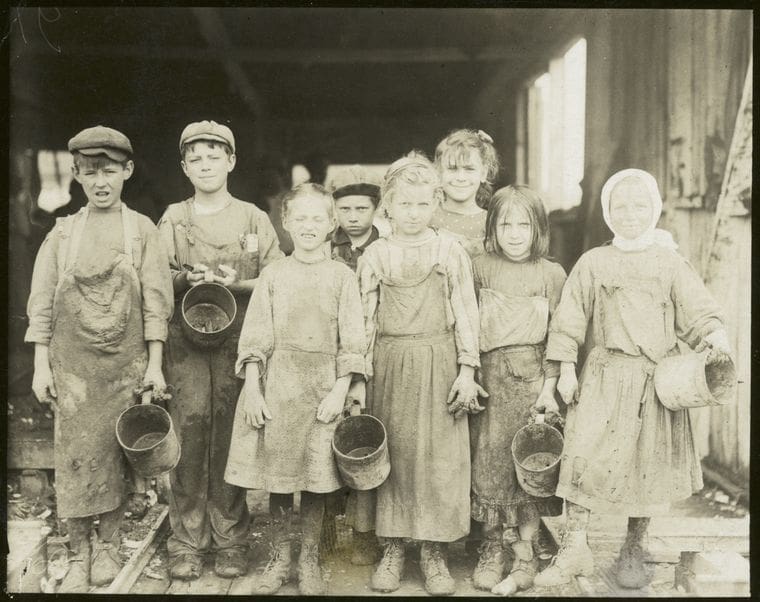
Photo of “Young oyster shuckers”. From NYPL Digital Collections.
If you download it, you will notice that the photo is at a low resolution. It has a little noise from film grain (not too obvious). And the photo is in black and white. The goal of this project is to make this into a high resolution color photo depicting the same people.
Superresolution
The original picture has a low resolution. Scaling up the resolution is called super-resolution, and multiple machine learning models have been developed for it.
The first step in processing an old photo is to perform superresolution. Usually, the old photo is in a low resolution, but that is not the reason. Even if the resolution is high (e.g., because you scan the old photo in high resolution), you may still want to downsample the photo and run superresolution for its side effect of removing noise and film grains.
At the Stable Diffusion Web UI, you can upload the photo to the “Extra” tab. This tab allows you to do many things but none is related to the diffusion process. Rather, it is to apply an image to various existing machine learning models. Here, you enable “Upscale” and set “Scale by” for a reasonable factor. For this particular photo, you can set the factor to 2. Then you should pick an upscaler, such as “R-ESRGAN 4x+”.
The next thing you can do on the Extra tab is CodeFormer. It is a model for fixing faces. Enable it and set the weight. A low weight gives CodeFormer more freedom to change the face, while a high weight tends to preserve the original facial expressions. The optimal weight should depend on the quality of the original photo. If there are more scratches or marks on the faces, you want a lower weight to allow for easier reconstruction.
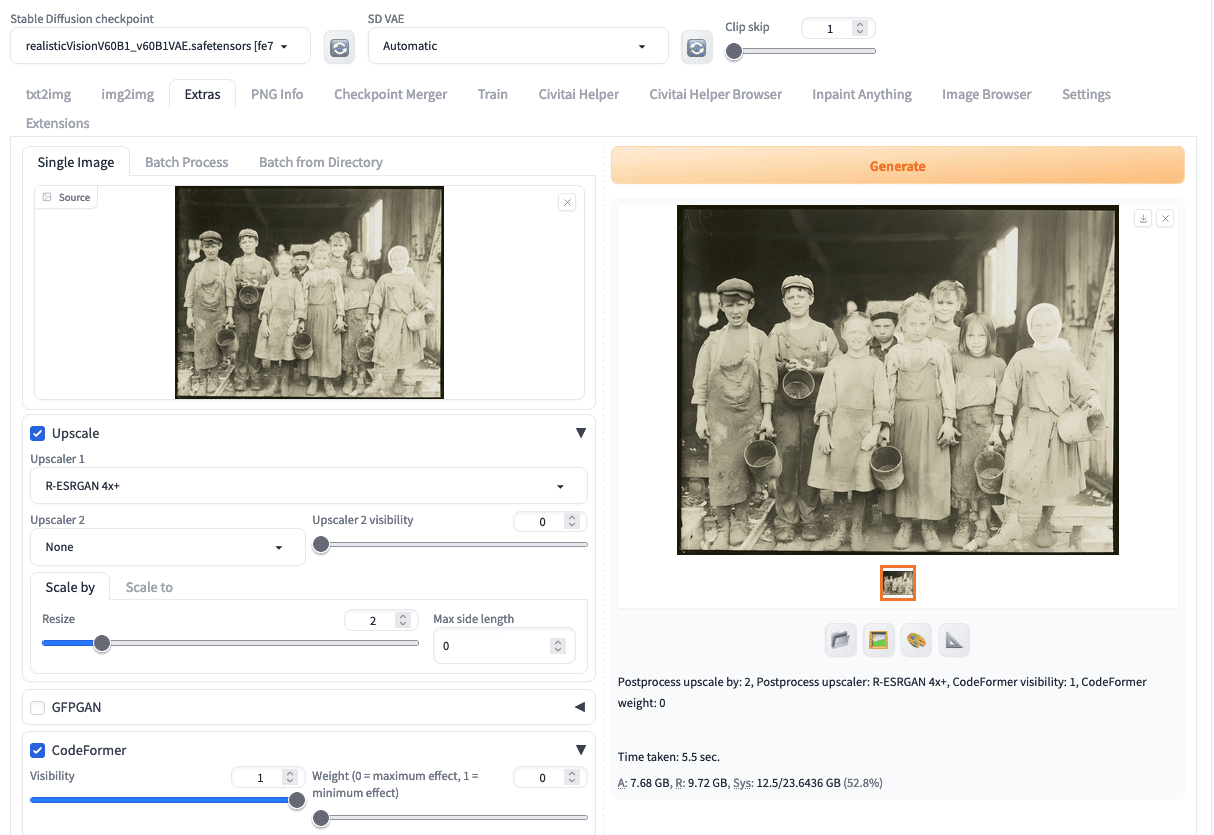
Superresolution is the first step in processing an old photo.
You should download the upscaled output for the next step.
Reconstruction
To reconstruct an old photo, you will use txt2img. You should not use img2img because providing the old photo as a starting point is imposing too much influence on the output, and you cannot see the correction that you are expecting.
But first, you should use img2img tab, upload the upscaled output, and click on the paper clip icon for the “CLIP interrogator”. This will auto-fill the positive prompt based on the uploaded image. You will construct your prompt at the txt2img tab based on the CLIP interrogator’s result.
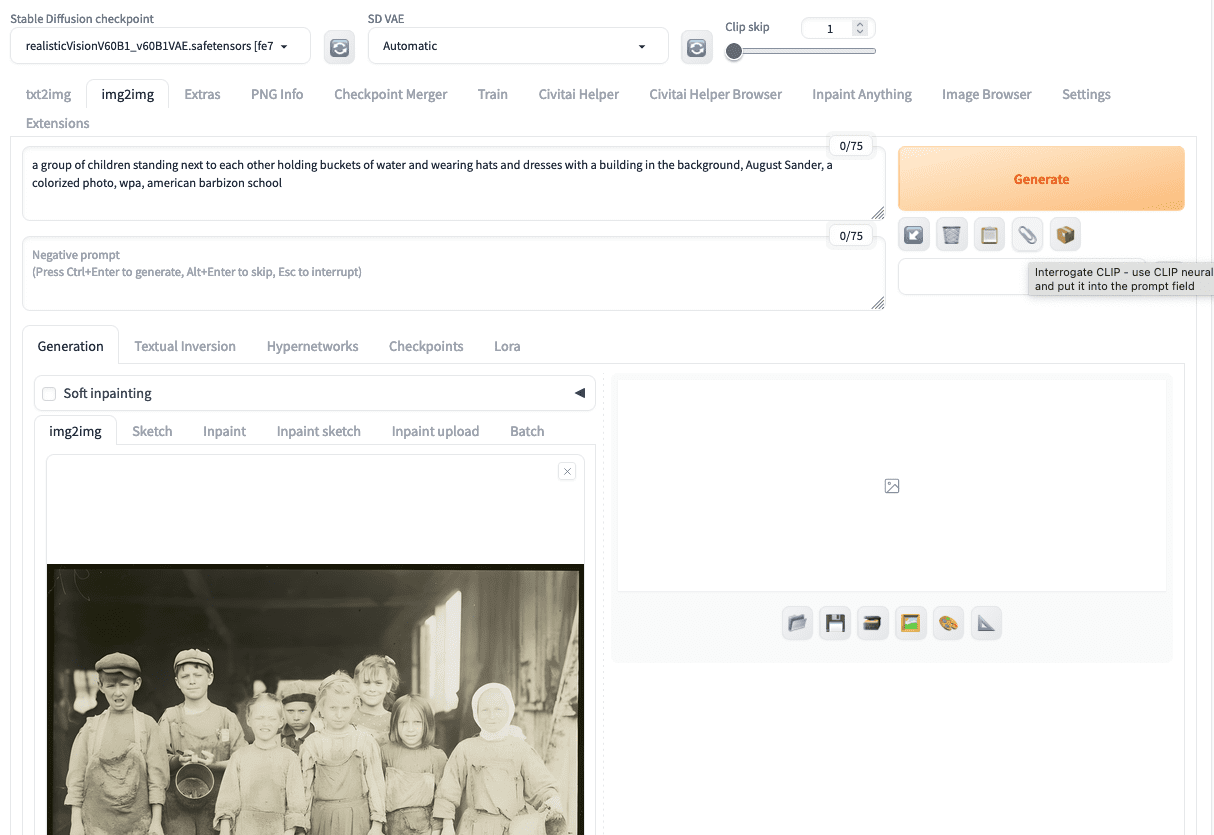
You can use CLIP interrogator from the img2img tab
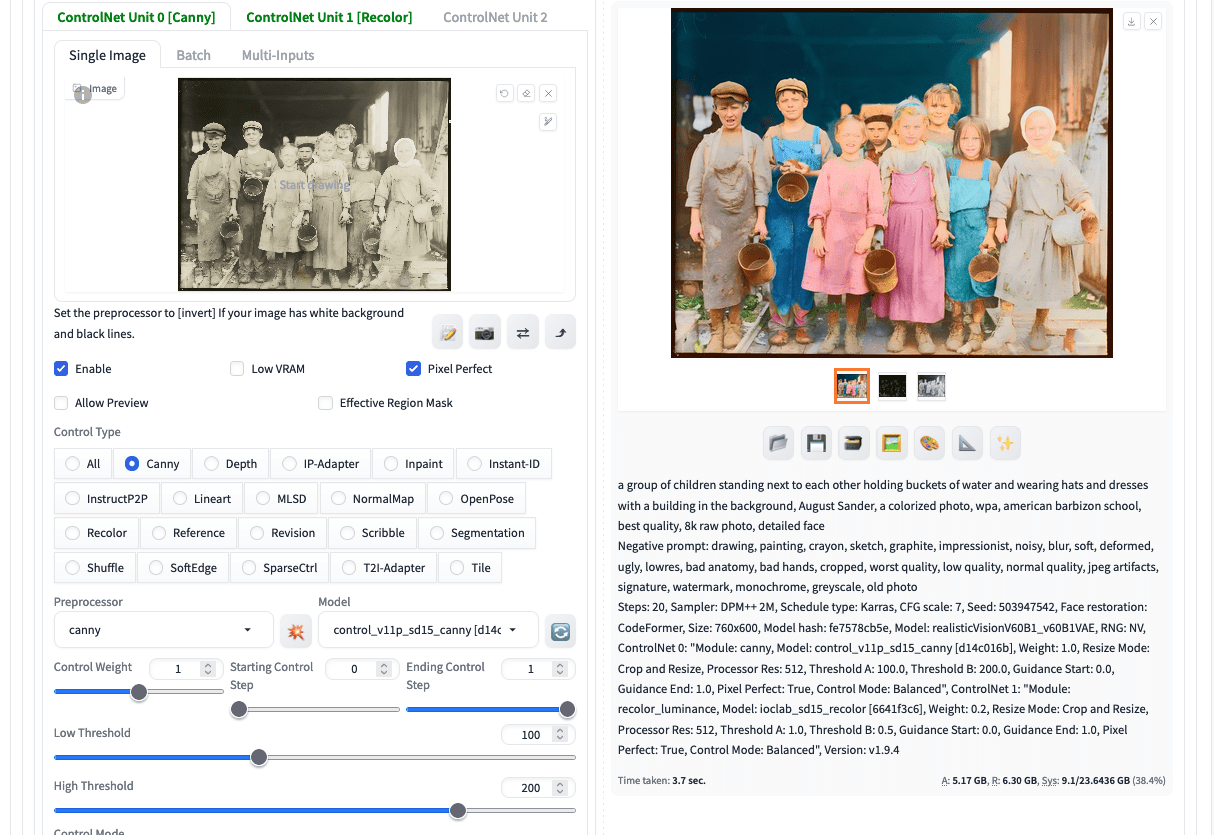
Now proceed to txt2img tab. Let’s use a SD1.5 model for photorealistic generation, such as Realistic Vision v6. Set the positive prompt, such as
a group of children standing next to each other holding buckets of water and wearing hats and dresses with a building in the background, August Sander, a colorized photo, wpa, american barbizon school, best quality, 8k raw photo, detailed face
The last few keywords are added to control the style in the output. You can use a boilerplate negative prompt, such as
drawing, painting, crayon, sketch, graphite, impressionist, noisy, blur, soft, deformed, ugly, lowres, bad anatomy, bad hands, cropped, worst quality, low quality, normal quality, jpeg artifacts, signature, watermark, monochrome, greyscale, old photo
The key for old photo reconstruction is to use ControlNet. You need two ControlNet units for the best result.
First upload the upscaled image to first ControlNet unit and set the type to be Canny. Remember to enable this unit and check “Pixel Perfect”. This helps the ControlNet preprocessor to use the optimal resolution. Set the first unit’s control weight to 0.8.
Then enable the second ControlNet unit. Upload the same image, turn on Pixel Perfect, and select the control type to be “Recolor”. This is a ControlNet model to color a black and white photo. You should use “recolor_luminance” model as preprocessor. Set the second unit’s control weight to 0.2. Optionally, you can adjust the Gamma correction if you need to fine-tune the output’s brightness.
Remember to set the output size in txt2img to an aspect ratio similar to the original and around the native resolution of your Stable Diffusion model. In this example, we use 760×600 pixels. Click generate, you will see the following:
An old photo colorized using Stable Diffusion
You can download the result. Let’s see what you get:
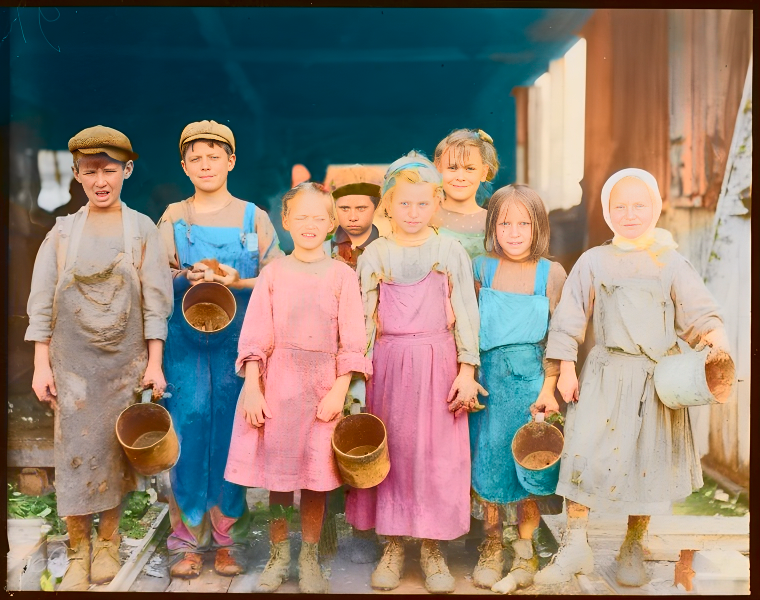
The reconstructed old photo.
This photo is a bit overexposed but you can see an old photo revived. All the details are preserved: All person’s facial expression are kept, the stains on the clothes they wore, and so on.
But how does it work? This is asking Stable Diffusion to redraw the photo. Hence, you need a prompt to guide the diffusion process of the draw. But to control precisely the shape and persons, you used the Canny type ControlNet to outline the drawing and ask the diffusion process to fit into the outline. However, this outline is not perfect because the Canny edge detection algorithm does not convert a picture into a line drawing. To lower the distortion, you use the second ControlNet unit to recolor the input photo based on brightness. All the original colors were ignored (and there were none), and colors were filled based on a machine learning model. However, you do not want those defects in the photo. Hence, you set a higher weight for Canny and a much lower weight for Recolor.
If you click the generate button again, you may see people wearing clothes of different colors. This is because the model is not confident about what color they should be wearing. You may want to describe their color in the prompt to control that. You can also try to turn off one of the ControlNet units and observe the result. The best result should only be obtained when both are working together.
Note about a photo with faces: If your original photo is in bad shape that the people’s faces are not very recognizable, you want to turn on ADetailer to reconstruct the faces. But do that only when necessary! Otherwise you may find your photo are depicting entirely different person.
In the above, the output was set to resolution 760×600. But you may want a higher resolution than the Stable Diffusion model can support. You can use the “Hires. fix” feature in txt2img to run an upscaler after the image is generated. The options are very similar to that in Extra tab. But remember to set the denoising strength in the upscaler to a low value (such as 0.2) because you do not want to impose additional distortion.
Further Readings
This section provides more resources on the topic if you want to go deeper.
- Lewis Wickes Hine Documentary Photographs, 1905-1938 in New York Public Library Digital Collections
- Relistic Vision model on Civitai and Hugging Face Hub
- OpenModelDB for Upscaling models
- ControlNet recolor model
- ControlNet canny model
Summary
In this post, you cleaned up an old photo. You removed the defects and colored a black-and-white photo, bringing the photo to the modern day. In the process, you used textual prompts to drive the diffusion process to generate pictures at the coarse level. Then you use ControlNet to fine tune the output. You controlled the atmosphere at a coarse level and preserved the detail at the fine level. Stable Diffusion is to fill the gap and rebuilt the photo.
")


")
No comments yet.