Stable Diffusion can generate an image based on your input. There are many models that are similar in architecture and pipeline, but their output can be quite different. There are many ways to adjust their behavior, such as when you give a prompt, the output will be in a certain style by default. LoRA is one technique that does not require you to recreate a large model. In this post, you will see how you can create a LoRA on your own.
After finishing this post, you will learn
- How to prepare and train a LoRA model
- How to use the trained LoRA in Python
Kick-start your project with my book Mastering Digital Art with Stable Diffusion. It provides self-study tutorials with working code.
Let’s get started.

Fine-tuning Stable Diffusion with LoRA
Photo by Thimo Pedersen. Some rights reserved.
Overview
This post is in three parts; they are
- Preparation for Training a LoRA
- Training a LoRA with Diffusers Library
- Using Your Trained LoRA
Preparation for Training a LoRA
We covered the idea of using LoRA in the Web UI in a previous post. If you want to create your own LoRA, a plugin in the Web UI allows you to do that, or you can create one using your own program. Since all training will be computationally intensive, be sure you have a machine with GPU to continue.
We will use the training script from the example directory of the diffusers library. Before you start, you have to set up the environment by installing the required Python libraries, using the following commands:
|
1 2 3 4 5 6 |
pip install git+https://github.com/huggingface/diffusers pip install accelerate wand pip install -r https://raw.githubusercontent.com/huggingface/diffusers/main/examples/text_to_image/requirements.txt accelerate config default # accelerate configuration saved at $HOME/.cache/huggingface/accelerate/default_config.yaml |
The first command is to install the diffusers library from GitHub, which will be the development version. This is required because you will use the training script from GitHub, hence you should use the matching version.
The last command above confirmed you have installed the accelerate library and detect what GPU you have on your computer. You have downloaded and installed many libraries. You can try to run the Python statements below to confirm that all are installed correctly and that you have no import error:
|
1 2 3 4 |
import wandb import torch from diffusers import StableDiffusionPipeline, DPMSolverMultistepScheduler, AutoPipelineForText2Image from huggingface_hub import model_info |
You will use the LoRA training script from the examples of diffusers. Let’s download the script first:
|
1 |
wget -q https://raw.githubusercontent.com/huggingface/diffusers/main/examples/text_to_image/train_text_to_image_lora.py |
Training a LoRA with Diffusers Library
For fine-tuning, you will be using the Pokémon BLIP captions with English and Chinese dataset on the base model runwayml/stable-diffusion-v1-5 (the official Stable Diffusion v1.5 model). You can adjust hyperparameters to suit your specific use case, but you can start with the following Linux shell commands.
|
1 2 3 4 5 6 7 8 9 10 11 12 13 14 15 16 17 18 19 20 21 22 23 24 25 26 |
export MODEL_NAME="runwayml/stable-diffusion-v1-5" export OUTPUT_DIR="./finetune_lora/pokemon" export HUB_MODEL_ID="pokemon-lora" export DATASET_NAME="svjack/pokemon-blip-captions-en-zh" mkdir -p $OUTPUT_DIR accelerate launch --mixed_precision="bf16" train_text_to_image_lora.py \ --pretrained_model_name_or_path=$MODEL_NAME \ --dataset_name=$DATASET_NAME \ --dataloader_num_workers=8 \ --resolution=512 \ --center_crop \ --random_flip \ --train_batch_size=1 \ --gradient_accumulation_steps=4 \ --max_train_steps=15000 \ --learning_rate=1e-04 \ --max_grad_norm=1 \ --lr_scheduler="cosine" \ --lr_warmup_steps=0 \ --output_dir=${OUTPUT_DIR} \ --checkpointing_steps=500 \ --caption_column="en_text" \ --validation_prompt="A pokemon with blue eyes." \ --seed=1337 |
Running this command will take hours to complete, even with a high-end GPU. But let’s look closer at what this does.
The accelerate command helps you to launch the training across multiple GPUs. It does no harm if you have just one. Many modern GPUs support the “Brain Float 16” floating point introduced by the Google Brain project. If it is supported, the option --mixed_precision="bf16" will save memory and run faster.
The command script downloads the dataset from the Hugging Face Hub and uses it to train a LoRA model. The batch size, training steps, learning rate, and so on are the hyperparameters for the training. The trained model will be checkpointed once every 500 steps to the output directory.
Training a LoRA requires a dataset with images (pixels) and corresponding captions (text). The caption text describes the image, and the trained LoRA will understand that these captions should mean those images. If you check out the dataset on Hugging Face Hub, you will see the caption name was en_text, and that is set to --caption_column above.
If you are providing your own dataset instead (e.g., manually create captions for the images you gathered), you should create a CSV file metadata.csv with first column named file_name and second column to be your text captions, like the following:
|
1 2 3 4 5 |
file_name,caption image_0.png,a drawing of a green pokemon with red eyes image_1.png,a green and yellow toy with a red nose image_2.png,a red and white ball with an angry look on its face ... |
and keep this CSV together with all your images (matching the file_name column) in the same directory, and use the directory name as your dataset name.
There will be many subdirectories and files created under the directory as assigned to OUTPUT_DIR in the script above. Each checkpoint will contain the full Stable Diffusion model weight, and extracted LoRA safetensors. Once you finish the training, you can delete all of them except the final LoRA file, pytorch_lora_weights.safetensors.
Using Your Trained LoRA
Running a Stable Diffusion pipeline with LoRA just require a small modification to your Python code. An example would be the following:
|
1 2 3 4 5 6 7 8 9 10 11 12 13 14 15 16 17 |
from diffusers import StableDiffusionPipeline, DPMSolverMultistepScheduler from huggingface_hub import model_info import torch # LoRA weights ~3 MB model_path = "pcuenq/pokemon-lora" info = model_info(model_path) model_base = info.cardData["base_model"] pipe = StableDiffusionPipeline.from_pretrained(model_base, torch_dtype=torch.float16) pipe.scheduler = DPMSolverMultistepScheduler.from_config(pipe.scheduler.config) pipe.unet.load_attn_procs(model_path) pipe.to("cuda") image = pipe("Green pokemon with menacing face", num_inference_steps=25).images[0] image.save("green_pokemon.png") |
The code above downloaded a LoRA from the Hugging Face Hub repository pcuenq/pokemon-lora and attach it to the pipeline using the line pipe.unet.load_attn_procs(model_path). The rest is just as usual. The image generated may look like the following:
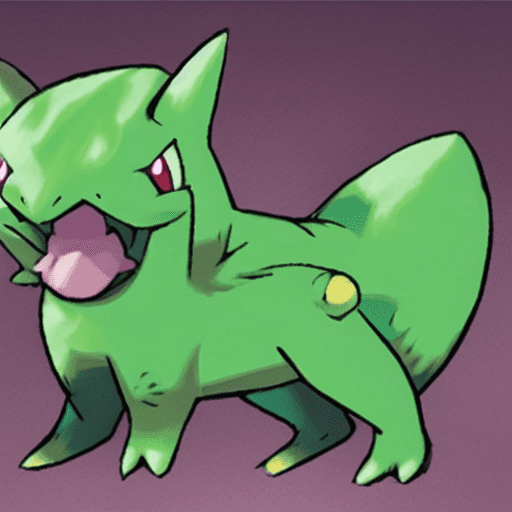
Green pokemon as generated
This is the more verbose way of using the LoRA since you have to know that this particular LoRA should be loaded to the attention process of the pipeline’s unet part. Such details should be found in the model card in the repository.
An easier way of using the LoRA would be to use the auto pipeline, from which the model architecture is inferred from the model file:
|
1 2 3 4 5 6 7 8 9 |
from diffusers import AutoPipelineForText2Image import torch pipeline = AutoPipelineForText2Image.from_pretrained("runwayml/stable-diffusion-v1-5", torch_dtype=torch.float16 ).to("cuda") pipeline.load_lora_weights("finetune_lora/pokemon", weight_name="pytorch_lora_weights.safetensors") image = pipeline("A pokemon with blue eyes").images[0] |
The parameters to load_lora_weights() is the directory name and the file name to your trained LoRA file. This works for other LoRA files, such as those you downloaded from Civitai.
Further Reading
This section provides more resources on the topic if you want to go deeper.
- LoRA training: https://huggingface.co/docs/diffusers/en/training/lora
- Stable Diffusion text2image pipeline: https://huggingface.co/docs/diffusers/v0.29.0/en/api/pipelines/stable_diffusion/text2img
Summary
In this post, you saw how to create your own LoRA model, given a set of images and the description text. This is a time-consuming process, but the result is that you have a small weight file that can modify the behavior of the diffusion model. You learned how to run the training of LoRA using diffusers library. You also saw how to use a LoRA weight in your Stable Diffusion pipeline code.
Get Started on Mastering Digital Art with Stable Diffusion!

Learn how to make Stable Diffusion work for you
...by learning some key elements in the image generation process
Discover how in my new Ebook:
Mastering Digital Art with Stable Diffusion
This book offers self-study tutorials complete with all the working code in Python, guiding you from a novice to an expert in image generation. It teaches you how to set up Stable Diffusion, fine-tune models, automate workflows, adjust key parameters, and much more...all to help you create stunning digital art.

")
")


Great Artical. Thanks for sharing.
I have question about Stable Diffusion with LoRA. It trained based only one subject. Can I know if, when we have 5 pictures for each of two different persons (P1 and P2), using Stable Diffusion with lora, we need to generate a image of P1 person in a different background, a new P2 person in a different background, and both P1 and P2 in the same image with a different background?
Can I do it one model(Stable Diffusion with LoRA)
Do I need to create 3 models for that task?
Thank you
Hi Lahiru…Using Stable Diffusion with LoRA (Low-Rank Adaptation) to generate images with multiple subjects in different backgrounds is a flexible approach. Here’s how you can handle this task:
### Single Model Approach
You can use one model to handle all these tasks by training it to recognize both subjects and different backgrounds. Here’s a suggested approach:
1. **Data Preparation**:
– Prepare a dataset with images of person P1 in various backgrounds.
– Prepare a dataset with images of person P2 in various backgrounds.
– Prepare combined images of both P1 and P2 in different backgrounds.
2. **Training the Model**:
– Use LoRA to fine-tune the Stable Diffusion model on this combined dataset.
– Ensure that the model learns to differentiate between P1 and P2 as well as various backgrounds.
3. **Generating Images**:
– To generate images of P1 in different backgrounds, use prompts that specify P1 and the desired background.
– To generate images of P2 in different backgrounds, use prompts that specify P2 and the desired background.
– To generate images of both P1 and P2 together in different backgrounds, use prompts that specify both subjects and the desired background.
### Multiple Models Approach
Alternatively, you can use separate models if you want to have more specialized control over each type of generation. Here’s how:
1. **Model for P1 in Different Backgrounds**:
– Train a model specifically on images of P1 in various backgrounds using LoRA.
2. **Model for P2 in Different Backgrounds**:
– Train another model specifically on images of P2 in various backgrounds using LoRA.
3. **Model for P1 and P2 Together in Different Backgrounds**:
– Train a third model on images that include both P1 and P2 in various backgrounds using LoRA.
### Comparison
– **Single Model Approach**:
– Pros: More flexible, single model handles all cases.
– Cons: May require more extensive training and a more complex dataset.
– **Multiple Models Approach**:
– Pros: More specialized models can be more accurate for their specific tasks.
– Cons: Requires training and maintaining multiple models.
### Implementation Steps for Single Model Approach
1. **Prepare Data**:
– Collect and preprocess images of P1 and P2 in different backgrounds.
– Ensure variety in the dataset to help the model generalize well.
2. **Train the Model**:
pythonfrom diffusers import StableDiffusionPipeline
import torch
model_id = "CompVis/stable-diffusion-v1-4"
pipe = StableDiffusionPipeline.from_pretrained(model_id, torch_dtype=torch.float16).to("cuda")
# Implement LoRA training here on combined dataset of P1 and P2
# Example training code
3. **Generate Images**:
– For P1 in different backgrounds:
python

     prompt = "A photo of P1 in a sunny beach background"

     image = pipe(prompt).images[0]

     image.show()
– For P2 in different backgrounds:
python

     prompt = "A photo of P2 in a city park background"

     image = pipe(prompt).images[0]

     image.show()
– For both P1 and P2 in a different background:
python

     prompt = "A photo of P1 and P2 together in a snowy mountain background"

     image = pipe(prompt).images[0]

     image.show()
By training the model with appropriate prompts and data, you can achieve the desired image generation tasks with a single model.
Hi James, Can you please help me with the preparation of the training set for multiple classes or objects, I mean the folder structure. Thank you
Hi Shashank…What specific questions do you have that I may help you with?
Hi James… So, let’s say I want to finetune Stable Diffusion on Multiple objects / Images. What I know is I can have one folder say image-folder with all the dog images and a json file which instance_prompt for example “A photo of xyz dog” Correct. Now lets I have to train for product A, B, C …so on then How will I prepare the data. Thanks