
Stable Diffusion is a powerful tool that helps you generate pictures. It is fun to play with the generative AI tool. But it would be useful if the tool could help you in a real job. In this post, you will see how you can leverage the power of Stable Diffusion to work on something realistic and practical. After finishing this post, you will learn:
- The reasoning process to decide how to use Stable Diffusion
- Augmenting other tools with Stable Diffusion in your creative project
Let’s get started

Stable Diffusion Project: Word Art
Photo by Zach Key. Some rights reserved.
Overview
This post is in three parts; they are:
- Project Idea
- Creating the Picture
- Same Idea on a Different Theme
Project Idea
Imagine you are working on a project and need some word art. It can be a banner for your website or the key visual in a poster. Words should be seen, but graphics are also important. How can you blend letters into pictures? You want to make the result very appealing, not at the level that you can easily create with Photoshop or Microsoft Word.
Let’s consider the theme of “green” to conserve the environment. We want a picture of the nature and the word “green”. Let’s see how it can be created.
Creating the Picture
It is easy to create a scene of nature with an appropriate prompt in Stable Diffusion. Overlaying text onto a picture should not be too difficult because you can easily add text with a drop shadow to a picture background in PowerPoint. But making the scene blend with the text would need some skill, even with Photoshop, and it takes a significant amount of time, too.
The idea of providing a prompt to control the picture generation but at the same time imposing additional constraints on the picture is what ControlNet can do. To use ControlNet, you need an image. Let’s create one with GIMP.
Assume the target picture is 768×512 pixels (remember the default resolution for SD1 models is 512×512 pixels; you shouldn’t make the size too different). You can set up the canvas to this size in GIMP and make a text “GREEN” in black color on a white background. Then save the picture as PNG.
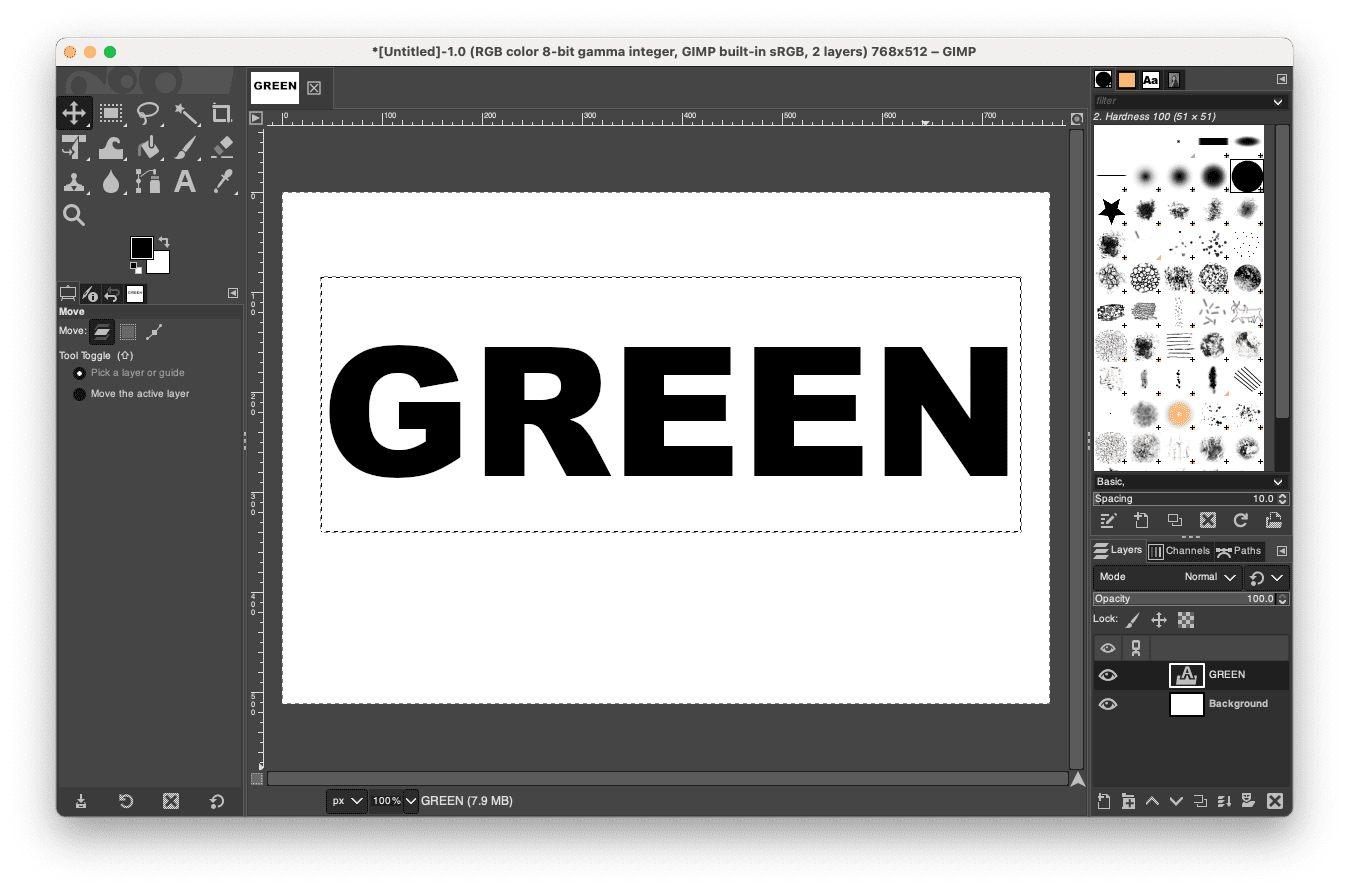
Creating a picture with white background and black text “GREEN”.
Note that you are not mandatory to use GIMP to create such picture. You can also type the text on Microsoft Word and make a screenshot. The only problem with this approach is that you are not easy to control the resolution.
Let’s go to the Stable Diffusion Web UI. You should use “text2img” function and pick a Stable Diffusion 1.x model (such as Deliberate_v6). Because we want to generate a nature scene, you can set the prompt:
nature scene of a forest, highly detailed, epic
and keep the negative prompt empty. Set the image size to 768 pixels in width and 512 pixels in height. With such a prompt (and depends on the model you choose, the CFG scale, and the sampler), you can generate a picture like the follows:
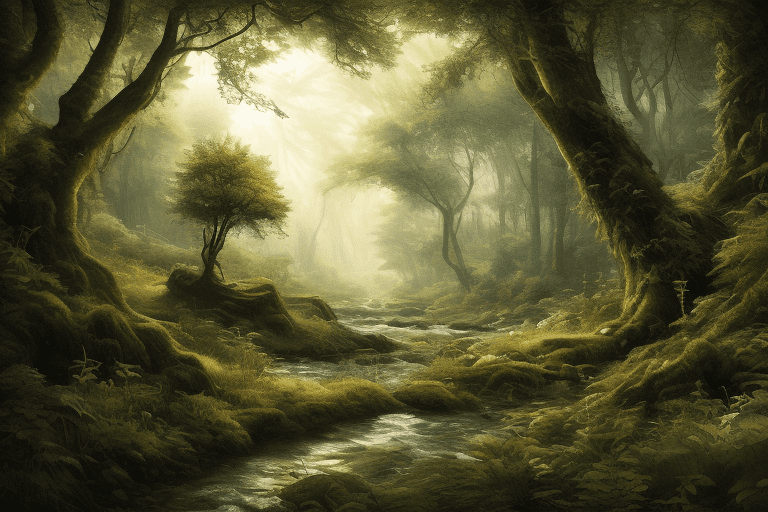
A picture of forest. Generated using Stable Diffusion by the author.
It looks nice. Now you confirmed the prompt works and the output meets what you expected. Let’s move on to ControlNet. Enable the ControlNet, and upload the picture that you created with GIMP. Set the “Control Type” to “All”, then at the preprocessor, select “invert (from white bg & black line)” and the model select a depth model (e.g., “control_v11f1p_sd15_depth”). Then click generate and see how this works. You may see the result as follows:
A picture generated with bad blending of text to its background.
The text “GREEN” does not seem to blend into the picture. The text has some texture, but it is still awkwardly imposed on the picture. This is because you have not used the ControlNet right. This is the result when ControlNet drove the picture generation for too long. You can tune down the importance of ControlNet with a control weight of 0.7 instead of 1.0. But most importantly, you want the ControlNet to be involved only for the first 60% of the steps in the diffusion process. In this way, the latter 40% of the steps use only your prompt, but the outline of the picture has already been established.
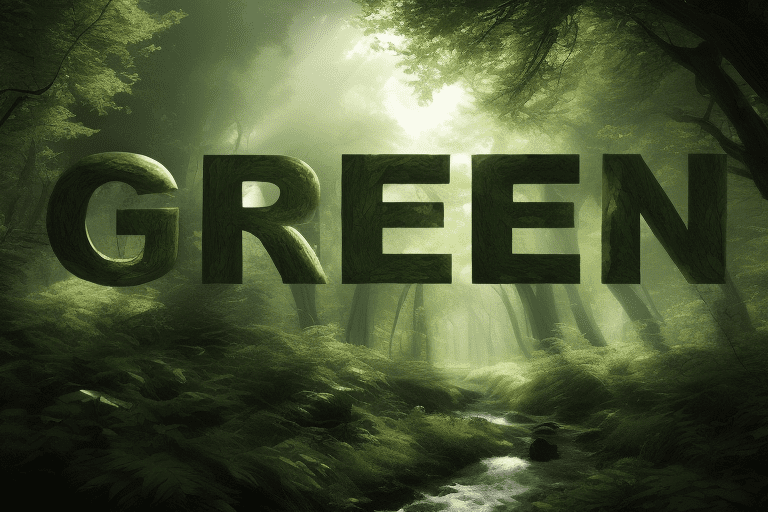
Just with this change, you should see a better blending of the text and the picture. But sometimes, you may see the text distorted because you gave too much freedom for the diffusion process to change your picture at the last 40% of the steps. It will be difficult to control, but you can set a larger batch size or generate multiple batches to check your luck with multiple random seeds. The following is an example of what you can get:
Word art generated by Stable Diffusion that text blended nicely into background.
This picture is using a CFG scale of 5 on the “Euler a” sampler with Karras schedule on 25 steps. ControlNet has weight of 0.7 with starting control step 0 and ending control step 0.6. Half of the pictures generated will have some letters malformed, but this is one of the best from the other half. You can see how the trees formed the letters. You will take a long time to draw such an effect with Photoshop.
Same Idea on a Different Theme
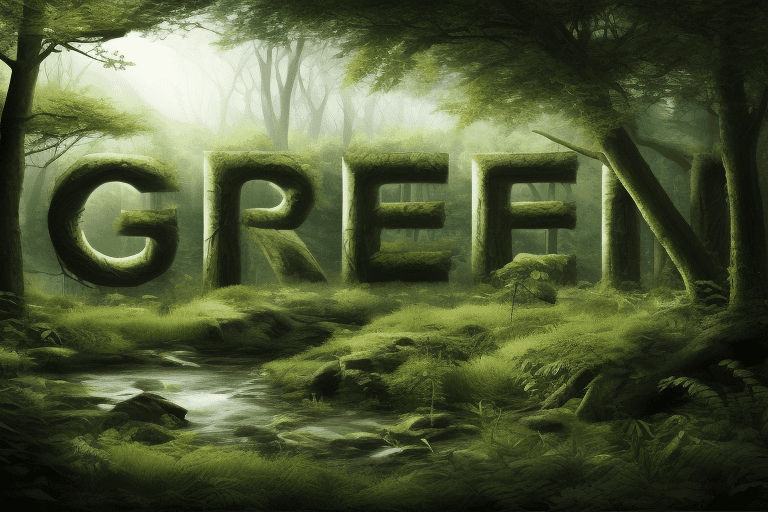
“Green” is not always about nature. With a different prompt but keeping all other parameters the same, you can get a different picture. Let’s “go green” and promote eating vegetables. By just changing the prompt to
vegatables on kitchen table
You can get the following picture:
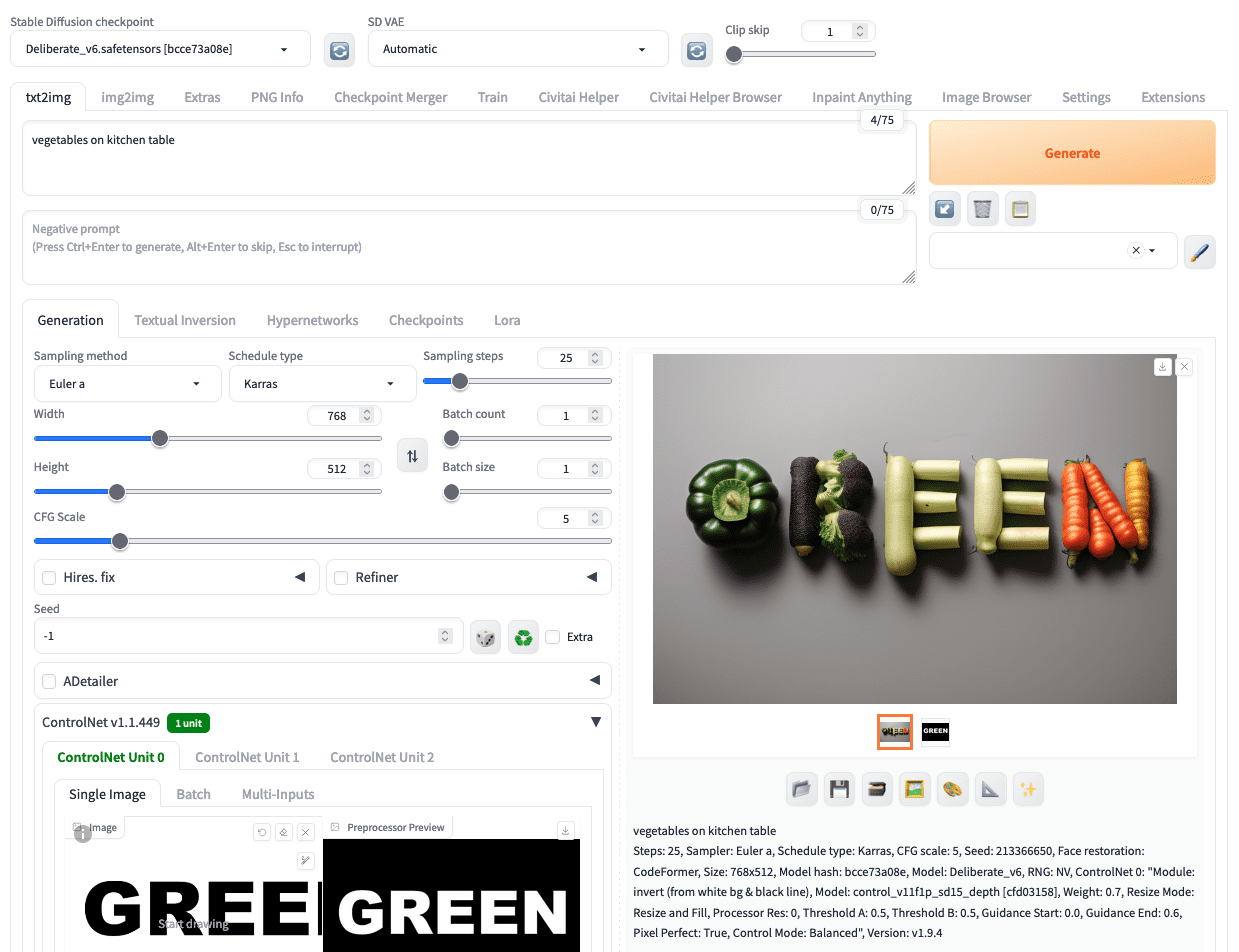
Reusing the same template to generate a different picture in Stable Diffusion.
This is, in fact, the lesson you should learn on how to use Stable Diffusion effectively: By experimenting with different parameters and find the best, you can easily tweak the workflow a bit to create a totally new picture with the same high quality result.
Further Readings
This section provides more resources on the topic if you want to go deeper.
- ControlNet on GitHub
- Adding Conditional Control to Text-to-Image Diffusion Models by Zhang et al (2023)
- Deliberate model on Hugging Face
Summary
In this post, you have seen how to create a word art picture that blended text into the background naturally. The result is appealing and it is not easy to create manually by drawing. However, you can quickly produce such detailed result using Stable Diffusion with ControlNet plugin.


")
was looking for exactly something like this today.
have you seen the ones that are similar to this, but they use like a spiral for the controlnet image, or hide a word in the composition of the image, it’s similar to this but the shapes are slightly more incorporated usually.
do you happen to know how that’s achieved? I’ve tried with the QR code model but with very little success, but I’ve had it work in the past but can’t seem to get back. feel free to email me if you’ve already covered this topic.