

Image created by Editor using Midjourney
Today’s digital landscape has never been so diverse. Every individual and company selects their preferred tools and operating systems, creating a diverse technological system. However, this diversity often leads to compatibility issues, making it hard to ensure application performance across different environments.
This is where Docker plays a key role as an indispensable tool for application development and deployment. Docker enables us to package any application within a container, building all its dependencies and isolating them from the host operating system. This isolation is precisely its best property – it ensures that the application runs consistently, regardless of where it is deployed.
This article aims to be a beginner’s guide to the Docker world. So let’s explore it together.
Why Use Docker?
Docker shines in its ability to run applications consistently on any hardware. By containerizing your application, you create a portable and reproducible environment that can be deployed anywhere, eliminating the classic “it works on my machine” problem.
To understand Docker, there are three basic concepts:
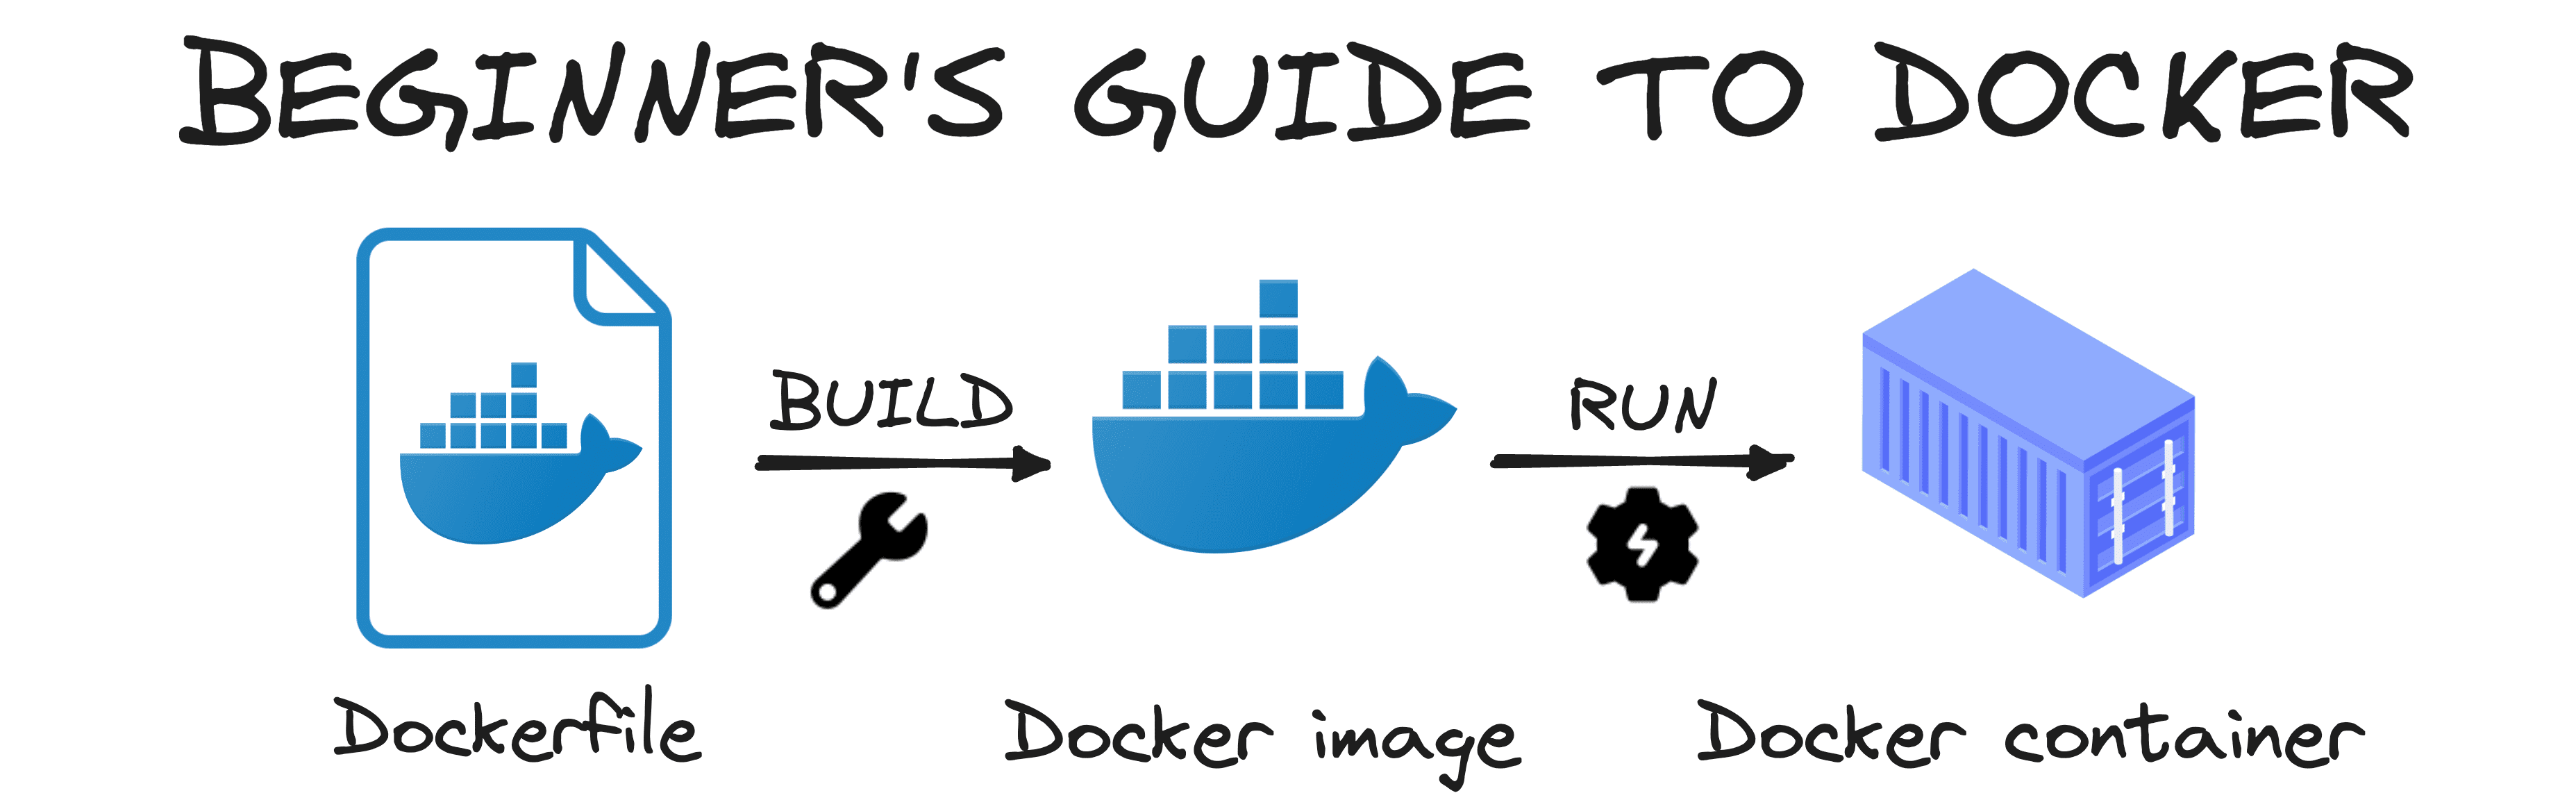
Image by Author
- Docker file: It is a script containing a set of instructions on how to build an image.
- Docker image: It is a template for running applications created from the Docker file. It serves to launch containers.
- Docker container: A running instance of the Docker image. It is a lightweight, stand-alone, and executable software package that includes everything needed to run your application.
To put it simply, a Dockerfile defines the steps to create a Docker image, which acts as a template for initiating processes known as containers.
Easy, right?
Now let’s learn how to perform this process with our own application.
Installing Docker
To begin with Docker, you’ll need to install it on your machine. Docker provides installation packages for different operating systems, including Windows, macOS, and various Linux distributions.
You can follow the installation guides available on the Docker website to set up Docker on your system, it is quite easy to install. Once it is installed, you will have the docker hub on your local machine.
Docker Basics
To dockerize an app we always start with a dockerfile in our environment. This file describes the environment in which your application runs and the steps to build it.
Let’s imagine we have a simple application that first asks the user for a number and then returns its squared number. I know this application is quite simple, but it is perfect to understand how Docker works.
|
1 2 3 4 5 6 7 8 |
import numpy as np def calculate_square_root(number): return np.sqrt(number) if __name__ == "__main__": number = float(input("Enter a number to calculate its square root: ")) print(f"The square root of {number} is {calculate_square_root(number)}") |
When setting up this application, the first thing we need to know is that it runs on Python. So, wherever we deploy it, Python must be our base image.
Moreover, this app also relies on NumPy. As NumPy isn’t a default Python library, we need to ensure it’s available whenever the app runs. In summary, there are two main dependencies:
- Base image: Python
- Dependency: NumPy
Even though it is not necessary, it is a good practice to always have a requirements.txt with all the libraries that our script requires. In this case, we would only add the numpy library.
So now, let’s understand how to containerize this script:
Step 1 – Define the dockerfile
To define a Dockerfile, it’s important to understand the structure of your application. Typically, I place the Dockerfile at the same level as my main script and the requirements.txt file. However, for more complex applications, you might need to organise your files into different directories. In such cases, it’s crucial to consider these directory levels when specifying file locations in the Dockerfile.
|
1 2 3 4 5 6 7 8 9 10 11 12 13 14 |
# Use the official Python image from the Docker Hub FROM python:3.9-slim # Set the working directory WORKDIR /app # Copy the requirements and main script into the container COPY requirements.txt main.py ./ # Install the dependencies RUN pip install --no-cache-dir -r requirements.txt # Set the entry point to run the Python script ENTRYPOINT ["python", "main.py"] |
In this Dockerfile:
- “FROM python:3.9-slim”: This line specifies the base image, in this case, Python 3.9, which Docker pulls from Docker Hub.
- “ADD requirements.txt and main.py .” : This command adds the main.py file to the container.
- “RUN pip install requests”: This installs the requests library inside the container.
- “ENTRYPOINT [“python”, “./main.py”]”: This command runs the application.
Each line in a Dockerfile represents a layer, and to optimise processing, Docker caches layers that remain unchanged. This means that to leverage this caching mechanism, it’s best to place layers that change infrequently at the beginning of the Dockerfile.
This way, Docker can reuse these cached layers, speeding up the build process.
Now that we already have the Dockerfile, we need to run our local docker hub and proceed to the second step.
Step 2 – Building and Running Docker Images
Once you have your Dockerfile ready, you can build and run your Docker image by executing the following command on your terminal.
|
1 |
docker build -t app-name . |
In this command:
- “-t my-python-app” : Tags the image with the name my-python-app.
- “.” : Indicates the current directory as the build context.
If you check your docker hub, a new image will appear under the name you used in the previous command. In my case, I called it sqrt-calculator.
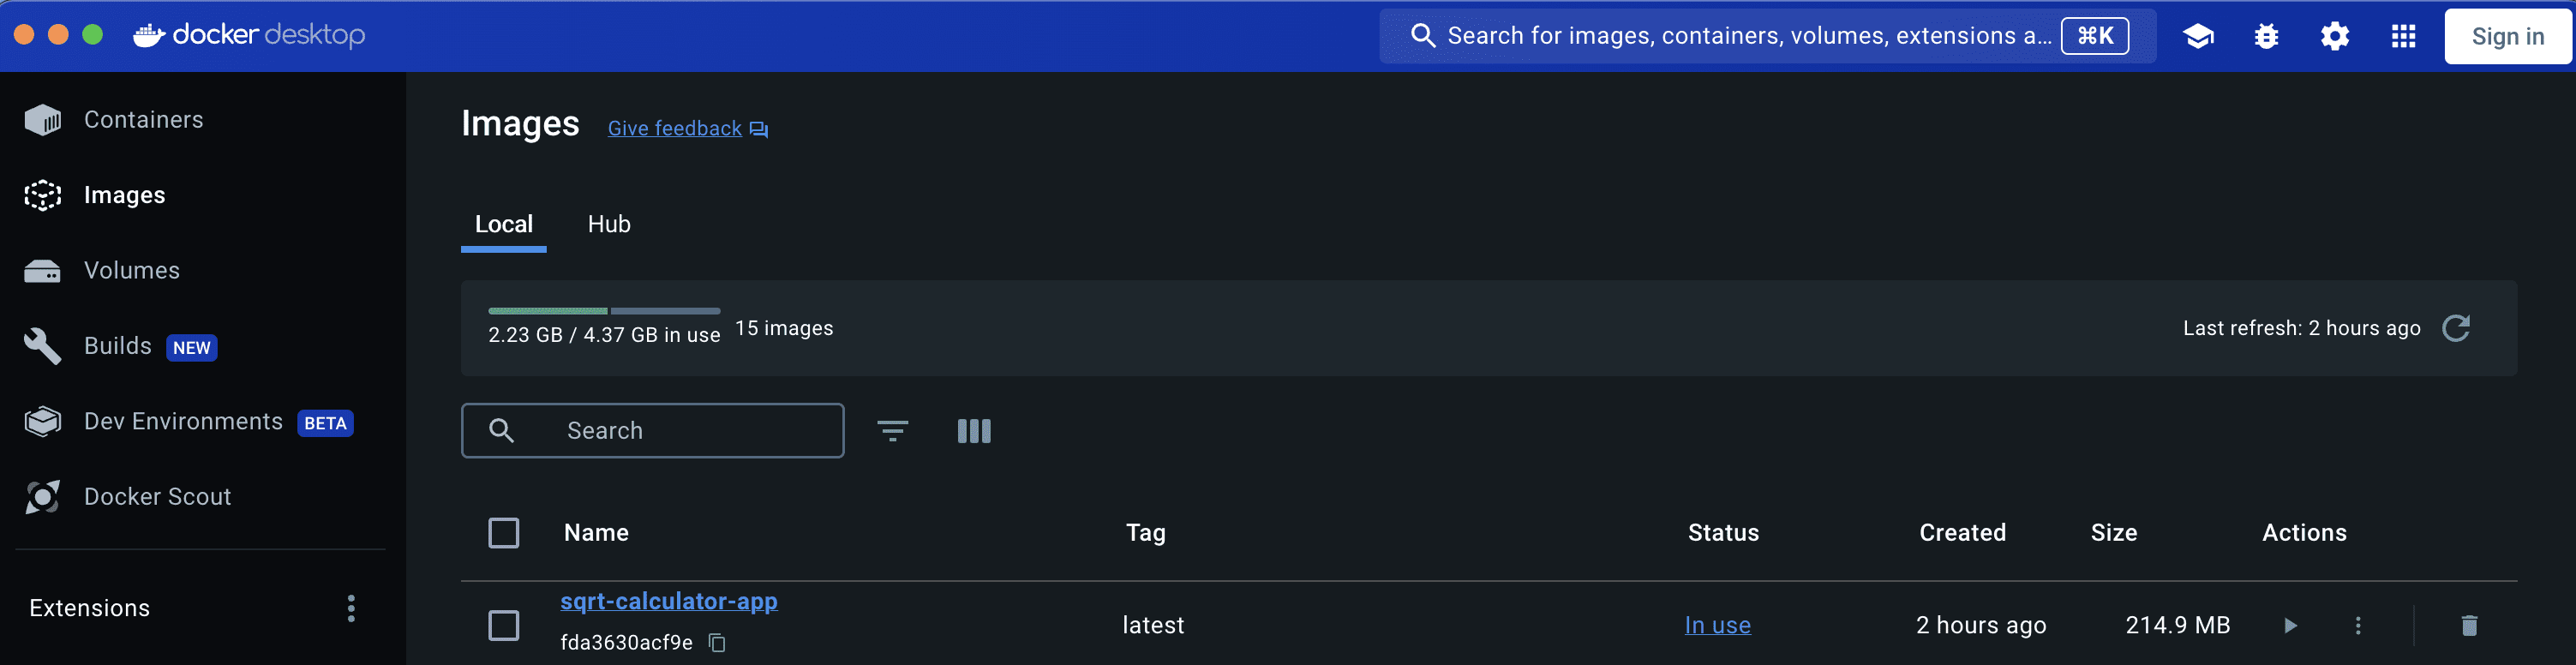
Screenshot of the Docker Desktop Interface
Step 3 – Running the Docker Container
To run the Docker image you’ve just created, use the following command in the terminal:
|
1 |
docker run app-name |
This command starts a container from the my-python-app image and runs the application. Although the necessary libraries are not installed in your local environment, you can still execute the code within the Docker container, as it includes all the dependencies needed for the application.
In Brief
- Docker’s Role and Importance: Docker addresses compatibility issues in a diverse technological environment by containerizing applications and ensuring consistent performance across different systems.
- Core Components: A Dockerfile contains instructions to build a Docker image, which serves as a template to run containers. Containers are instances that package everything needed to run the application.
- Building and Running Containers: To use Docker, create a Dockerfile defining your application’s environment and dependencies, build the Docker image with docker build -t app-name ., and run the container with docker run app-name, allowing your application to run consistently regardless of local library installations.
If you want to check my code, you can find it in the following GitHub repo.
Get Started on The Beginner's Guide to Data Science!

Learn the mindset to become successful in data science projects
...using only minimal math and statistics, acquire your skill through short examples in Python
Discover how in my new Ebook:
The Beginner's Guide to Data Science
It provides self-study tutorials with all working code in Python to turn you from a novice to an expert. It shows you how to find outliers, confirm the normality of data, find correlated features, handle skewness, check hypotheses, and much more...all to support you in creating a narrative from a dataset.

")


Hi Josep,
Nice work. One typo, “docker build -t app-name .” should be “docker build -t my-python-app .”
How did you know the base image to be used for Python?
Lucian