A popular demonstration of the capability of deep learning techniques is object recognition in image data.
The “hello world” of object recognition for machine learning and deep learning is the MNIST dataset for handwritten digit recognition.
In this post, you will discover how to develop a deep learning model to achieve near state-of-the-art performance on the MNIST handwritten digit recognition task in Python using the Keras deep learning library.
After completing this tutorial, you will know:
How to load the MNIST dataset in Keras
How to develop and evaluate a baseline neural network model for the MNIST problem
How to implement and evaluate a simple Convolutional Neural Network for MNIST
How to implement a close to state-of-the-art deep learning model for MNIST
Kick-start your project with my new book Deep Learning With Python, including step-by-step tutorials and the Python source code files for all examples.
Let’s get started.
Jun/2016: First published
Update Oct/2016: Updated for Keras 1.1.0, TensorFlow 0.10.0 and scikit-learn v0.18
Update Mar/2017: Updated for Keras 2.0.2, TensorFlow 1.0.1 and Theano 0.9.0
Update Sep/2019: Updated for Keras 2.2.5 API
Update Jul/2022: Updated for TensorFlow 2.x API
Note, for an extended version of this tutorial, see:
Handwritten digit recognition using convolutional neural networks in Python with Keras Photo by Jamie, some rights reserved.
Description of the MNIST Handwritten Digit Recognition Problem
The MNIST problem is a dataset developed by Yann LeCun, Corinna Cortes, and Christopher Burges for evaluating machine learning models on the handwritten digit classification problem.
The dataset was constructed from a number of scanned document datasets available from the National Institute of Standards and Technology (NIST). This is where the name for the dataset comes from, the Modified NIST or MNIST dataset.
Images of digits were taken from a variety of scanned documents, normalized in size, and centered. This makes it an excellent dataset for evaluating models, allowing the developer to focus on machine learning with minimal data cleaning or preparation required.
Each image is a 28×28-pixel square (784 pixels total). A standard split of the dataset is used to evaluate and compare models, where 60,000 images are used to train a model, and a separate set of 10,000 images are used to test it.
It is a digit recognition task. As such, there are ten digits (0 to 9) or ten classes to predict. Results are reported using prediction error, which is nothing more than the inverted classification accuracy.
Excellent results achieve a prediction error of less than 1%. A state-of-the-art prediction error of approximately 0.2% can be achieved with large convolutional neural networks. There is a listing of the state-of-the-art results and links to the relevant papers on the MNIST and other datasets on Rodrigo Benenson’s webpage.
Need help with Deep Learning in Python?
Take my free 2-week email course and discover MLPs, CNNs and LSTMs (with code).
Click to sign-up now and also get a free PDF Ebook version of the course.
Loading the MNIST Dataset in Keras
The Keras deep learning library provides a convenient method for loading the MNIST dataset.
The dataset is downloaded automatically the first time this function is called and stored in your home directory in ~/.keras/datasets/mnist.npz as an 11MB file.
This is very handy for developing and testing deep learning models.
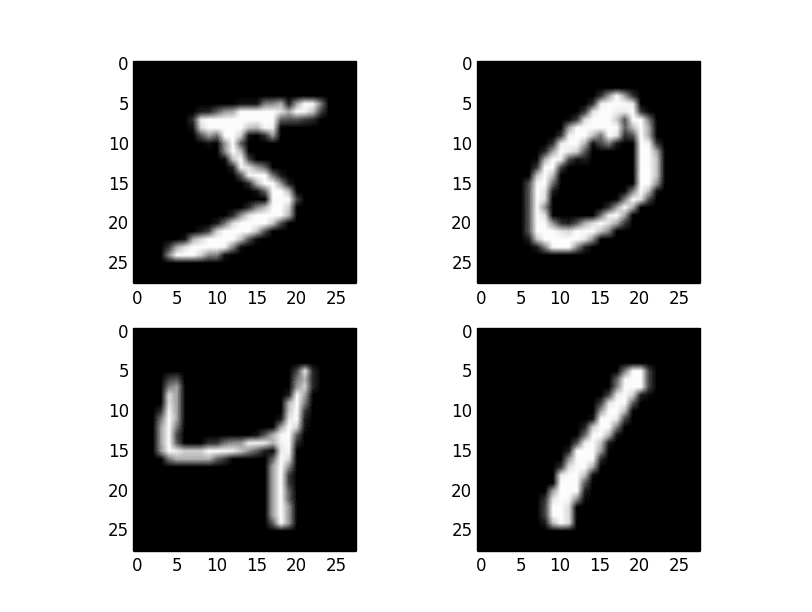
To demonstrate how easy it is to load the MNIST dataset, first, write a little script to download and visualize the first four images in the training dataset.
You can see that downloading and loading the MNIST dataset is as easy as calling the mnist.load_data() function. Running the above example, you should see the image below.
Examples from the MNIST dataset
Baseline Model with Multi-Layer Perceptrons
Do you really need a complex model like a convolutional neural network to get the best results with MNIST?
You can get very good results using a very simple neural network model with a single hidden layer. In this section, you will create a simple multi-layer perceptron model that achieves an error rate of 1.74%. You will use this as a baseline for comparing more complex convolutional neural network models.
Let’s start by importing the classes and functions you will need.
1
2
3
4
5
6
from tensorflow.keras.datasets import mnist
from tensorflow.keras.models import Sequential
from tensorflow.keras.layers import Dense
from tensorflow.keras.layers import Dropout
from tensorflow.keras.utils import to_categorical
...
Now, you can load the MNIST dataset using the Keras helper function.
The training dataset is structured as a 3-dimensional array of instance, image width, and image height. For a multi-layer perceptron model, you must reduce the images down into a vector of pixels. In this case, the 28×28-sized images will be 784 pixel input values.
You can do this transform easily using the reshape() function on the NumPy array. You can also reduce your memory requirements by forcing the precision of the pixel values to be 32-bit, the default precision used by Keras anyway.
1
2
3
4
5
...
# flatten 28*28 images to a 784 vector for each image
The pixel values are grayscale between 0 and 255. It is almost always a good idea to perform some scaling of input values when using neural network models. Because the scale is well known and well behaved, you can very quickly normalize the pixel values to the range 0 and 1 by dividing each value by the maximum of 255.
1
2
3
4
...
# normalize inputs from 0-255 to 0-1
X_train=X_train/255
X_test=X_test/255
Finally, the output variable is an integer from 0 to 9. This is a multi-class classification problem. As such, it is good practice to use a one-hot encoding of the class values, transforming the vector of class integers into a binary matrix.
You can easily do this using the built-in tf.keras.utils.to_categorical() helper function in Keras.
1
2
3
4
5
...
# one hot encode outputs
y_train=to_categorical(y_train)
y_test=to_categorical(y_test)
num_classes=y_test.shape[1]
You are now ready to create your simple neural network model. You will define your model in a function. This is handy if you want to extend the example later and try and get a better score.
The model is a simple neural network with one hidden layer with the same number of neurons as there are inputs (784). A rectifier activation function is used for the neurons in the hidden layer.
A softmax activation function is used on the output layer to turn the outputs into probability-like values and allow one class of the ten to be selected as the model’s output prediction. Logarithmic loss is used as the loss function (called categorical_crossentropy in Keras), and the efficient ADAM gradient descent algorithm is used to learn the weights.
You can now fit and evaluate the model. The model is fit over ten epochs with updates every 200 images. The test data is used as the validation dataset, allowing you to see the skill of the model as it trains. A verbose value of 2 is used to reduce the output to one line for each training epoch.
Finally, the test dataset is used to evaluate the model, and a classification error rate is printed.
Running the example might take a few minutes when you run it on a CPU.
Note: Your results may vary given the stochastic nature of the algorithm or evaluation procedure, or differences in numerical precision. Consider running the example a few times and compare the average outcome.
You should see the output below. This very simple network defined in very few lines of code achieves a respectable error rate of 2.3%.
Now that you have seen how to load the MNIST dataset and train a simple multi-layer perceptron model on it, it is time to develop a more sophisticated convolutional neural network or CNN model.
In this section, you will create a simple CNN for MNIST that demonstrates how to use all the aspects of a modern CNN implementation, including Convolutional layers, Pooling layers, and Dropout layers.
The first step is to import the classes and functions needed.
1
2
3
4
5
6
7
8
9
from tensorflow.keras.datasets import mnist
from tensorflow.keras.models import Sequential
from tensorflow.keras.layers import Dense
from tensorflow.keras.layers import Dropout
from tensorflow.keras.layers import Flatten
from tensorflow.keras.layers import Conv2D
from tensorflow.keras.layers import MaxPooling2D
from tensorflow.keras.utils import to_categorical
...
Next, you need to load the MNIST dataset and reshape it to be suitable for training a CNN. In Keras, the layers used for two-dimensional convolutions expect pixel values with the dimensions [pixels][width][height][channels].
Note that you are forcing so-called channels-last ordering for consistency in this example.
In the case of RGB, the last dimension pixels would be 3 for the red, green, and blue components, and it would be like having three image inputs for every color image. In the case of MNIST, where the pixel values are grayscale, the pixel dimension is set to 1.
As before, it is a good idea to normalize the pixel values to the range 0 and 1 and one-hot encode the output variables.
1
2
3
4
5
6
7
8
...
# normalize inputs from 0-255 to 0-1
X_train=X_train/255
X_test=X_test/255
# one hot encode outputs
y_train=to_categorical(y_train)
y_test=to_categorical(y_test)
num_classes=y_test.shape[1]
Next, define your neural network model.
Convolutional neural networks are more complex than standard multi-layer perceptrons, so you will start by using a simple structure that uses all the elements for state-of-the-art results. Below summarizes the network architecture.
The first hidden layer is a convolutional layer called a Convolution2D. The layer has 32 feature maps, with the size of 5×5 and a rectifier activation function. This is the input layer that expects images with the structure outlined above: [pixels][width][height].
Next, define a pooling layer that takes the max called MaxPooling2D. It is configured with a pool size of 2×2.
The next layer is a regularization layer using dropout called Dropout. It is configured to randomly exclude 20% of neurons in the layer in order to reduce overfitting.
Next is a layer that converts the 2D matrix data to a vector called Flatten. It allows the output to be processed by standard, fully connected layers.
Next is a fully connected layer with 128 neurons and a rectifier activation function.
Finally, the output layer has ten neurons for the ten classes and a softmax activation function to output probability-like predictions for each class.
As before, the model is trained using logarithmic loss and the ADAM gradient descent algorithm.
After running the example, the accuracy of the training and validation test is printed for each epoch, and at the end, the classification error rate is printed.
Note: Your results may vary given the stochastic nature of the algorithm or evaluation procedure, or differences in numerical precision. Consider running the example a few times and compare the average outcome.
Epochs may take about 45 seconds to run on the GPU (e.g., on AWS). You can see that the network achieves an error rate of 1.19%, which is better than our simple multi-layer perceptron model above.
This time you will define a large CNN architecture with additional convolutional, max pooling layers, and fully connected layers. The network topology can be summarized as follows:
Convolutional layer with 30 feature maps of size 5×5
Pooling layer taking the max over 2*2 patches
Convolutional layer with 15 feature maps of size 3×3
Pooling layer taking the max over 2*2 patches
Dropout layer with a probability of 20%
Flatten layer
Fully connected layer with 128 neurons and rectifier activation
Fully connected layer with 50 neurons and rectifier activation
Running the example prints accuracy on the training and validation datasets of each epoch and a final classification error rate.
Note: Your results may vary given the stochastic nature of the algorithm or evaluation procedure, or differences in numerical precision. Consider running the example a few times and compare the average outcome.
The model takes about 100 seconds to run per epoch. This slightly larger model achieves a respectable classification error rate of 0.83%.
This is not an optimized network topology. Nor is it a reproduction of a network topology from a recent paper. There is a lot of opportunity for you to tune and improve upon this model.
What is the best error rate score you can achieve?
Post your configuration and best score in the comments.
Resources on MNIST
The MNIST dataset is very well studied. Below are some additional resources you might want to look into.
In this post, you discovered the MNIST handwritten digit recognition problem and deep learning models developed in Python using the Keras library that are capable of achieving excellent results.
Working through this tutorial, you learned:
How to load the MNIST dataset in Keras and generate plots of the dataset
How to reshape the MNIST dataset and develop a simple but well-performing multi-layer perceptron model on the problem
How to use Keras to create convolutional neural network models for MNIST
How to develop and evaluate larger CNN models for MNIST capable of near world-class results.
Do you have any questions about handwriting recognition with deep learning or this post? Ask your question in the comments, and I will do my best to answer.
Thanks for this tutorial. It was great. Though(it might sound silly) how do I see it in action? I mean if I wanna see it predict an answer for an image how do I do that?
Thanks again.
sir please help me !!
pip install tensorflow
ERROR: Could not find a version that satisfies the requirement tensorflow (from versions: none)
ERROR: No matching distribution found for tensorflow
py ver is 3.8.2
win 10
i am on it from one month but didnt got the perfect solution i feel you can help me out from this
Hello , i am also working on this Project and i choose this for my final year project of software engineering so i want help from u to understand it more better. miansahilawais@gmail.com
When I try the baseline model with MLPs I get much worse performance than what you are showing (an error rate of 53.64%). Any idea why I could be seeing such vastly different results when I’m using the same code? Thanks.
I am also having the same issue of getting a very high error rate: 51.08%, 43.26% and 52.01%. But then I found that I forgot to normalize the pixels values from 0-255 to 0-1. After correcting now I got 1.93% baseline error.
Can you please explain this effect of normalization?
To get an error rate that high, the code must have been copied incorrectly or something similar. Beyond that, do notice that each time you run this, the final output will be slightly different each time because of the Dropout layer in the neural network. It will randomly choose that 20% each time it runs thereby slightly affecting the final outcome.
Hello Jason, I tried running the script, but the baseline model is taking too much time.. its running from past 20 hours and still is on 4th EPoch,, can you please suggest some way to speed up the process.. I am using 4 gb ram computer, and running on Anaconda Theano backened Keras
Hi jason, I tried it, but I got the error below. I use tensorflow r0.11. I’m not sure whether it is the casuse.
Using TensorFlow backend.
Traceback (most recent call last):
File “/Users/Jack/.pyenv/versions/3.5.1/lib/python3.5/site-packages/tensorflow/python/framework/common_shapes.py”, line 594, in call_cpp_shape_fn
status)
File “/Users/Jack/.pyenv/versions/3.5.1/lib/python3.5/contextlib.py”, line 66, in __exit__
next(self.gen)
File “/Users/Jack/.pyenv/versions/3.5.1/lib/python3.5/site-packages/tensorflow/python/framework/errors.py”, line 463, in raise_exception_on_not_ok_status
pywrap_tensorflow.TF_GetCode(status))
tensorflow.python.framework.errors.InvalidArgumentError: Negative dimension size caused by subtracting 5 from 1
Keras has changed it’s input format. Instead of [pixel, width, height] it is now [width, height, pixel].
Change the input_shape = (28, 28, 1) in conv2D and in reshape call.
I tried predicting with a test set and got the one-hot encoded predictions. I was just wondering if there’s a built-in function to convert it back to original labels (0,1,2,3…).
Great question gs, I don’t have an example at the moment.
You will need to encode your own pictures in the same way as the MNIST dataset – mainly rescale to the same size. Then load them as a matrix of pixel values and you can make predictions.
Hello,
Thanks for great example, but how do I save the state of the net,
I mean that net learns on 60000 examples, then it tests and try to guess 10000
But if I want to use always, every day, for example, how can I use it without training it every day?
Jason, does your book explain “WHY” you chose the various layers you did in this tutorial and shed light on how and why to choose certain designs for different data sets?
hello
when i try to make a prediction for my own image, the net get it wrong
this is depressing me.
i use the command model.predict_classes(img)
please is there a way to get correct answer for my handwritten digit
Great tutorial Jason, in fact you are the best, very easy to follow, I enjoy all your tutorials, thank you! In fact,
I achieved an error rate of 0.74 at one point using GPU and it took about 30sec to run.
Thanks for the great tutorial. Just one thing I didn’t understand. In the Convolution2D layer, there is a border_mode=”valid” parameter. What does this do? What’s its purpose? The Keras documentation doesn’t seem to have an explanation for it either.
Excellent tutorial Jason. I really enjoyed reading it and implementing it. I just figured that if you have cuDNN installed it makes things waay fast (at least for the toy examples I’ve tried). I recommend anyone reading this to install cuDNN and configure theano to use it. You just have to put
[dnn]
enabled = True
in theanorc file.
—————————————————————————————-
I want to check if I am in the right direction on this.
I am not getting the accuracy more than 66% which is quite surprising.
Am I doing the Embedding Layer correctly. As when I see the embedding layer weights I see there is difference in what Layer Paremeters I set with the Weights I retreive.
The image will have to be scaled to the same dimensions as those expected by the network.
Also, in this example, the network expects images to have a specific set of proportions and to be white digits on a black background. New examples will have to be prepared in the same way.
Hi jason,
snippet of your code:
————————-
in the step # load data
(X_train, y_train), (X_test, y_test) = mnist.load_data()
# reshape to be [samples][pixels][width][height]
X_train = X_train.reshape(X_train.shape[0], 1, 28, 28).astype(‘float32’)
X_test = X_test.reshape(X_test.shape[0], 1, 28, 28).astype(‘float32’)
you are using mnist data. what kind of data strurcture is it?
how to pre process images (in a list) an labels(in a list) into this structure anf fid it to keras model?
what exactly this line
X_train = X_train.reshape(X_train.shape[0], 1, 28, 28).astype(‘float32’)
Hi Jason, what led you to choose 128 neurons for the fully-connected layer? (Calculating the number of activations leading into the fully-connected layer, it’s much larger than 128) Thanks!
Hi @Jason Brownlee, first things first awesome tut u got there ..!!
There’s a small problem at d following lines:
Small CNN:
# build the model
model = baseline_model()
Large CNN:
# build the model
model = larger_model()
Using the recent versions of Tensorfllow throws an AttributeError:
=> AttributeError: module ‘tensorflow.python’ has no attribute ‘control_flow_ops’ <=
solution:
Add following lines:
import tensorflow as tf
tf.python.control_flow_ops = tf
Hello sir, thanks for your great writing and well explanation. I have tried it and it works. But how can I train the network using my own handwriting data set instead of MNIST data.
It would be very helpful if you shed some light on this..
Hi
Thanks for your nice explanation. I succesfully trained all the networks you introduced here. However, when I want to use the trained model to make some predictions, using this pice of code:
I have question about the ‘model.add(Dropout(0.2))’. As you stated ‘The next layer is a regularization layer using dropout called Dropout. It is configured to randomly exclude 20% of neurons in the layer in order to reduce overfitting.’ in the post, Dropout is treated as a separated layer in Keras, instead of a regularization operation on the existing layers such as convolution layer and fully-connected layer. How is this being achieved?
Since this Dropout is between MaxPooling and the next fully-connected layer, which part of the weights was applied Dropout?
Hello sir, thanks for your well explanation. I have tried it and it works well. But how can I train the network using my own handwriting data set instead of MNIST data set.
It would be very thankful if you shed some light on this..
Got the verbatim code from above with one change:
X_train = X_train[:-20000 or None]
y_train = y_train[:-20000 or None]
to reduce the memory usage to run on a Mac OSX El Capitan (GeForce 650M with 512MB)
The error rate was a little higher at
1.51%
I used keras with the tensorflow-GPU backend.
Really awesome introduction to keras and digit recognition for a beginner like me.
You are using mnist dataset which is in form of pickled object (I guess). But my question is how will you convert set of existing images to this pickled object?
Secondly, you are calculating error rate compared to your test dataset. But suppose I have an image with a number written on it, how will you return class label of it, without making much changes in the above program.
I would recommend loading your image data as numpy arrays and working with them directly.
You can make a prediction with the network (y = model.predict(x)) and use the numpy argmax() function to convert the one hot encoded output into a class index.
I tried to save and load the model as you describe in another post, but I get always erros like:
ValueError: Error when checking model target: expected dense_3 to have shape (None, 1) but got array with shape (10000, 10)
The error happens at the
score = model.evaluate(…)
line after load
#
# save model and weights
print("Saving model...")
model_json = model.to_json()
with open('mnist_model.json', 'w') as json_file:
json_file.write(model_json)
model.save_weights("mnist_weights.h5")
print("model saved to disk")
# load model and weights
print("Laoding model...")
with open('mnist_model.json') as json_file:
model_json = json_file.read()
model = model_from_json(model_json)
model.load_weights('mnist_weights.h5')
print("mode loaded from disk")
Great site and tutorial. I understand you haven’t been able to describe how to pre-process our own images to be readable in our MNIST trained models, as a lot of other people here have asked. Perfectly understand if you don’t have the time to explain how to do this.
Would you be able to guide me on how I might continue my search to do this though? I’ve tried creating a new 28×28 pixel image, black background with white foreground for the image drawing, converting this to grayscale (for 1,28,28 input dimensions). Then I divide that by 255. The prediction accuracy for these customs images are very low (the model has a 99% accuracy on the MNIST test images).
Looking at the individual features, I see that the locations of the decimals for the custom images pre-processed as described above seem quite different to the MNIST ones, with the decimals and 0’s appearing in vastly different locations compared to the MNIST data. Completely different patterns. This leads me to believe some more complicated pre-processing must be going on besides the intuitive steps done above. I looked at instructions on the MNIST page for how the pre-processing took place, but don’t know how to implement these instructions in python. There also seem to be some pre-processing scripts out there but I can’t get these to work.
Any other suggestions on how I might continue my search to find how to pre-process custom images? All instructions in Google are too complex or the implementation seems to fail.
The last row is the result I have split it away and converted it to one shot hot.
I am trying many models and many different parameters but none is learning anything. Even trying oversampling on few collums and looking if a model can reproduce the trained outputs fails!
But all your examples run without problems and produce the same results like you describe. So my setup: latest python 3.6 with anaconda runing on windows 10, should be all right.
So I fear that somethig with my inputs is wrong 🙁 . Should I standardice them? How can I do it? Later I will also have mixed inputs: numbers and strings. How could I work with this?
Would be very nice to get your kind help!
Thanks!
(pls excuse my very little perhaps bad english from school)
Thanks for this! This is really helpful. I was just wondering; I realized you used all 60,000 training data. How would the code look like if you were to use only say 10k or 30k of the training data, yet achieve a low error?
Hello,
Thanks for your code.
I have a question.
How can I add a new activation function to this code?
I found the place where I can add the activation function, but I don’t know where should I add the derivative of the new activation function.
I really appreciate if you help me.
Thanks.
Ehsan.
hello team, I have following dought please help me
# create model
model = Sequential()
model.add(Conv2D(30, (5, 5), input_shape=(1, 28, 28), activation=’relu’))
model.add(MaxPooling2D(pool_size=(2, 2)))
in the above code input shape=(1,28,28)that’s for binary image, for color image we kept (3,28,28)..but what we kept for non image data?
I have dataset of 10248 obs with 18 variables including target variable.
Sir, the input to my neural network is in a numpy array e.g. [[1,1,1,2], [1,2,1,2], ……..] and in this line of code
X_train = X_train.reshape(X_train.shape[0], 1, 28, 28).astype(‘float32’)
the compiler throws an error:
ValueError: total size of new array must be unchanged
HI, Jason. Great tutorial! This is my first CNN and I cannot believe it is actually working, exited!
I am just wondering why there is no need to initialize the weights in CNN, using “kernel_initializer=”? In the baseline MLP you initialize every layer whereas for CNN, those lines are not there, no matter for the conv layer, the maxpooling layer, or the final fully connected layer.
Great work .Thank you Sir . After Completing the training and testing I want to predict a character where I have a new character Image which Contains a New handwritten character . How Can I Do that sir .Please help me
Hi, Jason
My question is :
test_data is for check the model once you have already defined a model ( by using train_data).
why do you use the test data in your model training?
model.fit(X_train, y_train, validation_data=(X_test, y_test), epochs=10, batch_size=200, verbose=2)
# Final evaluation of the model
scores = model.evaluate(X_test, y_test, verbose=0)
Hi Jason still not clear for me (How Keras divide the datasets)?
is the validation data the same test data itself..?
this is what I have seen in the model fit equation !
so the datasets only divided by keras to training and test..
and then the test data is fit instead of validation?
I can not understand it but in this way !
Am I Right?
thank you so much
saeed
Good evening, I really have your explanation on the recognition of manuscript characters and its helped me a lot to understand the architecture and operation of a CNN with keras. But, I have a concern, you will not have a good tutorial that deals with the problem of face recognition with CNN … I have done with other approaches like OpenCV, dlib … But, Would like to do it with a CNN.
Thank you…
Hi, Jason. A start to play with mnist and CNN in keras and your post was very helpful!
Thanks!
I have one question: In my tests I got poor probabilities distribution. In most cases we got 1 for the predicted class and 0 for others. I try figure out how to get a more informative distribution specially to able to find possible prediction errors. Initially I think that results have connection to a sigmoid activation function but look in the model we have only ReLu and Sofmax linear functions. Any suggestion on how we get more descriptive probabilities distribution?
Well, first I must retifie my mess with function names. I was start with the same model in the last example, i.e., with Softmax: a non-linear function. And got a binary 0 or 1 in probabilities ndarray when activate with predict_proba().
One test with linear function the learning converging slowlly and I decide to drop away this test for now…
With Softplus, a function I was think is similar to linear, got non-normalized array of probabilities but, more Interesting, in cases when model fails to predict all values in probabilities array is zero! This can be very usefull when we try to catch just cases when model can’t predict.
A last test with Sigmoid I got the same behavior as Softplus with cases when all probabilities is 0 but in cases correct predicted got value 1 on class predicted. This make more sense with probabilities normalized but no one case with a distribution of probabilities non-binary.
To sumarize: the function with best results still be Softmax; No one function got a distribution non-binary when activation with predict_proba(); Sofplus and Sigmoid show a Interesting behavior with all values returned by predict_proba() is 0 in fails cases.
After all I still try to find a way to got more descriptive distribution of probabilities.
Updating…
I found my mistake. In prediction I just forgot to normalize pixels values from 0-255 uint8 to 0-1 float. I think maybe this kind of inputs saturated and set outputs to 1 or 0 in all cases.
Thanks for another great post. Could you point us to techniques that may be useful for detecting which patches/regions of images the network learns as most relevant for making the predictions? This is analogous to feature importances.
For example, is it possible to analyze the last hidden layer to find what parts of a given image contribute most to making one of the ten predictions?
Hi Jason, I have tried this code tutorial on my windows 8.1 machine with theano 0.9 and keras 2.0.5 installed over Geforce 940M gpu but my model baseline error is worst , almost 90% . Please help
Jason, I’m going through trying to replicate these results on the data from the Kaggle competition using the same dataset, but I have a weird problem with the CNN section.
When I used the regular neural network model, it reached near 99% accuracy on the training set within a few epochs. However, when I use the CNN code in this article, the first epoch has an accuracy of around 53-54% and only slowly climbs to around 94% accuracy at best on the training set.
I’m using a training set of 42000 images rather than 60000, but I can’t imagine that would produce such a large effect on the performance of the model. Any idea what else might be going wrong?
(I’m using tensorflow backend for both kinds of NN by the way)
This appears to have fixed the issue. Now I have 90% accuracy on the first epoch. In following along I think I accidentally divided the pixel values by 255 again after having normalized them already earlier.
Thank you for the help. Do you know of any articles that explain the different kinds of network topology and how to go about deciding what kind of network to use? Is it all trial and error or are there certain kinds of networks suited for different problems?
Thank you this is very helpful. I also wanted to know if there is any standard methodlogy for determining the size and number of feature maps, pooling layer patches, and number of neurons in the fully-connected layers. I’ve seen some rules of thumb for the number of neurons in fully-connected layers, but I’m not sure how to go about deciding which value to choose without just running the network over and over.
I’m sorry to keep bothering you by the way, I appreciate the help.
What made you choose the value of 32 for the filter output dimension when creating the model for your 2D neural net? I’m teaching myself about this process and am interested in how one would optimize these variables.
print(model.predict_classes(x_test[1:5]))
print(y_test[1:5])
here i want to predict first five element from x_test and output is
[2 1 0 4](first five element)
[[ 0. 0. 1. 0. 0. 0. 0. 0. 0. 0.]
[ 0. 1. 0. 0. 0. 0. 0. 0. 0. 0.]
[ 1. 0. 0. 0. 0. 0. 0. 0. 0. 0.]
[ 0. 0. 0. 0. 1. 0. 0. 0. 0. 0.]]
my question is in the above prediction i am getting 2D array if i want to print in digit
[2]
[1]
[0]
[4]
Dhamu ChinnavelusamySeptember 25, 2017 at 8:52 pm#
Hi,
I have seen that everyone is eager to check their own handwritten images, follow the steps
1)open paint and write any digit(0-9) and save it as size of 28×28(pixels).
2)Use this code for prediction:
import cv2
test = cv2.imread(‘Test Image’)
test = cv2.cvtColor( test, cv2.COLOR_RGB2GRAY )
test = test.reshape(1, 1, 28, 28)
test = cv2.bitwise_not(test)
pred = model.predict_classes(test)
print(pred)
Hi, thank you very much for this program. So i already run the program and train the model and it’s working, then how can i use it for detecting number from my own image input?
Hi Jason,
Thank you for sharing the code, I learned a lot from this. l also used the for a paper for school (I ran an ‘experiment’ where I change the size of the training set and look at the accuracy). Is that ok with you (if I cite it, of course)?
Thank you!!!
Hi Jason ,
I am doing a course in neural networks , I appreciate your work you have done for a novices like me. In that course they proposes this problem of classification as linear regression problem to classify two classes . Is this problem using mnist dataset is also linear regression classifying 10 classes?
doesn’t your example take linear regression such that given an image it has to calculate probability that it is represented by particular class using linear regression?
Thanks for such an incredible tutorial!!! I really appreciate your time and effort in putting the code and text, and replying to each and everyone’s questions!
When I try to run the code under “Simple Convolutional Neural Network for MNIST”, as such, I get the following error. Is that something that you can help? I am running it on Jupyter Notebook with Tensorflow 1.2.1 version.
AttributeError Traceback (most recent call last)
in ()
44
45 # build the model
—> 46 model = baseline_model()
47
48 # Fit the model
in baseline_model()
32 # create model
33 model = Sequential()
—> 34 model.add(Conv2D(32, (5, 5), input_shape=(1, 28, 28), activation=’relu’))
35 model.add(MaxPooling2D(pool_size=(2, 2)))
36 model.add(Dropout(0.2))
~\Anaconda3\envs\tensorflow-sessions\lib\site-packages\keras\models.py in add(self, layer)
462 # and create the node connecting the current layer
463 # to the input layer we just created.
–> 464 layer(x)
465
466 if len(layer.inbound_nodes[-1].output_tensors) != 1:
~\Anaconda3\envs\tensorflow-sessions\lib\site-packages\keras\engine\topology.py in __call__(self, inputs, **kwargs)
601
602 # Actually call the layer, collecting output(s), mask(s), and shape(s).
–> 603 output = self.call(inputs, **kwargs)
604 output_mask = self.compute_mask(inputs, previous_mask)
605
~\Anaconda3\envs\tensorflow-sessions\lib\site-packages\keras\layers\convolutional.py in call(self, inputs)
162 padding=self.padding,
163 data_format=self.data_format,
–> 164 dilation_rate=self.dilation_rate)
165 if self.rank == 3:
166 outputs = K.conv3d(
~\Anaconda3\envs\tensorflow-sessions\lib\site-packages\keras\backend\tensorflow_backend.py in _get_available_gpus()
254 global _LOCAL_DEVICES
255 if _LOCAL_DEVICES is None:
–> 256 _LOCAL_DEVICES = get_session().list_devices()
257 return [x.name for x in _LOCAL_DEVICES if x.device_type == ‘GPU’]
258
AttributeError: ‘Session’ object has no attribute ‘list_devices’
thanks a lot.
please, i have a question. how can i create my own custom pooling layer with keras and not using conventional max-pooling layer ?
thanks another time.
Hi, Jason,
I love your code and it helps me a lot!
I have a question: In your simple CNN example, why you choose Conv2D(32,(5,5),..) (I mean why you choose 32 and 5 these numbers). Also why you choose 128 neurons in the fifth layer?
Also in your larger CNN example, why you choose Conv2D(30,..). I am confused about the reason you choose these numbers rather than other numbers like 31,32,33,34.
Thank you!
I used the advanced PReLU activation instead of relu, but not sure if that actually helped since I’m not sure how to best initialize the alphas anyway, so just left them at default.
Will look into playing around with the optimizers a bit as well. Possibly playing around with something more advanced than ADAM.
I am getting the “Value Error: Error when checking target: expected dense_8 to have shape (None, 784) but got array with shape (60000, 10)” while building the baseline model. I also did one hot encoding but still ending up the same error.
it is really a good post, useful for many students who are working on CNN.
I’m Jagadeesh currently doing my under-graduation(B.Tech) at AMRITA UNIVERSITY(INDIA). we are trying to do SENTIMENT ANALYSIS ON PRODUCT REVIEWS USING CNN. The Design of my project is like
step 1: collecting labelled data-set from amazon
step2: using word2vec tool , converting the text into vectors
step3: feeding these vectors as input to CNN .
Now we are struck at converting text into vectors, for this word2vec is giving many vectors for a songle word, i don’t know how to take a single vector from 180 vectors produced for that single word.
kindly please help me.
I have to finish this project by Feb 20th.
Thanking you sir.
hello
i have a dataset for handwritten digits in persian, it contains 10 folders for 10 digits(0, 1 ,2, …,9) that in each folder there is 6000 samples for that certain digit.each sample is an image of 61*61 size and in binary(black and white).
now how can i load this dataset in your ” Larger Convolutional Neural Network for MNIST ” code?
Hi Jason,
I am a beginner in neural networks. So the question may sound silly but it is really bugging me.
In “Simple Convolutional Neural Network for MNIST” section I see that you have used 32 5×5 filters in the first convolution layer. Right? Why are you using 32 filters only? Is there any mathematical reason for it? Even in the Tensorflow guide website https://www.tensorflow.org/tutorials/layers, I found that they are using 32 filters. What if I use like 100 filters or maybe 10 or 64?
I did understand the parts earlier to this section. Also thanks for the awesome, easy-to-grasp tutorial.
thanks for your quick response.. Even then i am confused about the label part. the words as such we will tag as the label or have to use int values that maps to it only?
The line forces the Keras framework to work the same for each platform, regardless of the backend. It helps when I am explaining how to prepare the input data.
model.fit(X_train, y_train, validation_data=(X_test, y_test), epochs=10, batch_size=200, verbose=2)
# Final evaluation of the model
scores = model.evaluate(X_test, y_test, verbose=0)
You have pulled validation from your test. While test is not trained on you would normally decouple your validation and test data to be something like:
split = 1./6. # use 10,000 elelment from train as validation during fit
model.fit(X_train, y_train, validation_split=split, epochs=10, batch_size=200, verbose=2)
^^^^^^^^^^^^^^^^^^^^
Thank You Jason for the tutorial. I am beginner to Neural networks and your tutorial helped me lot. I have got 0.70 error rate and could able to make predictions with my own images and worked out very well.
Great article Jason ! , i have simple question , if you could answer me , i want to retrain my model with new image input (which mean , add this image array to my dataset with his label )
Hi Jason,
I am newbie, a BIG THANK YOU!!!, this is wonderful example for the beginners, to get their hands dirty with the code.
I am getting some errors when loading an image and trying to predict the output, I am using the Baseline Model with Multi-Layer Perceptrons sample code.
I had tried that, no luck.
This is my complete code, see if this helps in resolving the issue.
import numpy
from keras.datasets import mnist
from keras.models import Sequential
from keras.layers import Dense
from keras.layers import Dropout
from keras.utils import np_utils
import cv2
# fix random seed for reproducibility
seed = 7
numpy.random.seed(seed)
# load data
(X_train, y_train), (X_test, y_test) = mnist.load_data()
# flatten 28*28 images to a 784 vector for each image
num_pixels = X_train.shape[1] * X_train.shape[2]
X_train = X_train.reshape(X_train.shape[0], num_pixels).astype(‘float32’)
X_test = X_test.reshape(X_test.shape[0], num_pixels).astype(‘float32′)
# normalize inputs from 0-255 to 0-1
X_train = X_train / 255
X_test = X_test / 255
# one hot encode outputs
y_train = np_utils.to_categorical(y_train)
y_test = np_utils.to_categorical(y_test)
num_classes = y_test.shape[1]
# define baseline model
def baseline_model():
# create model
model = Sequential()
model.add(Dense(num_pixels, input_dim=num_pixels, kernel_initializer=’normal’, activation=’relu’))
model.add(Dense(num_classes, kernel_initializer=’normal’, activation=’softmax’))
# Compile model
model.compile(loss=’categorical_crossentropy’, optimizer=’adam’, metrics=[‘accuracy’])
return model
# build the model
model = baseline_model()
# Fit the model
model.fit(X_train, y_train, validation_data=(X_test, y_test), epochs=10, batch_size=200, verbose=2)
# Final evaluation of the model
scores = model.evaluate(X_test, y_test, verbose=0)
print(“Baseline Error: %.2f%%” % (100-scores[1]*100))
If i finished training and testing the model and the performance is well enough, how can i identifies to the real image ? Cause i want to identify an alphabet in one image which is my image has different matrix size compared with model.
Hi Mr. Jason
if I want to use 14*28 images as the cnn input, what parametes should I change in your main simple cnn code?
I just changed the numbers that referred to the input size,i mean change all 28 ,28 to 14,28 but I faced to the error “ValueError: Error when checking target: expected dense_5 to have 2 dimensions, but got array with shape (60001, 10, 2)”.
Thank you for such a great article. Just wanted to know if there are any data sets similar to MNIST for alphabets. As Tesseract OCR is not working properly for my application, i want to have a similar model for Identifiying handwritten or Printed alphabets.
I want to improve the recognition accuracy ?
i have used your simple cnn for my data and 2.64% error was obtained.
now is this possible to improve my accuracy by adding layers?
what more suggestion do you have to achieve this purpose?
is there any preprocessing needed to be done on the images ?
i thank you for your guidance for confusion matrix, i could run it and get the table.
now i want to see the images that were classified incorrectly , how can i do that?
I would like to try with some image that i have captured. My images have 3 digits.
There is anyway to know the outcomes the CNN is predicting? what i want to know is if the result could be known to compare with the original image number?
~\Anaconda3\lib\site-packages\tensorflow\python\framework\errors_impl.py in __exit__(self, type_arg, value_arg, traceback_arg)
472 compat.as_text(c_api.TF_Message(self.status.status)),
–> 473 c_api.TF_GetCode(self.status.status))
474 # Delete the underlying status object from memory otherwise it stays alive
InvalidArgumentError: Negative dimension size caused by subtracting 5 from 1 for ‘conv2d_1/convolution’ (op: ‘Conv2D’) with input shapes: [?,1,28,28], [5,5,28,32].
During handling of the above exception, another exception occurred:
ValueError Traceback (most recent call last)
in ()
1 # build the model
—-> 2 model = baseline_model()
3 # Fit the model
4 model.fit(X_train, Y_train, validation_data=(X_eval, Y_eval), epochs=10, batch_size=200, verbose=2)
5 # Final evaluation of the model
~\Anaconda3\lib\site-packages\keras\models.py in add(self, layer)
465 # and create the node connecting the current layer
466 # to the input layer we just created.
–> 467 layer(x)
468
469 if len(layer._inbound_nodes[-1].output_tensors) != 1:
~\Anaconda3\lib\site-packages\keras\engine\topology.py in __call__(self, inputs, **kwargs)
617
618 # Actually call the layer, collecting output(s), mask(s), and shape(s).
–> 619 output = self.call(inputs, **kwargs)
620 output_mask = self.compute_mask(inputs, previous_mask)
621
~\Anaconda3\lib\site-packages\keras\layers\convolutional.py in call(self, inputs)
166 padding=self.padding,
167 data_format=self.data_format,
–> 168 dilation_rate=self.dilation_rate)
169 if self.rank == 3:
170 outputs = K.conv3d(
~\Anaconda3\lib\site-packages\keras\backend\tensorflow_backend.py in conv2d(x, kernel, strides, padding, data_format, dilation_rate)
3333 strides=strides,
3334 padding=padding,
-> 3335 data_format=tf_data_format)
3336
3337 if data_format == ‘channels_first’ and tf_data_format == ‘NHWC’:
~\Anaconda3\lib\site-packages\tensorflow\python\framework\ops.py in _create_op_helper(self, op, compute_shapes, compute_device)
3206 # compute_shapes argument.
3207 if op._c_op or compute_shapes: # pylint: disable=protected-access
-> 3208 set_shapes_for_outputs(op)
3209 # TODO(b/XXXX): move to Operation.__init__ once _USE_C_API flag is removed.
3210 self._add_op(op)
~\Anaconda3\lib\site-packages\tensorflow\python\framework\common_shapes.py in call_cpp_shape_fn(op, require_shape_fn)
625 res = _call_cpp_shape_fn_impl(op, input_tensors_needed,
626 input_tensors_as_shapes_needed,
–> 627 require_shape_fn)
628 if not isinstance(res, dict):
629 # Handles the case where _call_cpp_shape_fn_impl calls unknown_shape(op).
~\Anaconda3\lib\site-packages\tensorflow\python\framework\common_shapes.py in _call_cpp_shape_fn_impl(op, input_tensors_needed, input_tensors_as_shapes_needed, require_shape_fn)
689 missing_shape_fn = True
690 else:
–> 691 raise ValueError(err.message)
692
693 if missing_shape_fn:
ValueError: Negative dimension size caused by subtracting 5 from 1 for ‘conv2d_1/convolution’ (op: ‘Conv2D’) with input shapes: [?,1,28,28], [5,5,28,32].
It’s unclear to me why you do the part with the comment as such:
# reshape to be [samples][pixels][width][height]
This makes the shape of the problem go from this (60000, 28, 28) to this (60000, 1, 28, 28).
But since the pixel dimension will always be 1, what does this actually do for you? I know the article says “reshape it so that it is suitable for use training a CNN.” But many other examples using MNIST don’t do this.
So why does the reshaping make it more suitable versus less suitable?
I believe there will be many ways to model your problem, perhaps explore a few approaches and see what works best for your specific dataset. Also consider what approaches are popular in the literature for your problem type.
hello
my database is contain of vectors which each vector has 144 element.(1 , 144).
I want to classify these vectors.(the input of the CNN, is vectors)
1. how can I save my database in my system to be probably useful for the CNN input?(should all the vectors save in a matrix? for example I have 10 class each with 6000 sample and each sample is represented with a vector by 144 elements, how to save these vectors and by which format? )(I extract the feature vectors from the images by matlab2017 and then I want to use them as the input for CNN in Keras(jupyter notebook) for recognition process )
2. in a simple CNN the input are the images, now how should I change the CNN code to read my vectors instead of images as the input?
I mean what function or codes must be changed in “input load ” and “one hot encode outputs” part in your code above.
Keras excepts vectors of numbers as input. You can save the data any way you wish then load it and transform it into numpy arrays of numbers.
The input to a CNN are vectors, they could be images, or not. Search the blog, I show how to use CNNs for many other cases, such as text and time series.
Dear Jason,
Firstly I would like to thank you for your wonderful Data Science tutorials. Has been a real learning guide.
Secondly, I am facing an issue on implementation of the code. Could you kindly have a look and pronounce a solution for the same?
Error report:
In the baseline model with multilayer perceptron example, at the line below, I get the following error:
model.fit(X_train, y_train, validation_data=(X_test, y_test), epochs=10, batch_size=128, verbose=2)
Error:
ValueError: Error when checking target: expected dense_12 to have 2 dimensions, but got array with shape (60000, 10, 2, 2, 2, 2, 2, 2)
Can you kindly let me know how to move forward from here?
You are the Jason Bourne of Deep Learning !!! Wonderful articles, easy to read and follow and what is most amazing that you respond to almost every question, the respond rate seems close to 99%, even to repeated questions.
Apologies for multiple postings but I couldn’t decide where to exactly post.
JB, I am currently focusing on a use case where I have to read a drawing at this link https://imgur.com/a/Mg8YrgE
and have to accomplish the followings through deep learning and image processing:
1) Read the entire text which is very legible, particularly the line codes such as 8-N-120XXX-A01-NO. I tried tesseract 4.0 with LSTM which gives all the text but is it the best OCR or do you suggest something else?
2) Compute the location of the text in the image. Is this possible using tesseract ?
3) Detect all the symbols, small or big, through an already trained CNN model and their locations through bounding boxes.
Please feel free to respond to as many as you can and kindly direct me to useful resources to achieve my objectives. Many thanks and please keep posting new trends and useful info in deep learning.
Hi Jason, what do you mean by “a lot of prototyping” ? Do you mean an iterative trial and error approach? Can you specify which CV methods can be useful?
Imagine on a signed document you have to detect the handwritten signature and its position on the document. How would you approach?
Thanks a lot for your responses.
As you have mentioned in the post ” There is a lot of opportunity for you to tune and improve upon this model.”
It would be great if you can suggest what parameters are the most recommended, if not all, for tuning and possible ways for tuning. Should one be using grid search or random search or Bayesian optimization for it? It would be great if you can throw some light on it.
Why do I get the following error ??
Using TensorFlow backend.
Train on 60000 samples, validate on 10000 samples
Epoch 1/1
2018-11-20 01:11:49.591336: I tensorflow/core/platform/cpu_feature_guard.cc:141] Your CPU supports instructions that this TensorFlow binary was not compiled to use: AVX2 FMA
– 6s – loss: 0.2783 – acc: 0.9211 – val_loss: 0.1408 – val_acc: 0.9575
Baseline Error: 4.25%
Traceback (most recent call last):
File “cnn2clean.py”, line 91, in
model.fit(X_train, y_train, validation_data=(X_test, y_test), epochs=1, batch_size=200)
File “/root/anaconda3/lib/python3.6/site-packages/keras/engine/training.py”, line 952, in fit
batch_size=batch_size)
File “/root/anaconda3/lib/python3.6/site-packages/keras/engine/training.py”, line 789, in _standardize_user_data
exception_prefix=’target’)
File “/root/anaconda3/lib/python3.6/site-packages/keras/engine/training_utils.py”, line 128, in standardize_input_data
‘with shape ‘ + str(data_shape))
ValueError: Error when checking target: expected dense_5 to have 2 dimensions, but got array with shape (60000, 10, 2)
nkp-Inspiron-15-3567 pca #
hello Mr. Brownlee
I have 2 question about the simple CNN and
1. if I want to know how long do the training phase and the evaluation phase take?(each one separately) how can I do it? would you please learn me a code to add the above codes to reach the times that I told?
2. if l want to see the output image after each convolution layer, how can I? I mean I want to know what happens to a sample image after convolving it with a convolution layer filters. how can I show the output of a convolution layer as an image?
I really thank you if you guide me a keras code for those purpose .
Slam(peace upon u) Jason.
my self Shahbaz
U r my teacher in machine learning, but i want to ask , is this a complete ocr or further work remain, can i use it in my final year project. plz teach me how i develope my ocr system for final project in university..
i shall be very thank full for this act of kindness….
I have a problem on my laptop. Please solve it.
Traceback (most recent call last):
File “C:/python/python37/testpy6.py”, line 17, in
(x_train, y_train), (x_test, y_test) = mnist.load_data()
File “C:\python\python37\lib\site-packages\keras\datasets\mnist.py”, line 23, in load_data
file_hash=’8a61469f7ea1b51cbae51d4f78837e45′)
File “C:\python\python37\lib\site-packages\keras\utils\data_utils.py”, line 222, in get_file
urlretrieve(origin, fpath, dl_progress)
File “C:\python\python37\lib\urllib\request.py”, line 277, in urlretrieve
block = fp.read(bs)
File “C:\python\python37\lib\http\client.py”, line 449, in read
n = self.readinto(b)
File “C:\python\python37\lib\http\client.py”, line 493, in readinto
n = self.fp.readinto(b)
File “C:\python\python37\lib\socket.py”, line 586, in readinto
return self._sock.recv_into(b)
File “C:\python\python37\lib\ssl.py”, line 1009, in recv_into
return self.read(nbytes, buffer)
File “C:\python\python37\lib\ssl.py”, line 871, in read
return self._sslobj.read(len, buffer)
File “C:\python\python37\lib\ssl.py”, line 631, in read
v = self._sslobj.read(len, buffer)
ConnectionResetError: [WinError 10054] An existing connection was forcibly closed by the remote host
>>>
#code for predicting an image stored locally against a trained model
# my local image is 28 x 28 already
import numpy as np
from PIL import Image
from keras.preprocessing import image
img = image.load_img(‘file path include full file name’)# , target_size=(32,32))
img = image.img_to_array(img)
img = img.reshape((1,) + img.shape)
#img = img/255
img = img.reshape(-1,784)
img_class=model.predict_classes(img)
prediction = img_class[0]
classname = img_class[0]
print(“Class: “,classname)
Hello, great tutorial!
I have a couple questions:
1) Do you think this tutorial is still up to date or is there anything new in the last couple years that could be better?
2) In the larger model, what is the output dimensions after each conv2D and dense layers?
Thank you
Thanks for you tutorial .
I am a beginner in neural network and framework . I want to ask in this sample how is the weight initialized? and this model train by the number of epoch that we decided in model.fit, could i modify it the model repeated until one condition is satisfied?
If you want a real application for digit recognition you have to first check if it is a digit then you can use this solution to see what digit it is (or in reversed order) This general problem is harder. So the problem solved here is: “What digit is it when you know it is a digit”. An application not checking input is bad…
Try the link above http://myselph.de/neuralNet.html and draw an X char and you will probably get a prediciton = 8. Draw H an you will get 4.
Where can I find a solution of the more general problem?
You can also try my app at gubboit.se/digitapp. I intend to solve the more general problem.
hi, jason
thank you for the tutorial its really help me as a beginner.
I am wondering how can i save output each layer (hidden , output layer) in the form of array?
I tried model.layers[i].output but it only give me result in Tensor(“dense_1/Relu:0”, shape=(?, 128), dtype=float32)
Hi Jason, thanks for the tutorial! I’ve just started playing around with machine learning this weekend and it helped me a lot! I made a tkinter canvas to freely draw numbers and then feed them to the model for the predictions. I got frustrated at first because the results were nowhere near the 0.75% error rate the CNN model gave me after training. Some numbers would almost never be predicted correctly!
Only when I read the Javascript implementation web link above I realized the importance of preprocessing. After centering the image on its center of mass and rescaling, the error rate got negligible, even for poorly drawn numbers!
hello,
Thanks fa dis good example …
but it is recognising single digit itself.
what if i want to detect
123 X 435
234 X 543
987 X 453
kind of handwritten information line by line, how can i achieve this? Thanks in advance
but segmenting is really works?? to get the numbers line by line as i mentioned? Is this possible or any other perfect way by using deep learning(keras)?
I have an error issues when i run build_model function
but the message does’nt show any wrong code?
# build the model function with logarithmic loss and ADAM gradient descent
def baseline_model():
# create model
model = Sequential()
model.add(Conv2D(32, (5, 5), # filter and kernel
input_shape=(1, 28, 28),
activation=’relu’))
model.add(MaxPooling2D())
model.add(Dropout(0.2))
model.add(Flatten())
model.add(Dense(128, activation=’relu’))
model.add(Dense(num_classes, activation=’softmax’))
# compile the model
model.compile(loss=’categorical_crossentropy’,
optimizer=’adam’,
metrics=[‘accuracy’])
return model
InvalidArgumentError: Negative dimension size caused by subtracting 5 from 1 for ‘{{node conv2d_4/Conv2D}} = Conv2D[T=DT_FLOAT, data_format=”NHWC”, dilations=[1, 1, 1, 1], explicit_paddings=[], padding=”VALID”, strides=[1, 1, 1, 1], use_cudnn_on_gpu=true](Placeholder, conv2d_4/Conv2D/ReadVariableOp)’ with input shapes: [?,1,28,28], [5,5,28,32].
During handling of the above exception, another exception occurred:
ValueError Traceback (most recent call last)
18 frames
in ()
1 # fun the model function
—-> 2 model = baseline_model()
3
4 # train the model by fit function
5 model.fit(X_train, y_train,
/usr/local/lib/python3.7/dist-packages/keras/engine/sequential.py in add(self, layer)
200 # and create the node connecting the current layer
201 # to the input layer we just created.
–> 202 layer(x)
203 set_inputs = True
204
/usr/local/lib/python3.7/dist-packages/keras/engine/base_layer.py in __call__(self, *args, **kwargs)
975 if _in_functional_construction_mode(self, inputs, args, kwargs, input_list):
976 return self._functional_construction_call(inputs, args, kwargs,
–> 977 input_list)
978
979 # Maintains info about the Layer.call stack.
/usr/local/lib/python3.7/dist-packages/keras/engine/base_layer.py in _functional_construction_call(self, inputs, args, kwargs, input_list)
1113 # Check input assumptions set after layer building, e.g. input shape.
1114 outputs = self._keras_tensor_symbolic_call(
-> 1115 inputs, input_masks, args, kwargs)
1116
1117 if outputs is None:
/usr/local/lib/python3.7/dist-packages/keras/layers/convolutional.py in call(self, inputs)
247 inputs = tf.pad(inputs, self._compute_causal_padding(inputs))
248
–> 249 outputs = self._convolution_op(inputs, self.kernel)
250
251 if self.use_bias:
/usr/local/lib/python3.7/dist-packages/tensorflow/python/util/dispatch.py in wrapper(*args, **kwargs)
204 “””Call target, and fall back on dispatchers if there is a TypeError.”””
205 try:
–> 206 return target(*args, **kwargs)
207 except (TypeError, ValueError):
208 # Note: convert_to_eager_tensor currently raises a ValueError, not a
/usr/local/lib/python3.7/dist-packages/tensorflow/python/framework/op_def_library.py in _apply_op_helper(op_type_name, name, **keywords)
748 op = g._create_op_internal(op_type_name, inputs, dtypes=None,
749 name=scope, input_types=input_types,
–> 750 attrs=attr_protos, op_def=op_def)
751
752 # outputs is returned as a separate return value so that the output
here’s the code when i load the data
——————————————————————————————————————–
# load data digit
(X_train, y_train), (X_test, y_test) = mnist.load_data()
——————————————————————————————————————–
then im doing the transformation, i’ve been followed through your code
——————————————————————————————————————–
# reshape data menjadi [samples][width][heights][channels]
X_train = X_train.reshape((X_train.shape[0], 28, 28, 1)).astype(‘float32’)
X_test = X_test.reshape((X_test.shape[0], 28, 28, 1)).astype(‘float32’)
——————————————————————————————————————–
and this where im normalizing the digit data into 0-1
——————————————————————————————————————–
# normalisasi input dari 0-255 menjadi 0-1
X_train = X_train / 255
X_test = X_test / 255
——————————————————————————————————————–
and then im doing one hot encoding to each output
——————————————————————————————————————–
# one hot encode pada masing-masing label outputnya
y_train = np_utils.to_categorical(y_train)
y_test = np_utils.to_categorical(y_test)
num_classes = y_test.shape[1]
——————————————————————————————————————–
this code when i run build_model function
——————————————————————————————————————–
# fun the model function
model = baseline_model()
# train the model by fit function
model.fit(X_train, y_train,
validation_data = (X_test, y_test),
epochs=10, batch_size= 200, verbose=2)
——————————————————————————————————————–
I am too busy to debug everyone’s code. My advice would be to simply run the code and see if you have any error. Usually a mistake in the model will result in some error immediately when you start the training.
Hi
it seems there is an error in baseline convolution model function definition
shape of input in conv layer you define 1,28,28 but you are using in next section 28,28,1 and you are using channel last layout but written as [pixel][width][height]


")


Thanks for this tutorial. It was great. Though(it might sound silly) how do I see it in action? I mean if I wanna see it predict an answer for an image how do I do that?
Thanks again.
In it’s current form it is not a robust system.
You will have to provide a digit image with the same dimensions.
great work!!
but can you show that in action with a sample image
sir please help me !!
pip install tensorflow
ERROR: Could not find a version that satisfies the requirement tensorflow (from versions: none)
ERROR: No matching distribution found for tensorflow
py ver is 3.8.2
win 10
i am on it from one month but didnt got the perfect solution i feel you can help me out from this
I recommend this tutorial:
https://machinelearningmastery.com/setup-python-environment-machine-learning-deep-learning-anaconda/
How to predict an answer for an new image: https://blog.luisfred.com.br/reconhecimento-de-escrita-manual-com-redes-neurais-convolucionais/
use model.predict()
What is front end and back end used in this please tell me
Keras front end, tensorflow backend.
This URL is off-line now. It was changed to https://medium.com/luisfredgs/reconhecimento-de-escrita-manual-com-redes-neurais-convolucionais-6fca996af39e
Hello , i am also working on this Project and i choose this for my final year project of software engineering so i want help from u to understand it more better.
miansahilawais@gmail.com
Do you have a working program which recogniting the numbers ?
Just the examples in this tutorial Adrian.
did you get working program?
When I try the baseline model with MLPs I get much worse performance than what you are showing (an error rate of 53.64%). Any idea why I could be seeing such vastly different results when I’m using the same code? Thanks.
Hi Matthew, that is surprising that the numbers are so different.
Theano backend? or TensorFlow? What Platform? What version of Python?
Try running the example 3 times and report all 3 scores.
I have the same problem. I using Theano backend. platform: Pycharm. version 3.5
Sorry to hear that Adrian.
Does it work if you run on the command line?
I am also having the same issue of getting a very high error rate: 51.08%, 43.26% and 52.01%. But then I found that I forgot to normalize the pixels values from 0-255 to 0-1. After correcting now I got 1.93% baseline error.
Can you please explain this effect of normalization?
Yes, I have a huge post on the topic here:
https://machinelearningmastery.com/how-to-improve-neural-network-stability-and-modeling-performance-with-data-scaling/
Thanks!
To get an error rate that high, the code must have been copied incorrectly or something similar. Beyond that, do notice that each time you run this, the final output will be slightly different each time because of the Dropout layer in the neural network. It will randomly choose that 20% each time it runs thereby slightly affecting the final outcome.
yes.but the resulting accuracy varied even though i removed the dropout layer. any thoughts?. the accuracy shouldn’t change right?
You will get different accuracy each time you run the code. See this post:
https://machinelearningmastery.com/randomness-in-machine-learning/
wow! I realize that now. thank you
Could you please give some simple example for CNN for ex may be in uci repository data set. Whether is possible to apply CNN for numeric features.
Sorry, I don’t have such an example.
Hello Jason, I tried running the script, but the baseline model is taking too much time.. its running from past 20 hours and still is on 4th EPoch,, can you please suggest some way to speed up the process.. I am using 4 gb ram computer, and running on Anaconda Theano backened Keras
Sorry to hear that Dinesh.
Perhaps try training on AWS:
https://machinelearningmastery.com/develop-evaluate-large-deep-learning-models-keras-amazon-web-services/
Hi Jason,
What is the configuration of machine that you used to run the model.. have you used GPU to improve performance? How much time it took for you?
Also AWS is a paid platform, is there any free platform for running ML algorithms?
Thanks
I used at 8 core machine with 8GB of RAM. It completed in reasonable time from memory.
AWS is very reasonably priced, I think less than $1 USD per hour. Great for one-off models like this.
Ran to 10 epochs in about 6 minutes for me, also 4gb of RAM. Check your code?
Nice work!
Hi! Great post! I tried it, but for the first CNN It does not seem to compile. I got:
ValueError: Filter must not be larger than the input: Filter: (5, 5) Input: (1, 28)
just after model = baseline_model()
I have updated the examples, try again!
Hi jason, I tried it, but I got the error below. I use tensorflow r0.11. I’m not sure whether it is the casuse.
Using TensorFlow backend.
Traceback (most recent call last):
File “/Users/Jack/.pyenv/versions/3.5.1/lib/python3.5/site-packages/tensorflow/python/framework/common_shapes.py”, line 594, in call_cpp_shape_fn
status)
File “/Users/Jack/.pyenv/versions/3.5.1/lib/python3.5/contextlib.py”, line 66, in __exit__
next(self.gen)
File “/Users/Jack/.pyenv/versions/3.5.1/lib/python3.5/site-packages/tensorflow/python/framework/errors.py”, line 463, in raise_exception_on_not_ok_status
pywrap_tensorflow.TF_GetCode(status))
tensorflow.python.framework.errors.InvalidArgumentError: Negative dimension size caused by subtracting 5 from 1
Ouch Jack, that does not look good.
It looks like the API has changed. I’ll dive into it and fix up the examples.
OK, I have updated the examples.
Firstly, I recommend using TensorFlow 0.10.0, NOT 0.11 as there are issues with the latest version.
Secondly, You must add the following two lines to make the CNNs work:
Fix taken from here: https://github.com/fchollet/keras/issues/2681
I hope that helps Jack.
Hi Jason.
Thanks for the great tutorial.
Your comment has not solved the problem yet, and we still the same error, Could you please modify your model to work with TF backend?
Keras has changed it’s input format. Instead of [pixel, width, height] it is now [width, height, pixel].
Change the input_shape = (28, 28, 1) in conv2D and in reshape call.
Use parameter : data_format=’channels_first’ in Input layer Conv2D
model.add(Conv2D(32, kernel_size=(3, 3) , activation=’relu’,data_format=’channels_first’, input_shape=(1,28,28)))
or you need to change in default keras configuration
in ~/.keras/keras.json
from “image_data_format”: “channels_last” => “image_data_format”: “channels_first”
thanks
thanks.it solved my problem.
Glad ti hear it.
Hi, thanks for the great tutorial !
I tried predicting with a test set and got the one-hot encoded predictions. I was just wondering if there’s a built-in function to convert it back to original labels (0,1,2,3…).
Great question Abhai.
If you use scikit-learn to perform the one hot encoding, it offers an inverse transform to turn the encoded prediction back into the original values.
http://scikit-learn.org/stable/modules/generated/sklearn.preprocessing.OneHotEncoder.html
That would be my prefers as a starting point.
Hello,
Thank you very much for your usual brief and comprehensive illustration and discussion.
I’m glad you found the post useful Berisha.
Hello,
After finishing learning, how can I recognize my own pictures with this network.
Great question gs, I don’t have an example at the moment.
You will need to encode your own pictures in the same way as the MNIST dataset – mainly rescale to the same size. Then load them as a matrix of pixel values and you can make predictions.
jason can u brief more about this??? please
Thanks for the suggestion, I hope to cover it in the future.
Hello,
Thanks for great example, but how do I save the state of the net,
I mean that net learns on 60000 examples, then it tests and try to guess 10000
But if I want to use always, every day, for example, how can I use it without training it every day?
Great question, see this post for a tutorial on saving your net:
https://machinelearningmastery.com/save-load-keras-deep-learning-models/
Jason, does your book explain “WHY” you chose the various layers you did in this tutorial and shed light on how and why to choose certain designs for different data sets?
No, just the how John.
Why us hard, in most cases best results are achieved with trial and error. There is no “theory of neural networks” that helps you configure them.
hello
when i try to make a prediction for my own image, the net get it wrong
this is depressing me.
i use the command model.predict_classes(img)
please is there a way to get correct answer for my handwritten digit
Perhaps you need more and different training examples Nassim?
Perhaps some image augmentation can make your model more robust?
Great tutorial Jason, in fact you are the best, very easy to follow, I enjoy all your tutorials, thank you! In fact,
I achieved an error rate of 0.74 at one point using GPU and it took about 30sec to run.
Well done Anthony!
Thanks for the great tutorial. Just one thing I didn’t understand. In the Convolution2D layer, there is a border_mode=”valid” parameter. What does this do? What’s its purpose? The Keras documentation doesn’t seem to have an explanation for it either.
Excellent tutorial Jason. I really enjoyed reading it and implementing it. I just figured that if you have cuDNN installed it makes things waay fast (at least for the toy examples I’ve tried). I recommend anyone reading this to install cuDNN and configure theano to use it. You just have to put
[dnn]
enabled = True
in theanorc file.
Nice, thank for the tip Sanjaya.
See this post for how to run on AWS with GPUs if you do not have the hardware locally:
https://machinelearningmastery.com/develop-evaluate-large-deep-learning-models-keras-amazon-web-services/
Hi Jason,
I am trying to apply the CONVOLUTION1D for the IRIS Data.
The code is as below
—————————————————————————————–
max_features = 150
maxlen = 4
batch_size = 16
embedding_dims = 3
nb_epoch = 3
nb_classes =3
dropoutVal = 0.5
nb_filter = 5
hidden_dims = 500
filter_length = 4
import pandas as pd
data_load = pd.read_csv(“iris.csv”)
data = data_load.ix[:,0:4]
target = data_load.ix[:,4]
X_train = np.array(data[:100].values.astype(‘float32’))
Y_train = np.array(target[:100])
Y_train = np_utils.to_categorical(Y_train,nb_classes)
X_test = np.array(data[100:].values.astype(‘float32′))
Y_test = np.array(target[100:])
Y_test = np_utils.to_categorical(Y_test,nb_classes)
std = StandardScaler()
X_train = X_train_scaled = std.fit_transform(X_train)
X_test = X_test_scaled = std.transform(X_test)
X_train1 = sequence.pad_sequences(X_train_scaled,maxlen=maxlen)
X_test1 = sequence.pad_sequences(X_test_scaled,maxlen=maxlen)
model = Sequential()
model.add(Embedding(max_features,embedding_dims,input_length=maxlen))
model.add(Convolution1D(nb_filter=nb_filter,filter_length=filter_length, border_mode=’valid’,activation=’relu’))
model.add(GlobalMaxPooling1D())
model.add(Dense(hidden_dims,activation=’softmax’))
model.add(Dense(nb_classes))
model.add(Activation(‘sigmoid’))
model.compile(loss=’binary_crossentropy’, optimizer=’adam’, metrics=[‘accuracy’])
model.fit(X_train1, Y_train, nb_epoch=5, batch_size=10)
scores = model.evaluate(X_test1, Y_test, verbose=0)
predictions = model.predict(X_test1)
—————————————————————————————-
I want to check if I am in the right direction on this.
I am not getting the accuracy more than 66% which is quite surprising.
Am I doing the Embedding Layer correctly. As when I see the embedding layer weights I see there is difference in what Layer Paremeters I set with the Weights I retreive.
Please advise.
Regards
Ganesh
I would recommend using an MLP rather than a CNN for the iris flowers dataset.
See this post:
https://machinelearningmastery.com/multi-class-classification-tutorial-keras-deep-learning-library/
Hi Jason
Thank you so much for your great tutorial.
By the way, can you explain why MLP is better than CNN for iris flowers dataset. Thanks a lot.
Best wishes,
Lua
Because the data is tabular (e.g. measurements of flowers), not images (e.g. photos).
If the data was photos, then a CNN would be the method of choice.
Thank you very much for this post. (:
You’re welcome Ger.
can you tell me how can i give the system an image and he tells me what number is it ? sorry i am new to this , thank you !
Hi Remon,
The image will have to be scaled to the same dimensions as those expected by the network.
Also, in this example, the network expects images to have a specific set of proportions and to be white digits on a black background. New examples will have to be prepared in the same way.
how will we prepare that?
Google tutorials on Python “Image”, for example:
http://effbot.org/imagingbook/introduction.htm
Hi jason,
snippet of your code:
————————-
in the step # load data
(X_train, y_train), (X_test, y_test) = mnist.load_data()
# reshape to be [samples][pixels][width][height]
X_train = X_train.reshape(X_train.shape[0], 1, 28, 28).astype(‘float32’)
X_test = X_test.reshape(X_test.shape[0], 1, 28, 28).astype(‘float32’)
you are using mnist data. what kind of data strurcture is it?
how to pre process images (in a list) an labels(in a list) into this structure anf fid it to keras model?
what exactly this line
X_train = X_train.reshape(X_train.shape[0], 1, 28, 28).astype(‘float32’)
does?
thanks
joseph
Hi Joe,
The MNIST data is available within Keras.
It is stored as NumPy arrays of pixel data.
When used with a CNN, the data is reshaped into the format: [samples, pixels, width, height]
I hope that helps.
Hi Jason, what led you to choose 128 neurons for the fully-connected layer? (Calculating the number of activations leading into the fully-connected layer, it’s much larger than 128) Thanks!
Trial and error Amy.
Thank you!
Hi @Jason Brownlee, first things first awesome tut u got there ..!!
There’s a small problem at d following lines:
Small CNN:
# build the model
model = baseline_model()
Large CNN:
# build the model
model = larger_model()
Using the recent versions of Tensorfllow throws an AttributeError:
=> AttributeError: module ‘tensorflow.python’ has no attribute ‘control_flow_ops’ <=
solution:
Add following lines:
import tensorflow as tf
tf.python.control_flow_ops = tf
ref:
https://github.com/fchollet/keras/issues/3857
can u plz update the code..!!
once again thanx for d grt tut.
keep up the good work..!!
Thanks for the note Shaik, I’ll investigate.
your posts are great for an awesome start with keras. m loving it sir.
Thanks Mouz.
Hello sir, thanks for your great writing and well explanation. I have tried it and it works. But how can I train the network using my own handwriting data set instead of MNIST data.
It would be very helpful if you shed some light on this..
Thanks in advance.
Hi Faruk,
Generally, you will need to make the data consistent in dimensions as a starting point.
From there, you can separate the data into train/test sets or similar and begin exploring different configurations.
Does that help? Perhaps I misunderstand the question?
Hi
Thanks for your nice explanation. I succesfully trained all the networks you introduced here. However, when I want to use the trained model to make some predictions, using this pice of code:
im=misc.imread(‘test8.png’)
im=im[:,:,1]
im=im.flatten()
print(model.predict(im))
it gives me the error:
Error when checking : expected dense_input_1 to have shape (None, 784) but got array with shape (784, 1)
the ‘im’ has the shape (,784) , how can I feed in an array of size (None,784) ?
Hi Arash,
Consider reshaping as follows:
Hi Jason,
Thank you for your wonderful tutorial!
I have question about the ‘model.add(Dropout(0.2))’. As you stated ‘The next layer is a regularization layer using dropout called Dropout. It is configured to randomly exclude 20% of neurons in the layer in order to reduce overfitting.’ in the post, Dropout is treated as a separated layer in Keras, instead of a regularization operation on the existing layers such as convolution layer and fully-connected layer. How is this being achieved?
Since this Dropout is between MaxPooling and the next fully-connected layer, which part of the weights was applied Dropout?
Thank you very much!
Good question, it affects the weights between the layers it is inserted.
Hai mr Jason can we have chance to apply Ada boost to this hand digit recognition , may I know what the actual rate of accuracy
I have not, I recommend using the sklearn implementation of adaboost.
Hello sir, thanks for your well explanation. I have tried it and it works well. But how can I train the network using my own handwriting data set instead of MNIST data set.
It would be very thankful if you shed some light on this..
Thanks in advance.
You will need to load the data from file, adjust it so that it all has the same dimensions, then fit your model.
I do not have an example of working with custom data at the moment, sorry.
i tried the simple CNN with theano backend.
”’ImportError: (‘The following error happened while compiling the node’, DotModulo(A, s, m, A2, s2, m2), ‘\n’, ‘/home/pramod/.theano/compiledir_Linux-4.8–generic-x86_64-with-debian-stretch-sid-x86_64-2.7.13-64/tmpXpzrkl/d16654b784f584f17fdc481825fd2cca.so: undefined symbol: _ZdlPvm’, ‘[DotModulo(A, s, m, A2, s2, m2)]’)”’
i got this error while running the baseline model.
can you please tell me how to correct this?. i tried multiple ways of installing theano including pip and conda .
im guessing my theano installation is faulty .
clueless on how to proceed . please help.
thank you
I have not seen this error, sorry.
Many of my students have great success using Keras and Theano with Anaconda Python.
Got the verbatim code from above with one change:
X_train = X_train[:-20000 or None]
y_train = y_train[:-20000 or None]
to reduce the memory usage to run on a Mac OSX El Capitan (GeForce 650M with 512MB)
The error rate was a little higher at
1.51%
I used keras with the tensorflow-GPU backend.
Thanks for the note Chris!
Hi Jason,
Really awesome introduction to keras and digit recognition for a beginner like me.
You are using mnist dataset which is in form of pickled object (I guess). But my question is how will you convert set of existing images to this pickled object?
Secondly, you are calculating error rate compared to your test dataset. But suppose I have an image with a number written on it, how will you return class label of it, without making much changes in the above program.
Thanks Vikalp.
I would recommend loading your image data as numpy arrays and working with them directly.
You can make a prediction with the network (y = model.predict(x)) and use the numpy argmax() function to convert the one hot encoded output into a class index.
Hi Jason,
Thanks for quick reply.
I was looking into the way you suggested. Following is the code for that:
color_image = cv2.imread(“two.jpg”)
gray_image = cv2.cvtColor(color_image, cv2.COLOR_BGR2GRAY)
a = model.predict(numpy.array(gray_image))
print(a)
But getting following error:
ValueError: Error when checking : expected dense_1_input to have shape (None, 784) but got array with shape (1024, 791)
I am not sure if I am doing correct. Please guide over this. Thank you.
The loaded image must have the exact same dimensions as the data used to fit the model.
You may need to resize it.
Have you done this successfully? Can you please provide me the code
Hello,
I tried to save and load the model as you describe in another post, but I get always erros like:
ValueError: Error when checking model target: expected dense_3 to have shape (None, 1) but got array with shape (10000, 10)
The error happens at the
score = model.evaluate(…)
line after load
#
# save model and weights
print("Saving model...")
model_json = model.to_json()
with open('mnist_model.json', 'w') as json_file:
json_file.write(model_json)
model.save_weights("mnist_weights.h5")
print("model saved to disk")
# load model and weights
print("Laoding model...")
with open('mnist_model.json') as json_file:
model_json = json_file.read()
model = model_from_json(model_json)
model.load_weights('mnist_weights.h5')
print("mode loaded from disk")
print("compiling model...")
model.compile(loss='sparse_categorical_crossentropy', optimizer='adam', metrics=['accuracy'])
scores = model.evaluate(X_test, y_test, verbose=0)
print("Baseline Error: %.2f%%" % (100-scores[1]*100))
How to get precision and recall and f-measure of predicted output?
You can collect the predictions then use the tools from sklearn:
http://scikit-learn.org/stable/modules/classes.html#module-sklearn.metrics
Hi Jason,
Great site and tutorial. I understand you haven’t been able to describe how to pre-process our own images to be readable in our MNIST trained models, as a lot of other people here have asked. Perfectly understand if you don’t have the time to explain how to do this.
Would you be able to guide me on how I might continue my search to do this though? I’ve tried creating a new 28×28 pixel image, black background with white foreground for the image drawing, converting this to grayscale (for 1,28,28 input dimensions). Then I divide that by 255. The prediction accuracy for these customs images are very low (the model has a 99% accuracy on the MNIST test images).
Looking at the individual features, I see that the locations of the decimals for the custom images pre-processed as described above seem quite different to the MNIST ones, with the decimals and 0’s appearing in vastly different locations compared to the MNIST data. Completely different patterns. This leads me to believe some more complicated pre-processing must be going on besides the intuitive steps done above. I looked at instructions on the MNIST page for how the pre-processing took place, but don’t know how to implement these instructions in python. There also seem to be some pre-processing scripts out there but I can’t get these to work.
Any other suggestions on how I might continue my search to find how to pre-process custom images? All instructions in Google are too complex or the implementation seems to fail.
Generally, you need to train a model on data that will be representative of the type of images you need to make predictions on later.
Images will need to be of the same size (width x height) and the same colors.
If you expect a lot of variation in char placement in images, you can use image augmentation to create copies of your input data with random transforms:
https://machinelearningmastery.com/image-augmentation-deep-learning-keras/
I hope that helps as a start.
hey, can you please tell me how to mnist dataset readable, i have downloaded it in csv format now i want my image sto be readable
Hi Jason,
thx for your wonderfull courses!
My question is, why the pixels should be standardized to 0…1?
I have input like this:
70.67, 3170.27, 56.31, 1.28, 0.39, 0
204.70, 26419.57, 162.54, 0.42, -0.97, 1
173.70, 20141.12, 141.92, 0.61, -1.14, 3
219.80, 42211.29, 205.45, 0.55, -1.41, 0
243.00, 43254.00, 207.98, 0.23, -1.73, 0
241.22, 21973.94, 148.24, 0.07, -0.60, 3
245.42, 46176.45, 214.89, 0.29, -1.80, 0
164.78, 25253.94, 158.91, 1.08, -0.13, 0
115.29, 9792.57, 98.96, 0.56, -1.25, 1
The last row is the result I have split it away and converted it to one shot hot.
I am trying many models and many different parameters but none is learning anything. Even trying oversampling on few collums and looking if a model can reproduce the trained outputs fails!
But all your examples run without problems and produce the same results like you describe. So my setup: latest python 3.6 with anaconda runing on windows 10, should be all right.
So I fear that somethig with my inputs is wrong 🙁 . Should I standardice them? How can I do it? Later I will also have mixed inputs: numbers and strings. How could I work with this?
Would be very nice to get your kind help!
Thanks!
(pls excuse my very little perhaps bad english from school)
Input data must be scaled when working with neural networks, otherwise, large inputs will bias the network.
Ty Jason for your replay!
Meanwhile I found everything I needed here:
http://scikit-learn.org/stable/modules/preprocessing.html#preprocessing
My models are working now. Prediction is not as good as I want (just ~30%) but good enough to continue …
Thanks!
I’m glad to hear it.
Hi Jason,
Thanks for this! This is really helpful. I was just wondering; I realized you used all 60,000 training data. How would the code look like if you were to use only say 10k or 30k of the training data, yet achieve a low error?
Thanks!
You can select as much or little as of the training data as you wish to fit the model.
You can use array indexing to select the amount of data you require:
https://docs.scipy.org/doc/numpy/reference/arrays.indexing.html
Hello,
Thanks for your code.
I have a question.
How can I add a new activation function to this code?
I found the place where I can add the activation function, but I don’t know where should I add the derivative of the new activation function.
I really appreciate if you help me.
Thanks.
Ehsan.
Hi Ehsan,
You can specify the activation function between layers (e.g. model.add(…)) or on the layer (e.g. Dense(activation=’…’)).
Hello,
I couldn’t run the above example.
got the following error.
runfile(‘C:/Users/Paul/Desktop/CNN.py’, wdir=’C:/Users/Paul/Desktop’)
Traceback (most recent call last):
File “”, line 1, in
runfile(‘C:/Users/Paul/Desktop/CNN.py’, wdir=’C:/Users/Paul/Desktop’)
File “C:\Users\Paul\Anaconda2\lib\site-packages\spyderlib\widgets\externalshell\sitecustomize.py”, line 714, in runfile
execfile(filename, namespace)
File “C:\Users\Paul\Anaconda2\lib\site-packages\spyderlib\widgets\externalshell\sitecustomize.py”, line 74, in execfile
exec(compile(scripttext, filename, ‘exec’), glob, loc)
File “C:/Users/Paul/Desktop/CNN.py”, line 54, in
model = larger_model()
File “C:/Users/Paul/Desktop/CNN.py”, line 40, in larger_model
model.add(Conv2D(30, (5, 5), input_shape=(1, 28, 28), activation=’relu’))
TypeError: __init__() takes at least 4 arguments (4 given)
Can you help me out?
Sorry to hear that Paul, the case of your error is not obvious to me.
Perhaps confirm that you have the latest versions of all libraries and there were no copy paste errors with the code.
Nice work and spirit Jason, Thank you… it worked for me. I’m used Anaconda and GPU
Well done Jose!
hello team, I have following dought please help me
# create model
model = Sequential()
model.add(Conv2D(30, (5, 5), input_shape=(1, 28, 28), activation=’relu’))
model.add(MaxPooling2D(pool_size=(2, 2)))
in the above code input shape=(1,28,28)that’s for binary image, for color image we kept (3,28,28)..but what we kept for non image data?
I have dataset of 10248 obs with 18 variables including target variable.
what I need to kept in the input_shape?
please help me.
CNN is for image data.
For non-image data, you may want to consider an MLP. For sequence data, consider an RNN.
Sir, the input to my neural network is in a numpy array e.g. [[1,1,1,2], [1,2,1,2], ……..] and in this line of code
X_train = X_train.reshape(X_train.shape[0], 1, 28, 28).astype(‘float32’)
the compiler throws an error:
ValueError: total size of new array must be unchanged
looking forward for an solution to the problem
If your data is not image data, consider starting with an MLP, not a CNN.
HI, Jason. Great tutorial! This is my first CNN and I cannot believe it is actually working, exited!
I am just wondering why there is no need to initialize the weights in CNN, using “kernel_initializer=”? In the baseline MLP you initialize every layer whereas for CNN, those lines are not there, no matter for the conv layer, the maxpooling layer, or the final fully connected layer.
Did I miss something? Thanks in advance.
There is a default kernel_initializer:
https://keras.io/layers/convolutional/
Great work .Thank you Sir . After Completing the training and testing I want to predict a character where I have a new character Image which Contains a New handwritten character . How Can I Do that sir .Please help me
How can I evaluate my models and estimate their performance
on unseen data.
See this post:
https://machinelearningmastery.com/evaluate-skill-deep-learning-models/
Hi, Jason
My question is :
test_data is for check the model once you have already defined a model ( by using train_data).
why do you use the test data in your model training?
model.fit(X_train, y_train, validation_data=(X_test, y_test), epochs=10, batch_size=200, verbose=2)
# Final evaluation of the model
scores = model.evaluate(X_test, y_test, verbose=0)
It is only used to report the skill of the model on unseen during training (validation dataset).
Hi Jason still not clear for me (How Keras divide the datasets)?
is the validation data the same test data itself..?
this is what I have seen in the model fit equation !
so the datasets only divided by keras to training and test..
and then the test data is fit instead of validation?
I can not understand it but in this way !
Am I Right?
thank you so much
saeed
You can learn more about the validation dataset here:
https://machinelearningmastery.com/difference-test-validation-datasets/
Good evening, I really have your explanation on the recognition of manuscript characters and its helped me a lot to understand the architecture and operation of a CNN with keras. But, I have a concern, you will not have a good tutorial that deals with the problem of face recognition with CNN … I have done with other approaches like OpenCV, dlib … But, Would like to do it with a CNN.
Thank you…
Great suggestion, thanks.
How will predict the prediction on a new test example?
Fit the model on the entire available dataset, then pass in an image to:
Hi, Jason. A start to play with mnist and CNN in keras and your post was very helpful!
Thanks!
I have one question: In my tests I got poor probabilities distribution. In most cases we got 1 for the predicted class and 0 for others. I try figure out how to get a more informative distribution specially to able to find possible prediction errors. Initially I think that results have connection to a sigmoid activation function but look in the model we have only ReLu and Sofmax linear functions. Any suggestion on how we get more descriptive probabilities distribution?
I just see we have using Sofplus not Softmax function. I’ll try linear and relu functions to see whats the difference in outputs =)
Let me know how you go.
Well, first I must retifie my mess with function names. I was start with the same model in the last example, i.e., with Softmax: a non-linear function. And got a binary 0 or 1 in probabilities ndarray when activate with predict_proba().
One test with linear function the learning converging slowlly and I decide to drop away this test for now…
With Softplus, a function I was think is similar to linear, got non-normalized array of probabilities but, more Interesting, in cases when model fails to predict all values in probabilities array is zero! This can be very usefull when we try to catch just cases when model can’t predict.
A last test with Sigmoid I got the same behavior as Softplus with cases when all probabilities is 0 but in cases correct predicted got value 1 on class predicted. This make more sense with probabilities normalized but no one case with a distribution of probabilities non-binary.
To sumarize: the function with best results still be Softmax; No one function got a distribution non-binary when activation with predict_proba(); Sofplus and Sigmoid show a Interesting behavior with all values returned by predict_proba() is 0 in fails cases.
After all I still try to find a way to got more descriptive distribution of probabilities.
The model is not trying to output probabilities, it is approximating a function.
No matter what, you will have to mangle the output to get probability-looking values coming out.
Updating…
I found my mistake. In prediction I just forgot to normalize pixels values from 0-255 uint8 to 0-1 float. I think maybe this kind of inputs saturated and set outputs to 1 or 0 in all cases.
Glad to hear you figured it out.
Thanks for another great post. Could you point us to techniques that may be useful for detecting which patches/regions of images the network learns as most relevant for making the predictions? This is analogous to feature importances.
For example, is it possible to analyze the last hidden layer to find what parts of a given image contribute most to making one of the ten predictions?
It’s an area I’d like to cover in the future.
Hi Jason, I have tried this code tutorial on my windows 8.1 machine with theano 0.9 and keras 2.0.5 installed over Geforce 940M gpu but my model baseline error is worst , almost 90% . Please help
Consider running the example a few times.
Sir i tried it, but it did not help me. Plz suggest.
Jason, I’m going through trying to replicate these results on the data from the Kaggle competition using the same dataset, but I have a weird problem with the CNN section.
When I used the regular neural network model, it reached near 99% accuracy on the training set within a few epochs. However, when I use the CNN code in this article, the first epoch has an accuracy of around 53-54% and only slowly climbs to around 94% accuracy at best on the training set.
I’m using a training set of 42000 images rather than 60000, but I can’t imagine that would produce such a large effect on the performance of the model. Any idea what else might be going wrong?
(I’m using tensorflow backend for both kinds of NN by the way)
Double check you have normalized the input data.
This appears to have fixed the issue. Now I have 90% accuracy on the first epoch. In following along I think I accidentally divided the pixel values by 255 again after having normalized them already earlier.
Glad to hear that you worked it out Stefan.
Thank you for the help. Do you know of any articles that explain the different kinds of network topology and how to go about deciding what kind of network to use? Is it all trial and error or are there certain kinds of networks suited for different problems?
Great question.
Generally, start with an MLP as a baseline regardless. They can do a lot and provide a good starting point for more sophisticated models to beat
Use CNNs for problems with spatial input like image, but worth a shot on text, audio and other analog data.
Use RNNs for problems with a time component (e.g. observations over time) as input and/or output.
Does that help?
Thank you this is very helpful. I also wanted to know if there is any standard methodlogy for determining the size and number of feature maps, pooling layer patches, and number of neurons in the fully-connected layers. I’ve seen some rules of thumb for the number of neurons in fully-connected layers, but I’m not sure how to go about deciding which value to choose without just running the network over and over.
I’m sorry to keep bothering you by the way, I appreciate the help.
Not that I’m aware. It’s more art than science at this stage. Test.
What made you choose the value of 32 for the filter output dimension when creating the model for your 2D neural net? I’m teaching myself about this process and am interested in how one would optimize these variables.
It is arbitrary, 32 is commonly used in CNN demonstrations.
I recommend tuning the hyperparameters of your model on your problem to get the best performance.
Hello Jason! Any idea why am I getting this error?https://stackoverflow.com/questions/45479009/how-to-train-a-keras-ltsm-with-a-multidimensional-input
Sorry, I cannot debug your code for you, I just don’t have the capacity. I’m sure you can understand.
Hi jason, have you tried this with DropConnect and can you tell me how i can implement Dropconnect to MNIST?
Sorry I have not used drop connect in Keras.
Where does the initialized/default feature maps come from and what do they look like/check for?
What do you mean exactly Matt?
hi ,i am new in machine learning
print(model.predict_classes(x_test[1:5]))
print(y_test[1:5])
here i want to predict first five element from x_test and output is
[2 1 0 4](first five element)
[[ 0. 0. 1. 0. 0. 0. 0. 0. 0. 0.]
[ 0. 1. 0. 0. 0. 0. 0. 0. 0. 0.]
[ 1. 0. 0. 0. 0. 0. 0. 0. 0. 0.]
[ 0. 0. 0. 0. 1. 0. 0. 0. 0. 0.]]
my question is in the above prediction i am getting 2D array if i want to print in digit
[2]
[1]
[0]
[4]
This sounds like a Python array question.
You can access the prediction as the first element of each prediction:
Hi,
I have seen that everyone is eager to check their own handwritten images, follow the steps
1)open paint and write any digit(0-9) and save it as size of 28×28(pixels).
2)Use this code for prediction:
import cv2
test = cv2.imread(‘Test Image’)
test = cv2.cvtColor( test, cv2.COLOR_RGB2GRAY )
test = test.reshape(1, 1, 28, 28)
test = cv2.bitwise_not(test)
pred = model.predict_classes(test)
print(pred)
Thanks!! enjoy NN..
Thanks for sharing.
Hi,
I tried your code, but it is throwing error below:
ValueError: Error when checking : expected dense_1_input to have 2 dimensions, but got array with shape (1, 1, 28, 28)
Any ideas ?
Hi,
I am getting the same error. Where you able to resolve?
Saleem
can you say in which location we have to save the ‘Test image’
In the same directory as your code file.
Is there a typo in the third output print?
The code says:
print(“Baseline Error: %.2f%%” % (100-scores[1]*100))
while the output screen displays:
CNN Error: x.xx%
Yes, I have fixed this typo.
Hi, thank you very much for this program. So i already run the program and train the model and it’s working, then how can i use it for detecting number from my own image input?
Your new images will need to be formatted and resized the same as the MNIST examples.
I don’t have an example sorry.
How can i get the training model from this program? so i can use the model for my program to detecting number from image input
You could train the model and save it, then later load it within your application. This post shows you how:
https://machinelearningmastery.com/save-load-keras-deep-learning-models/
Hi Jason,
Thank you for sharing the code, I learned a lot from this. l also used the for a paper for school (I ran an ‘experiment’ where I change the size of the training set and look at the accuracy). Is that ok with you (if I cite it, of course)?
Thank you!!!
Well done!
Yes of course, please just reference the site or this page.
Hi Jason ,
I am doing a course in neural networks , I appreciate your work you have done for a novices like me. In that course they proposes this problem of classification as linear regression problem to classify two classes . Is this problem using mnist dataset is also linear regression classifying 10 classes?
Thank you>>>!!!
Sorry, I do not have an example of linear regression for classification.
doesn’t your example take linear regression such that given an image it has to calculate probability that it is represented by particular class using linear regression?
The above example demonstrates a neural network, not linear regression.
Hi Jason,
Thanks for such an incredible tutorial!!! I really appreciate your time and effort in putting the code and text, and replying to each and everyone’s questions!
When I try to run the code under “Simple Convolutional Neural Network for MNIST”, as such, I get the following error. Is that something that you can help? I am running it on Jupyter Notebook with Tensorflow 1.2.1 version.
With thanks in advance,
Socrates
________________________________________________________
AttributeError Traceback (most recent call last)
in ()
44
45 # build the model
—> 46 model = baseline_model()
47
48 # Fit the model
in baseline_model()
32 # create model
33 model = Sequential()
—> 34 model.add(Conv2D(32, (5, 5), input_shape=(1, 28, 28), activation=’relu’))
35 model.add(MaxPooling2D(pool_size=(2, 2)))
36 model.add(Dropout(0.2))
~\Anaconda3\envs\tensorflow-sessions\lib\site-packages\keras\models.py in add(self, layer)
462 # and create the node connecting the current layer
463 # to the input layer we just created.
–> 464 layer(x)
465
466 if len(layer.inbound_nodes[-1].output_tensors) != 1:
~\Anaconda3\envs\tensorflow-sessions\lib\site-packages\keras\engine\topology.py in __call__(self, inputs, **kwargs)
601
602 # Actually call the layer, collecting output(s), mask(s), and shape(s).
–> 603 output = self.call(inputs, **kwargs)
604 output_mask = self.compute_mask(inputs, previous_mask)
605
~\Anaconda3\envs\tensorflow-sessions\lib\site-packages\keras\layers\convolutional.py in call(self, inputs)
162 padding=self.padding,
163 data_format=self.data_format,
–> 164 dilation_rate=self.dilation_rate)
165 if self.rank == 3:
166 outputs = K.conv3d(
~\Anaconda3\envs\tensorflow-sessions\lib\site-packages\keras\backend\tensorflow_backend.py in conv2d(x, kernel, strides, padding, data_format, dilation_rate)
3178 raise ValueError(‘Unknown data_format ‘ + str(data_format))
3179
-> 3180 x, tf_data_format = _preprocess_conv2d_input(x, data_format)
3181
3182 padding = _preprocess_padding(padding)
~\Anaconda3\envs\tensorflow-sessions\lib\site-packages\keras\backend\tensorflow_backend.py in _preprocess_conv2d_input(x, data_format)
3060 tf_data_format = ‘NHWC’
3061 if data_format == ‘channels_first’:
-> 3062 if not _has_nchw_support():
3063 x = tf.transpose(x, (0, 2, 3, 1)) # NCHW -> NHWC
3064 else:
~\Anaconda3\envs\tensorflow-sessions\lib\site-packages\keras\backend\tensorflow_backend.py in _has_nchw_support()
268 “””
269 explicitly_on_cpu = _is_current_explicit_device(‘CPU’)
–> 270 gpus_available = len(_get_available_gpus()) > 0
271 return (not explicitly_on_cpu and gpus_available)
272
~\Anaconda3\envs\tensorflow-sessions\lib\site-packages\keras\backend\tensorflow_backend.py in _get_available_gpus()
254 global _LOCAL_DEVICES
255 if _LOCAL_DEVICES is None:
–> 256 _LOCAL_DEVICES = get_session().list_devices()
257 return [x.name for x in _LOCAL_DEVICES if x.device_type == ‘GPU’]
258
AttributeError: ‘Session’ object has no attribute ‘list_devices’
________________________________________________________
Looks like a problem with your TensorFlow version or Keras version. Ensure you have the latest installed.
Also, perhaps try running on the CPU first before trying the GPU.
Thanks for your immediate response, Jason!
Following are the version of Keras and Tensorflow:
Keras: 2.1.1
Tensorflow: 1.2.1
I am not running it on GPU either. In fact my machine does have GPU. It is T450s Lenovo Laptop with Intel(R) Core(TM) i5-5200U CPU @ 2.20GHz .
I would recommend updating to the latest version of Keras 2.1.2 and TensorFlow 1.4.1.
Thanks Jason!
Uninstalled Anaconda completely and reinstalled it. Then installed TensorFlow and Keras on top of that. It worked fine!!!
Well done!
Hi Jason, found your post very informative but I am getting an error saying “cannot import name ‘backend'”. how do i solve it?
Perhaps double check that your version of Keras is up to date?
Finally, the output variable is an integer from 0 to 9. Should be 0 to 0.9.
No, here I am commenting on the range of outputs before we normalize.
thanks a lot.
please, i have a question. how can i create my own custom pooling layer with keras and not using conventional max-pooling layer ?
thanks another time.
I have not done that. Perhaps you can use existing Keras code as a template?
Hi, Jason,
I love your code and it helps me a lot!
I have a question: In your simple CNN example, why you choose Conv2D(32,(5,5),..) (I mean why you choose 32 and 5 these numbers). Also why you choose 128 neurons in the fifth layer?
Also in your larger CNN example, why you choose Conv2D(30,..). I am confused about the reason you choose these numbers rather than other numbers like 31,32,33,34.
Thank you!
I used a little trial and error.
I got down to:
CNN Error: 0.67%
I used the advanced PReLU activation instead of relu, but not sure if that actually helped since I’m not sure how to best initialize the alphas anyway, so just left them at default.
Will look into playing around with the optimizers a bit as well. Possibly playing around with something more advanced than ADAM.
Nice work!
I am getting the “Value Error: Error when checking target: expected dense_8 to have shape (None, 784) but got array with shape (60000, 10)” while building the baseline model. I also did one hot encoding but still ending up the same error.
What is the solution?
it is really a good post, useful for many students who are working on CNN.
I’m Jagadeesh currently doing my under-graduation(B.Tech) at AMRITA UNIVERSITY(INDIA). we are trying to do SENTIMENT ANALYSIS ON PRODUCT REVIEWS USING CNN. The Design of my project is like
step 1: collecting labelled data-set from amazon
step2: using word2vec tool , converting the text into vectors
step3: feeding these vectors as input to CNN .
Now we are struck at converting text into vectors, for this word2vec is giving many vectors for a songle word, i don’t know how to take a single vector from 180 vectors produced for that single word.
kindly please help me.
I have to finish this project by Feb 20th.
Thanking you sir.
I have a few posts on word2vec that may help, perhaps start here:
https://machinelearningmastery.com/develop-word-embeddings-python-gensim/
hello
i run the simple CNN but nothing happen.how can i find out that the code is running?
i wrote the code in jupyter notebook.
Try running from the command line.
Try enabling the verbose output on the fit() function call.
hello again
it works and the cnn error was 0.93%.
i really thank you for your helpful codes.
Nice work!
hello
i have a dataset for handwritten digits in persian, it contains 10 folders for 10 digits(0, 1 ,2, …,9) that in each folder there is 6000 samples for that certain digit.each sample is an image of 61*61 size and in binary(black and white).
now how can i load this dataset in your ” Larger Convolutional Neural Network for MNIST ” code?
are data stored in MNIST images or matrix?
again i really grateful for your help.
His tutorial might give you some ideas:
https://blog.keras.io/building-powerful-image-classification-models-using-very-little-data.html
Hi, Jason. 🙂
I’ve reduced it to 0.16% 🙂 Will continue with tuning.
Thanx for the tutorial, it is pretty useful and understandable! 🙂
Cheers!
Well done!
Hi Jason,
I am a beginner in neural networks. So the question may sound silly but it is really bugging me.
In “Simple Convolutional Neural Network for MNIST” section I see that you have used 32 5×5 filters in the first convolution layer. Right? Why are you using 32 filters only? Is there any mathematical reason for it? Even in the Tensorflow guide website https://www.tensorflow.org/tutorials/layers, I found that they are using 32 filters. What if I use like 100 filters or maybe 10 or 64?
I did understand the parts earlier to this section. Also thanks for the awesome, easy-to-grasp tutorial.
Thanks.
No reason, trial and error and 32 is convention because it often fits nicely into GPU memory. Experiment, see what works for your data.
Will this be working only for Digits? How can i customise it for recognising handwritten words?
Thanks!
Perhaps segment the words into letters first?
thanks for your quick response.. Even then i am confused about the label part. the words as such we will tag as the label or have to use int values that maps to it only?
Each letter you segment will need to be mapped to a label outcome.
Hi there!
Thanks a lot for this great tutorial.
I followed along with you but when I try to fit my model I get an InternalError: GPU sync failed.
Any ideas how to solve this?
Am using Keras + tensorflow with GPU
This sounds like a problem with your environment. Perhaps try searching/posting on stackoverflow?
I ended up just uninstalling Tensorflow and reinstalling the CPU version. Bit slower but no errors 🙂
Glad to hear it Casey!
hello.thanks for your grate post.
can you tell me what does set_image_dim_ordering do?
The line forces the Keras framework to work the same for each platform, regardless of the backend. It helps when I am explaining how to prepare the input data.
Hi,
I am new to Machine Learning. First of all thanks for the awesome tutorials.
I ran the sample code and it everything works. Is there any way that I can use my own training and testing set of images using your sample code?
Thanks
Yes. You will need to prepare the data to ensure the size of the images are all consistent in size.
Then load the data, and use it as we do the MNIST examples.
Hi Jason,
I took the liberty of using your code for a Notebook example using Google Colab and I mention you there.
Let me know if that’s not ok with you.
https://colab.research.google.com/notebook#fileId=15t4LIQdLVe4y_X1t6Mup0IZ4uO0h8mSJ
Thanks for these great tutorials!
Carlos
I’m happy for you to play wit the code, but I’d rather it’s not reposted elsewhere and made publicly available.
For the convolutonal model, I think you need to make a couple of corrections:
1. MaxPooling2D:
The default value for data_format is ‘channels_last’ while your data was reformatted with the channel in front of the data dimensions… It should be:
MaxPooling2D(pool_size=(2,2), data_format=’channels_first’)
2. fitting/evaluation
You have the following code:
model.fit(X_train, y_train, validation_data=(X_test, y_test), epochs=10, batch_size=200, verbose=2)
# Final evaluation of the model
scores = model.evaluate(X_test, y_test, verbose=0)
You have pulled validation from your test. While test is not trained on you would normally decouple your validation and test data to be something like:
split = 1./6. # use 10,000 elelment from train as validation during fit
model.fit(X_train, y_train, validation_split=split, epochs=10, batch_size=200, verbose=2)
^^^^^^^^^^^^^^^^^^^^
Score as before.
Thank you for the example code, it was helpful.
uDude
Hi!
First of all thank you for the example, I tried running the code but python gives an error when running
num_pixels = X_train.shape[1] * X_train.shape[2]
X_train = X_train.reshape(X_train.shape[0], num_pixels).astype(‘float32’)
X_test = X_test.reshape(X_test.shape[0], num_pixels).astype(‘float32’)
IndexError Traceback (most recent call last)
in ()
—-> 1 num_pixels = X_train.shape[1] * X_train.shape[2]
2 X_train = X_train.reshape(X_train.shape[0], num_pixels).astype(‘float32’)
3 X_test = X_test.reshape(X_test.shape[0], num_pixels).astype(‘float32’)
4 X_train = X_train / 255
5 X_test = X_test / 255
IndexError: tuple index out of range
Are you able to confirm that your environment is up to date and that you copied all of the code as-is?
Thank You Jason for the tutorial. I am beginner to Neural networks and your tutorial helped me lot. I have got 0.70 error rate and could able to make predictions with my own images and worked out very well.
Well done!
Great article Jason ! , i have simple question , if you could answer me , i want to retrain my model with new image input (which mean , add this image array to my dataset with his label )
Perhaps this post will give you ideas:
https://blog.keras.io/building-powerful-image-classification-models-using-very-little-data.html
Big Thanks , for your reply !!!
Hi Jason,
I am newbie, a BIG THANK YOU!!!, this is wonderful example for the beginners, to get their hands dirty with the code.
I am getting some errors when loading an image and trying to predict the output, I am using the Baseline Model with Multi-Layer Perceptrons sample code.
Below is the my sample code to loading the image.
img_pred = cv2.imread(“C:/ProgramData/Anaconda3/mycode/PythonApplication2/PythonApplication2/1.png”, 0)
#print(img_pred)
if img_pred.shape != [28,28]:
img2 = cv2.resize(img_pred, (28, 28))
img_pred = img2.reshape(28,28,-1);
else :
imp_pred = img_pred.reshape(28,28,-1);
img_pred = img_pred.reshape(1, 1, 28, 28)
pred = model.predict_classes(img_pred)
pred_proba = model.predict_proba(img_pred)
print(pred_proba)
The Error I get is:
ValueError: Error when checking : expected dense_1_input to have 2 dimensions, but got array with shape (1, 1, 28, 28)
Anyhelp with this will be great.
Thanks,
Saleem
Sorry to hear about the errors.
Perhaps reshape as [1,28,28]?
You can learn more about reshaping arrays here:
https://machinelearningmastery.com/index-slice-reshape-numpy-arrays-machine-learning-python/
I had tried that, no luck.
This is my complete code, see if this helps in resolving the issue.
import numpy
from keras.datasets import mnist
from keras.models import Sequential
from keras.layers import Dense
from keras.layers import Dropout
from keras.utils import np_utils
import cv2
# fix random seed for reproducibility
seed = 7
numpy.random.seed(seed)
# load data
(X_train, y_train), (X_test, y_test) = mnist.load_data()
# flatten 28*28 images to a 784 vector for each image
num_pixels = X_train.shape[1] * X_train.shape[2]
X_train = X_train.reshape(X_train.shape[0], num_pixels).astype(‘float32’)
X_test = X_test.reshape(X_test.shape[0], num_pixels).astype(‘float32′)
# normalize inputs from 0-255 to 0-1
X_train = X_train / 255
X_test = X_test / 255
# one hot encode outputs
y_train = np_utils.to_categorical(y_train)
y_test = np_utils.to_categorical(y_test)
num_classes = y_test.shape[1]
# define baseline model
def baseline_model():
# create model
model = Sequential()
model.add(Dense(num_pixels, input_dim=num_pixels, kernel_initializer=’normal’, activation=’relu’))
model.add(Dense(num_classes, kernel_initializer=’normal’, activation=’softmax’))
# Compile model
model.compile(loss=’categorical_crossentropy’, optimizer=’adam’, metrics=[‘accuracy’])
return model
# build the model
model = baseline_model()
# Fit the model
model.fit(X_train, y_train, validation_data=(X_test, y_test), epochs=10, batch_size=200, verbose=2)
# Final evaluation of the model
scores = model.evaluate(X_test, y_test, verbose=0)
print(“Baseline Error: %.2f%%” % (100-scores[1]*100))
img_pred = cv2.imread(“C:/ProgramData/Anaconda3/mycode/PythonApplication2/PythonApplication2/1.png”, 0)
#print(img_pred)
if img_pred.shape != [28,28]:
img2 = cv2.resize(img_pred, (28, 28))
img_pred = img2.reshape(28,28,-1);
else :
imp_pred = img_pred.reshape(28,28,-1);
img_pred = img_pred.reshape(1, 28, 28)
pred = model.predict_classes(img_pred)
print(pred_proba)
pred_proba = model.predict_proba(img_pred)
print(pred_proba)
Hi Jason,
If i finished training and testing the model and the performance is well enough, how can i identifies to the real image ? Cause i want to identify an alphabet in one image which is my image has different matrix size compared with model.
This post may help:
https://blog.keras.io/building-powerful-image-classification-models-using-very-little-data.html
hi jason ,
can I use your code for another data set
if yes ,
then what type of change I have to made
thank you
Yes. Changes really depend on the data.
I try to provide enough context so that you can make these changes yourself.
Hi Mr. Jason
if I want to use 14*28 images as the cnn input, what parametes should I change in your main simple cnn code?
I just changed the numbers that referred to the input size,i mean change all 28 ,28 to 14,28 but I faced to the error “ValueError: Error when checking target: expected dense_5 to have 2 dimensions, but got array with shape (60001, 10, 2)”.
thanks for your help
You would specify the image size in the “input_shape” argument.
Thank you for such a great article. Just wanted to know if there are any data sets similar to MNIST for alphabets. As Tesseract OCR is not working properly for my application, i want to have a similar model for Identifiying handwritten or Printed alphabets.
Please let me know,
thanks a lot once aain
I’m sure there are, I’m not across them sorry.
I get this error when I try to run the code for CNN
–
ValueError Traceback (most recent call last)
in ()
1 #build the model
—-> 2 model = larger_model()
3 #fit the model
4 model.fit(X_train, y_train, validation_data=(X_test, y_test), nb_epoch=10, batch_size=200, verbose=2)
5
in larger_model()
9 model.add(Dropout(0.2))
10 model.add(Flatten())
—> 11 model.add(Dense(128, activation=’relu’))
12 model.add(Dense(50, activation=’relu’))
13 model.add(Dense(num_classes, activation=’softmax’))
~\Anaconda3\lib\site-packages\keras\models.py in add(self, layer)
490 output_shapes=[self.outputs[0]._keras_shape])
491 else:
–> 492 output_tensor = layer(self.outputs[0])
493 if isinstance(output_tensor, list):
494 raise TypeError(‘All layers in a Sequential model ‘
~\Anaconda3\lib\site-packages\keras\engine\topology.py in __call__(self, inputs, **kwargs)
590 ‘
layer.build(batch_input_shape)‘)591 if len(input_shapes) == 1:
–> 592 self.build(input_shapes[0])
593 else:
594 self.build(input_shapes)
~\Anaconda3\lib\site-packages\keras\layers\core.py in build(self, input_shape)
840 name=’kernel’,
841 regularizer=self.kernel_regularizer,
–> 842 constraint=self.kernel_constraint)
843 if self.use_bias:
844 self.bias = self.add_weight(shape=(self.units,),
~\Anaconda3\lib\site-packages\keras\legacy\interfaces.py in wrapper(*args, **kwargs)
89 warnings.warn(‘Update your
' + object_name +call to the Keras 2 API: ‘ + signature, stacklevel=2)90 '
—> 91 return func(*args, **kwargs)
92 wrapper._original_function = func
93 return wrapper
~\Anaconda3\lib\site-packages\keras\engine\topology.py in add_weight(self, name, shape, dtype, initializer, regularizer, trainable, constraint)
411 if dtype is None:
412 dtype = K.floatx()
–> 413 weight = K.variable(initializer(shape),
414 dtype=dtype,
415 name=name,
~\Anaconda3\lib\site-packages\keras\initializers.py in __call__(self, shape, dtype)
215 limit = np.sqrt(3. * scale)
216 return K.random_uniform(shape, -limit, limit,
–> 217 dtype=dtype, seed=self.seed)
218
219 def get_config(self):
~\Anaconda3\lib\site-packages\keras\backend\theano_backend.py in random_uniform(shape, minval, maxval, dtype, seed)
2304 seed = np.random.randint(1, 10e6)
2305 rng = RandomStreams(seed=seed)
-> 2306 return rng.uniform(shape, low=minval, high=maxval, dtype=dtype)
2307
2308
~\Anaconda3\lib\site-packages\theano\sandbox\rng_mrg.py in uniform(self, size, low, high, ndim, dtype, nstreams, **kwargs)
860 raise ValueError(
861 “The specified size contains a dimension with value 862 size)
863
864 else:
ValueError: (‘The specified size contains a dimension with value <= 0', (-150, 128))
I’m sorry to hear that, here are some ideas:
https://machinelearningmastery.com/faq/single-faq/why-does-the-code-in-the-tutorial-not-work-for-me
hello
would you please help me that how can I have the misclassified sample that cause the recognition error in your simple CNN?
I want to exactly know which classes cause the most error in the learning and classification process.
thank you very much
A confusion matrix will help you understand the types of errors made by the model:
https://machinelearningmastery.com/confusion-matrix-machine-learning/
hello Dr.Jason Brownlee
I want to improve the recognition accuracy ?
i have used your simple cnn for my data and 2.64% error was obtained.
now is this possible to improve my accuracy by adding layers?
what more suggestion do you have to achieve this purpose?
is there any preprocessing needed to be done on the images ?
i thank you for your guidance for confusion matrix, i could run it and get the table.
now i want to see the images that were classified incorrectly , how can i do that?
Here are some ideas to try:
https://machinelearningmastery.com/improve-deep-learning-performance/
Hi Jason!
I would like to try with some image that i have captured. My images have 3 digits.
There is anyway to know the outcomes the CNN is predicting? what i want to know is if the result could be known to compare with the original image number?
Your images will have to be prepared in the same way as the training data.
The output of the network is the class, and also the integer represented on the image.
I want to train Brain Images and it has to segmented ..
Kindly guide me with some blogs sir.
Sorry, I don’t have examples of working with brain images or segmenting images.
I have tried simple neural network with one hidden layer. I am getting different accuracy while running the script repeatedly . what is the reason?
This is a feature of the network, you can learn more here:
https://machinelearningmastery.com/randomness-in-machine-learning/
InvalidArgumentError Traceback (most recent call last)
~\Anaconda3\lib\site-packages\tensorflow\python\framework\common_shapes.py in _call_cpp_shape_fn_impl(op, input_tensors_needed, input_tensors_as_shapes_needed, require_shape_fn)
685 graph_def_version, node_def_str, input_shapes, input_tensors,
–> 686 input_tensors_as_shapes, status)
687 except errors.InvalidArgumentError as err:
~\Anaconda3\lib\site-packages\tensorflow\python\framework\errors_impl.py in __exit__(self, type_arg, value_arg, traceback_arg)
472 compat.as_text(c_api.TF_Message(self.status.status)),
–> 473 c_api.TF_GetCode(self.status.status))
474 # Delete the underlying status object from memory otherwise it stays alive
InvalidArgumentError: Negative dimension size caused by subtracting 5 from 1 for ‘conv2d_1/convolution’ (op: ‘Conv2D’) with input shapes: [?,1,28,28], [5,5,28,32].
During handling of the above exception, another exception occurred:
ValueError Traceback (most recent call last)
in ()
1 # build the model
—-> 2 model = baseline_model()
3 # Fit the model
4 model.fit(X_train, Y_train, validation_data=(X_eval, Y_eval), epochs=10, batch_size=200, verbose=2)
5 # Final evaluation of the model
in baseline_model()
2
3 model = Sequential()
—-> 4 model.add(Conv2D(32, (5, 5), input_shape=(1, 28, 28), activation=’relu’))
5 model.add(MaxPooling2D(pool_size=(2, 2)))
6 model.add(Dropout(0.2))
~\Anaconda3\lib\site-packages\keras\models.py in add(self, layer)
465 # and create the node connecting the current layer
466 # to the input layer we just created.
–> 467 layer(x)
468
469 if len(layer._inbound_nodes[-1].output_tensors) != 1:
~\Anaconda3\lib\site-packages\keras\engine\topology.py in __call__(self, inputs, **kwargs)
617
618 # Actually call the layer, collecting output(s), mask(s), and shape(s).
–> 619 output = self.call(inputs, **kwargs)
620 output_mask = self.compute_mask(inputs, previous_mask)
621
~\Anaconda3\lib\site-packages\keras\layers\convolutional.py in call(self, inputs)
166 padding=self.padding,
167 data_format=self.data_format,
–> 168 dilation_rate=self.dilation_rate)
169 if self.rank == 3:
170 outputs = K.conv3d(
~\Anaconda3\lib\site-packages\keras\backend\tensorflow_backend.py in conv2d(x, kernel, strides, padding, data_format, dilation_rate)
3333 strides=strides,
3334 padding=padding,
-> 3335 data_format=tf_data_format)
3336
3337 if data_format == ‘channels_first’ and tf_data_format == ‘NHWC’:
~\Anaconda3\lib\site-packages\tensorflow\python\ops\nn_ops.py in convolution(input, filter, padding, strides, dilation_rate, name, data_format)
752 dilation_rate=dilation_rate,
753 name=name, data_format=data_format)
–> 754 return op(input, filter)
755
756
~\Anaconda3\lib\site-packages\tensorflow\python\ops\nn_ops.py in __call__(self, inp, filter)
836
837 def __call__(self, inp, filter): # pylint: disable=redefined-builtin
–> 838 return self.conv_op(inp, filter)
839
840
~\Anaconda3\lib\site-packages\tensorflow\python\ops\nn_ops.py in __call__(self, inp, filter)
500
501 def __call__(self, inp, filter): # pylint: disable=redefined-builtin
–> 502 return self.call(inp, filter)
503
504
~\Anaconda3\lib\site-packages\tensorflow\python\ops\nn_ops.py in __call__(self, inp, filter)
188 padding=self.padding,
189 data_format=self.data_format,
–> 190 name=self.name)
191
192
~\Anaconda3\lib\site-packages\tensorflow\python\ops\gen_nn_ops.py in conv2d(input, filter, strides, padding, use_cudnn_on_gpu, data_format, dilations, name)
723 “Conv2D”, input=input, filter=filter, strides=strides,
724 padding=padding, use_cudnn_on_gpu=use_cudnn_on_gpu,
–> 725 data_format=data_format, dilations=dilations, name=name)
726 _result = _op.outputs[:]
727 _inputs_flat = _op.inputs
~\Anaconda3\lib\site-packages\tensorflow\python\framework\op_def_library.py in _apply_op_helper(self, op_type_name, name, **keywords)
785 op = g.create_op(op_type_name, inputs, output_types, name=scope,
786 input_types=input_types, attrs=attr_protos,
–> 787 op_def=op_def)
788 return output_structure, op_def.is_stateful, op
789
~\Anaconda3\lib\site-packages\tensorflow\python\framework\ops.py in create_op(self, op_type, inputs, dtypes, input_types, name, attrs, op_def, compute_shapes, compute_device)
3160 op_def=op_def)
3161 self._create_op_helper(ret, compute_shapes=compute_shapes,
-> 3162 compute_device=compute_device)
3163 return ret
3164
~\Anaconda3\lib\site-packages\tensorflow\python\framework\ops.py in _create_op_helper(self, op, compute_shapes, compute_device)
3206 # compute_shapes argument.
3207 if op._c_op or compute_shapes: # pylint: disable=protected-access
-> 3208 set_shapes_for_outputs(op)
3209 # TODO(b/XXXX): move to Operation.__init__ once _USE_C_API flag is removed.
3210 self._add_op(op)
~\Anaconda3\lib\site-packages\tensorflow\python\framework\ops.py in set_shapes_for_outputs(op)
2425 return _set_shapes_for_outputs_c_api(op)
2426 else:
-> 2427 return _set_shapes_for_outputs(op)
2428
2429
~\Anaconda3\lib\site-packages\tensorflow\python\framework\ops.py in _set_shapes_for_outputs(op)
2398 shape_func = _call_cpp_shape_fn_and_require_op
2399
-> 2400 shapes = shape_func(op)
2401 if shapes is None:
2402 raise RuntimeError(
~\Anaconda3\lib\site-packages\tensorflow\python\framework\ops.py in call_with_requiring(op)
2328
2329 def call_with_requiring(op):
-> 2330 return call_cpp_shape_fn(op, require_shape_fn=True)
2331
2332 _call_cpp_shape_fn_and_require_op = call_with_requiring
~\Anaconda3\lib\site-packages\tensorflow\python\framework\common_shapes.py in call_cpp_shape_fn(op, require_shape_fn)
625 res = _call_cpp_shape_fn_impl(op, input_tensors_needed,
626 input_tensors_as_shapes_needed,
–> 627 require_shape_fn)
628 if not isinstance(res, dict):
629 # Handles the case where _call_cpp_shape_fn_impl calls unknown_shape(op).
~\Anaconda3\lib\site-packages\tensorflow\python\framework\common_shapes.py in _call_cpp_shape_fn_impl(op, input_tensors_needed, input_tensors_as_shapes_needed, require_shape_fn)
689 missing_shape_fn = True
690 else:
–> 691 raise ValueError(err.message)
692
693 if missing_shape_fn:
ValueError: Negative dimension size caused by subtracting 5 from 1 for ‘conv2d_1/convolution’ (op: ‘Conv2D’) with input shapes: [?,1,28,28], [5,5,28,32].
Perhaps confirm that you have the latest version of Keras, TensorFlow and that you have copied all of the code from the tutorial?
This solves it:
from keras import backend as K
K.set_image_dim_ordering(‘th’)
🙂
Yes, this forces the code to use channels first ordering.
hello Mr.Brownlee
first of all, I again thank you for the codes above.
I have tried it for my database(28*28 images) and it worked well.
now I have a question,
if I want to feed the CNN with the HOG features that are extracted from the digit images, how can I do that?
I mean instead of using 28*28 images as the input of the CNN, I want to use the HOG features of each image.
thank you for your help
Perhaps have a multi-headed model with a CNN input and a vector input.
This post might give you ideas:
https://machinelearningmastery.com/keras-functional-api-deep-learning/
It’s unclear to me why you do the part with the comment as such:
# reshape to be [samples][pixels][width][height]
This makes the shape of the problem go from this (60000, 28, 28) to this (60000, 1, 28, 28).
But since the pixel dimension will always be 1, what does this actually do for you? I know the article says “reshape it so that it is suitable for use training a CNN.” But many other examples using MNIST don’t do this.
So why does the reshaping make it more suitable versus less suitable?
CNNs expect 1 or more channels. For black and white, this is 1 channel, for RGB, this is 3 channels.
We must meet the expectations of the model.
Hi Jason,
Thank you so much for such a wonderful tutorial!!
I have few questions
1. For an Image containing lines of handwritten text CNN is best or RNN (I don’t know text belongs to sequence prediction or not)?
2. How to train the model for recognizing an image containing series of handwritten text? Should I train with all possible classes with labels?
3. Do I need to segment the text into isolated characters and then evaluate? If yes kindly suggest the reference for segmentation
Thanks
Generally, CNNs are best for image data. An LSTM can help to model a sequence of images.
Perhaps start by defining your problem clearly:
https://machinelearningmastery.com/how-to-define-your-machine-learning-problem/
I believe there will be many ways to model your problem, perhaps explore a few approaches and see what works best for your specific dataset. Also consider what approaches are popular in the literature for your problem type.
hello
my database is contain of vectors which each vector has 144 element.(1 , 144).
I want to classify these vectors.(the input of the CNN, is vectors)
would you please show me how to write the code?
i really need it.
thanks a lot
Sure, what problem are you having exactly?
my problems are that
1. how can I save my database in my system to be probably useful for the CNN input?(should all the vectors save in a matrix? for example I have 10 class each with 6000 sample and each sample is represented with a vector by 144 elements, how to save these vectors and by which format? )(I extract the feature vectors from the images by matlab2017 and then I want to use them as the input for CNN in Keras(jupyter notebook) for recognition process )
2. in a simple CNN the input are the images, now how should I change the CNN code to read my vectors instead of images as the input?
I mean what function or codes must be changed in “input load ” and “one hot encode outputs” part in your code above.
thank you very much for your help
Keras excepts vectors of numbers as input. You can save the data any way you wish then load it and transform it into numpy arrays of numbers.
The input to a CNN are vectors, they could be images, or not. Search the blog, I show how to use CNNs for many other cases, such as text and time series.
Hi Jason , Is it possible to draw an architecture for your simple CNN MNIST ?
Thank you
Sure, you can use the plot_model() function to plot your architecture. You can learn more here:
https://machinelearningmastery.com/visualize-deep-learning-neural-network-model-keras/
Dear Jason,
Firstly I would like to thank you for your wonderful Data Science tutorials. Has been a real learning guide.
Secondly, I am facing an issue on implementation of the code. Could you kindly have a look and pronounce a solution for the same?
Error report:
In the baseline model with multilayer perceptron example, at the line below, I get the following error:
model.fit(X_train, y_train, validation_data=(X_test, y_test), epochs=10, batch_size=128, verbose=2)
Error:
ValueError: Error when checking target: expected dense_12 to have 2 dimensions, but got array with shape (60000, 10, 2, 2, 2, 2, 2, 2)
Can you kindly let me know how to move forward from here?
Looks like the shape of your data and the expectations of your model are different.
You are the Jason Bourne of Deep Learning !!! Wonderful articles, easy to read and follow and what is most amazing that you respond to almost every question, the respond rate seems close to 99%, even to repeated questions.
Apologies for multiple postings but I couldn’t decide where to exactly post.
JB, I am currently focusing on a use case where I have to read a drawing at this link https://imgur.com/a/Mg8YrgE
and have to accomplish the followings through deep learning and image processing:
1) Read the entire text which is very legible, particularly the line codes such as 8-N-120XXX-A01-NO. I tried tesseract 4.0 with LSTM which gives all the text but is it the best OCR or do you suggest something else?
2) Compute the location of the text in the image. Is this possible using tesseract ?
3) Detect all the symbols, small or big, through an already trained CNN model and their locations through bounding boxes.
Please feel free to respond to as many as you can and kindly direct me to useful resources to achieve my objectives. Many thanks and please keep posting new trends and useful info in deep learning.
Thanks.
What problem are you having exactly? E.g. what are you stuck on?
I appreciate your response Jason. I am stuck at
1) Tesseract gives me almost all the text in the image but I need the text location too.
2) What can be a good approach to detect the symbols and their positions in the image? Pure image processing or CNN?
Thanks
I would expect a lot of prototyping will be required. I would also expect a combination of CV methods and a CNN will be required.
Hi Jason, what do you mean by “a lot of prototyping” ? Do you mean an iterative trial and error approach? Can you specify which CV methods can be useful?
Imagine on a signed document you have to detect the handwritten signature and its position on the document. How would you approach?
Thanks a lot for your responses.
I mean try different method and see what works.
I cannot instruct you on the best approach. Applied machine learning is about discovering what works best, you cannot be told – no one knows.
I could outline how I might work through the problem, but I don’t have the capacity for free/any consulting, sorry.
Great post Jason! Thank you.
As you have mentioned in the post ” There is a lot of opportunity for you to tune and improve upon this model.”
It would be great if you can suggest what parameters are the most recommended, if not all, for tuning and possible ways for tuning. Should one be using grid search or random search or Bayesian optimization for it? It would be great if you can throw some light on it.
Regularization methods would be a great place to start.
More ideas here:
https://machinelearningmastery.com/improve-deep-learning-performance/
Why do I get the following error ??
Using TensorFlow backend.
Train on 60000 samples, validate on 10000 samples
Epoch 1/1
2018-11-20 01:11:49.591336: I tensorflow/core/platform/cpu_feature_guard.cc:141] Your CPU supports instructions that this TensorFlow binary was not compiled to use: AVX2 FMA
– 6s – loss: 0.2783 – acc: 0.9211 – val_loss: 0.1408 – val_acc: 0.9575
Baseline Error: 4.25%
Traceback (most recent call last):
File “cnn2clean.py”, line 91, in
model.fit(X_train, y_train, validation_data=(X_test, y_test), epochs=1, batch_size=200)
File “/root/anaconda3/lib/python3.6/site-packages/keras/engine/training.py”, line 952, in fit
batch_size=batch_size)
File “/root/anaconda3/lib/python3.6/site-packages/keras/engine/training.py”, line 789, in _standardize_user_data
exception_prefix=’target’)
File “/root/anaconda3/lib/python3.6/site-packages/keras/engine/training_utils.py”, line 128, in standardize_input_data
‘with shape ‘ + str(data_shape))
ValueError: Error when checking target: expected dense_5 to have 2 dimensions, but got array with shape (60000, 10, 2)
nkp-Inspiron-15-3567 pca #
Looks like a mismatch between your data and your script. You change your data or change your model.
hello Mr. Brownlee
I have 2 question about the simple CNN and
1. if I want to know how long do the training phase and the evaluation phase take?(each one separately) how can I do it? would you please learn me a code to add the above codes to reach the times that I told?
2. if l want to see the output image after each convolution layer, how can I? I mean I want to know what happens to a sample image after convolving it with a convolution layer filters. how can I show the output of a convolution layer as an image?
I really thank you if you guide me a keras code for those purpose .
No, model convergence is challenging. We have no guarantees of the result or how long.
You can plot the intermediate representations, sorry, I don’t have any examples.
Slam(peace upon u) Jason.
my self Shahbaz
U r my teacher in machine learning, but i want to ask , is this a complete ocr or further work remain, can i use it in my final year project. plz teach me how i develope my ocr system for final project in university..
i shall be very thank full for this act of kindness….
Sorry, this is the only example I have on the topic.
I have a problem on my laptop. Please solve it.
Traceback (most recent call last):
File “C:/python/python37/testpy6.py”, line 17, in
(x_train, y_train), (x_test, y_test) = mnist.load_data()
File “C:\python\python37\lib\site-packages\keras\datasets\mnist.py”, line 23, in load_data
file_hash=’8a61469f7ea1b51cbae51d4f78837e45′)
File “C:\python\python37\lib\site-packages\keras\utils\data_utils.py”, line 222, in get_file
urlretrieve(origin, fpath, dl_progress)
File “C:\python\python37\lib\urllib\request.py”, line 277, in urlretrieve
block = fp.read(bs)
File “C:\python\python37\lib\http\client.py”, line 449, in read
n = self.readinto(b)
File “C:\python\python37\lib\http\client.py”, line 493, in readinto
n = self.fp.readinto(b)
File “C:\python\python37\lib\socket.py”, line 586, in readinto
return self._sock.recv_into(b)
File “C:\python\python37\lib\ssl.py”, line 1009, in recv_into
return self.read(nbytes, buffer)
File “C:\python\python37\lib\ssl.py”, line 871, in read
return self._sslobj.read(len, buffer)
File “C:\python\python37\lib\ssl.py”, line 631, in read
v = self._sslobj.read(len, buffer)
ConnectionResetError: [WinError 10054] An existing connection was forcibly closed by the remote host
>>>
Sorry, I have not seen this issue, perhaps try posting on stackoverflow?
Please … Tell me solution..How to implement this model in image or video (API ) ?
Sorry, I don’t have a tutorial on working with video data.
#code for predicting an image stored locally against a trained model
# my local image is 28 x 28 already
import numpy as np
from PIL import Image
from keras.preprocessing import image
img = image.load_img(‘file path include full file name’)# , target_size=(32,32))
img = image.img_to_array(img)
img = img.reshape((1,) + img.shape)
#img = img/255
img = img.reshape(-1,784)
img_class=model.predict_classes(img)
prediction = img_class[0]
classname = img_class[0]
print(“Class: “,classname)
Nice work!
Hello, great tutorial!
I have a couple questions:
1) Do you think this tutorial is still up to date or is there anything new in the last couple years that could be better?
2) In the larger model, what is the output dimensions after each conv2D and dense layers?
Thank you
I think the model could be improved.
You can get the dimensions of the output of all layers by reviewing the model.summary() output.
thank you so much for this explain
i want to ask you how can i did it for normal image
Perhaps start here:
https://machinelearningmastery.com/object-recognition-convolutional-neural-networks-keras-deep-learning-library/
Thanks for you tutorial .
I am a beginner in neural network and framework . I want to ask in this sample how is the weight initialized? and this model train by the number of epoch that we decided in model.fit, could i modify it the model repeated until one condition is satisfied?
Weights are initialized with small random values.
Yes, you fit for the number of training epochs that you specify.
Thanks Jason:) This post is very nice to understand CNN.
How can I show the result?
This post just see the scores.. I want to see the images
Thanks.
What do you mean show the result exactly?
If you want a real application for digit recognition you have to first check if it is a digit then you can use this solution to see what digit it is (or in reversed order) This general problem is harder. So the problem solved here is: “What digit is it when you know it is a digit”. An application not checking input is bad…
Try the link above http://myselph.de/neuralNet.html and draw an X char and you will probably get a prediciton = 8. Draw H an you will get 4.
Where can I find a solution of the more general problem?
You can also try my app at gubboit.se/digitapp. I intend to solve the more general problem.
Thanks.
hi, jason
thank you for the tutorial its really help me as a beginner.
I am wondering how can i save output each layer (hidden , output layer) in the form of array?
I tried model.layers[i].output but it only give me result in Tensor(“dense_1/Relu:0”, shape=(?, 128), dtype=float32)
Typically, you save the entire model, not each layer:
https://machinelearningmastery.com/save-load-keras-deep-learning-models/
thank you for the fast response, i `ll try to learn it.
Thank you so so much,
You’re welcome.
Hi Jason,
I got error rate of 0.80. Thanks for the tutorial !!
Can you please guide me how can train this model on my own data set of handwritten characters?
Thanks 🙂
Yes, start by collecting the data, then load it, then scale it and feed to the model.
You can see examples of each step here:
https://machinelearningmastery.com/start-here/#dlfcv
Hi Jason, thanks for the tutorial! I’ve just started playing around with machine learning this weekend and it helped me a lot! I made a tkinter canvas to freely draw numbers and then feed them to the model for the predictions. I got frustrated at first because the results were nowhere near the 0.75% error rate the CNN model gave me after training. Some numbers would almost never be predicted correctly!
Only when I read the Javascript implementation web link above I realized the importance of preprocessing. After centering the image on its center of mass and rescaling, the error rate got negligible, even for poorly drawn numbers!
Well done, that sounds like a fun extension to the project!
Hi Jason,
Thanks for the tutorial, I wonder is it allowed to use this code in a project I am building?
This is a common question that I answer here:
https://machinelearningmastery.com/faq/single-faq/can-i-use-your-code-in-my-own-project
Hi Jason,
I am new in machine learning
i want to run this code but i dont know what environmental setup is required in it.
could you please help me.
Yes, follow this tutorial to setup your environment:
https://machinelearningmastery.com/setup-python-environment-machine-learning-deep-learning-anaconda/
hello,
Thanks fa dis good example …
but it is recognising single digit itself.
what if i want to detect
123 X 435
234 X 543
987 X 453
kind of handwritten information line by line, how can i achieve this? Thanks in advance
One approach might be to first segment the input into digits, then classify each.
can you please provide that related tutorial ??
Thanks for the suggestion, hopefully in the future.
but segmenting is really works?? to get the numbers line by line as i mentioned? Is this possible or any other perfect way by using deep learning(keras)?
Yes, it works. Sorry, I don’t have a tutorial on this topic for you to follow.
sir please explain how we can apply already trained model on our application images
You can call model.predict() on new images.
This will help:
https://machinelearningmastery.com/how-to-make-classification-and-regression-predictions-for-deep-learning-models-in-keras/
sir for this code i need streamlit canvas
and also i have a doubt that hidden layers have been included or not
What is “streamlit canvas”?
in this how to give own data set?
Perhaps this will help you load your dataset:
https://machinelearningmastery.com/how-to-load-convert-and-save-images-with-the-keras-api/
I have an error issues when i run build_model function
but the message does’nt show any wrong code?
# build the model function with logarithmic loss and ADAM gradient descent
def baseline_model():
# create model
model = Sequential()
model.add(Conv2D(32, (5, 5), # filter and kernel
input_shape=(1, 28, 28),
activation=’relu’))
model.add(MaxPooling2D())
model.add(Dropout(0.2))
model.add(Flatten())
model.add(Dense(128, activation=’relu’))
model.add(Dense(num_classes, activation=’softmax’))
# compile the model
model.compile(loss=’categorical_crossentropy’,
optimizer=’adam’,
metrics=[‘accuracy’])
return model
—————————————————————————
InvalidArgumentError Traceback (most recent call last)
/usr/local/lib/python3.7/dist-packages/tensorflow/python/framework/ops.py in _create_c_op(graph, node_def, inputs, control_inputs, op_def)
1879 try:
-> 1880 c_op = pywrap_tf_session.TF_FinishOperation(op_desc)
1881 except errors.InvalidArgumentError as e:
InvalidArgumentError: Negative dimension size caused by subtracting 5 from 1 for ‘{{node conv2d_4/Conv2D}} = Conv2D[T=DT_FLOAT, data_format=”NHWC”, dilations=[1, 1, 1, 1], explicit_paddings=[], padding=”VALID”, strides=[1, 1, 1, 1], use_cudnn_on_gpu=true](Placeholder, conv2d_4/Conv2D/ReadVariableOp)’ with input shapes: [?,1,28,28], [5,5,28,32].
During handling of the above exception, another exception occurred:
ValueError Traceback (most recent call last)
18 frames
in ()
1 # fun the model function
—-> 2 model = baseline_model()
3
4 # train the model by fit function
5 model.fit(X_train, y_train,
in baseline_model()
5 model.add(Conv2D(32, (5, 5), # filter and kernel
6 input_shape=(1, 28, 28),
—-> 7 activation=’relu’))
8 model.add(MaxPooling2D())
9 model.add(Dropout(0.2))
/usr/local/lib/python3.7/dist-packages/tensorflow/python/training/tracking/base.py in _method_wrapper(self, *args, **kwargs)
528 self._self_setattr_tracking = False # pylint: disable=protected-access
529 try:
–> 530 result = method(self, *args, **kwargs)
531 finally:
532 self._self_setattr_tracking = previous_value # pylint: disable=protected-access
/usr/local/lib/python3.7/dist-packages/keras/engine/sequential.py in add(self, layer)
200 # and create the node connecting the current layer
201 # to the input layer we just created.
–> 202 layer(x)
203 set_inputs = True
204
/usr/local/lib/python3.7/dist-packages/keras/engine/base_layer.py in __call__(self, *args, **kwargs)
975 if _in_functional_construction_mode(self, inputs, args, kwargs, input_list):
976 return self._functional_construction_call(inputs, args, kwargs,
–> 977 input_list)
978
979 # Maintains info about the
Layer.callstack./usr/local/lib/python3.7/dist-packages/keras/engine/base_layer.py in _functional_construction_call(self, inputs, args, kwargs, input_list)
1113 # Check input assumptions set after layer building, e.g. input shape.
1114 outputs = self._keras_tensor_symbolic_call(
-> 1115 inputs, input_masks, args, kwargs)
1116
1117 if outputs is None:
/usr/local/lib/python3.7/dist-packages/keras/engine/base_layer.py in _keras_tensor_symbolic_call(self, inputs, input_masks, args, kwargs)
846 return tf.nest.map_structure(keras_tensor.KerasTensor, output_signature)
847 else:
–> 848 return self._infer_output_signature(inputs, args, kwargs, input_masks)
849
850 def _infer_output_signature(self, inputs, args, kwargs, input_masks):
/usr/local/lib/python3.7/dist-packages/keras/engine/base_layer.py in _infer_output_signature(self, inputs, args, kwargs, input_masks)
886 self._maybe_build(inputs)
887 inputs = self._maybe_cast_inputs(inputs)
–> 888 outputs = call_fn(inputs, *args, **kwargs)
889
890 self._handle_activity_regularization(inputs, outputs)
/usr/local/lib/python3.7/dist-packages/keras/layers/convolutional.py in call(self, inputs)
247 inputs = tf.pad(inputs, self._compute_causal_padding(inputs))
248
–> 249 outputs = self._convolution_op(inputs, self.kernel)
250
251 if self.use_bias:
/usr/local/lib/python3.7/dist-packages/tensorflow/python/util/dispatch.py in wrapper(*args, **kwargs)
204 “””Call target, and fall back on dispatchers if there is a TypeError.”””
205 try:
–> 206 return target(*args, **kwargs)
207 except (TypeError, ValueError):
208 # Note: convert_to_eager_tensor currently raises a ValueError, not a
/usr/local/lib/python3.7/dist-packages/tensorflow/python/ops/nn_ops.py in convolution_v2(input, filters, strides, padding, data_format, dilations, name)
1136 data_format=data_format,
1137 dilations=dilations,
-> 1138 name=name)
1139
1140
/usr/local/lib/python3.7/dist-packages/tensorflow/python/ops/nn_ops.py in convolution_internal(input, filters, strides, padding, data_format, dilations, name, call_from_convolution, num_spatial_dims)
1266 data_format=data_format,
1267 dilations=dilations,
-> 1268 name=name)
1269 else:
1270 if channel_index == 1:
/usr/local/lib/python3.7/dist-packages/tensorflow/python/ops/nn_ops.py in _conv2d_expanded_batch(input, filters, strides, padding, data_format, dilations, name)
2720 data_format=data_format,
2721 dilations=dilations,
-> 2722 name=name)
2723 return squeeze_batch_dims(
2724 input,
/usr/local/lib/python3.7/dist-packages/tensorflow/python/ops/gen_nn_ops.py in conv2d(input, filter, strides, padding, use_cudnn_on_gpu, explicit_paddings, data_format, dilations, name)
971 padding=padding, use_cudnn_on_gpu=use_cudnn_on_gpu,
972 explicit_paddings=explicit_paddings,
–> 973 data_format=data_format, dilations=dilations, name=name)
974 _result = _outputs[:]
975 if _execute.must_record_gradient():
/usr/local/lib/python3.7/dist-packages/tensorflow/python/framework/op_def_library.py in _apply_op_helper(op_type_name, name, **keywords)
748 op = g._create_op_internal(op_type_name, inputs, dtypes=None,
749 name=scope, input_types=input_types,
–> 750 attrs=attr_protos, op_def=op_def)
751
752 #
outputsis returned as a separate return value so that the output/usr/local/lib/python3.7/dist-packages/tensorflow/python/framework/func_graph.py in _create_op_internal(self, op_type, inputs, dtypes, input_types, name, attrs, op_def, compute_device)
599 return super(FuncGraph, self)._create_op_internal( # pylint: disable=protected-access
600 op_type, captured_inputs, dtypes, input_types, name, attrs, op_def,
–> 601 compute_device)
602
603 def capture(self, tensor, name=None, shape=None):
/usr/local/lib/python3.7/dist-packages/tensorflow/python/framework/ops.py in _create_op_internal(self, op_type, inputs, dtypes, input_types, name, attrs, op_def, compute_device)
3567 input_types=input_types,
3568 original_op=self._default_original_op,
-> 3569 op_def=op_def)
3570 self._create_op_helper(ret, compute_device=compute_device)
3571 return ret
/usr/local/lib/python3.7/dist-packages/tensorflow/python/framework/ops.py in __init__(self, node_def, g, inputs, output_types, control_inputs, input_types, original_op, op_def)
2040 op_def = self._graph._get_op_def(node_def.op)
2041 self._c_op = _create_c_op(self._graph, node_def, inputs,
-> 2042 control_input_ops, op_def)
2043 name = compat.as_str(node_def.name)
2044
/usr/local/lib/python3.7/dist-packages/tensorflow/python/framework/ops.py in _create_c_op(graph, node_def, inputs, control_inputs, op_def)
1881 except errors.InvalidArgumentError as e:
1882 # Convert to ValueError for backwards compatibility.
-> 1883 raise ValueError(str(e))
1884
1885 return c_op
ValueError: Negative dimension size caused by subtracting 5 from 1 for ‘{{node conv2d_4/Conv2D}} = Conv2D[T=DT_FLOAT, data_format=”NHWC”, dilations=[1, 1, 1, 1], explicit_paddings=[], padding=”VALID”, strides=[1, 1, 1, 1], use_cudnn_on_gpu=true](Placeholder, conv2d_4/Conv2D/ReadVariableOp)’ with input shapes: [?,1,28,28], [5,5,28,32].
The code looks right but seems your input shape might be the cause.
what’s going on with the input shape?
here’s the code when i load the data
——————————————————————————————————————–
# load data digit
(X_train, y_train), (X_test, y_test) = mnist.load_data()
——————————————————————————————————————–
then im doing the transformation, i’ve been followed through your code
——————————————————————————————————————–
# reshape data menjadi [samples][width][heights][channels]
X_train = X_train.reshape((X_train.shape[0], 28, 28, 1)).astype(‘float32’)
X_test = X_test.reshape((X_test.shape[0], 28, 28, 1)).astype(‘float32’)
——————————————————————————————————————–
and this where im normalizing the digit data into 0-1
——————————————————————————————————————–
# normalisasi input dari 0-255 menjadi 0-1
X_train = X_train / 255
X_test = X_test / 255
——————————————————————————————————————–
and then im doing one hot encoding to each output
——————————————————————————————————————–
# one hot encode pada masing-masing label outputnya
y_train = np_utils.to_categorical(y_train)
y_test = np_utils.to_categorical(y_test)
num_classes = y_test.shape[1]
——————————————————————————————————————–
this code when i run build_model function
——————————————————————————————————————–
# fun the model function
model = baseline_model()
# train the model by fit function
model.fit(X_train, y_train,
validation_data = (X_test, y_test),
epochs=10, batch_size= 200, verbose=2)
——————————————————————————————————————–
sorry im might be not realized if make mistake from my code before model building phase, so could you correct me if i’m wrong
I am too busy to debug everyone’s code. My advice would be to simply run the code and see if you have any error. Usually a mistake in the model will result in some error immediately when you start the training.
Hi
it seems there is an error in baseline convolution model function definition
shape of input in conv layer you define 1,28,28 but you are using in next section 28,28,1 and you are using channel last layout but written as [pixel][width][height]
You’re right. It is corrected.